Leaderboard


Popular Content
Showing content with the highest reputation since 12/14/2024 in all areas
-
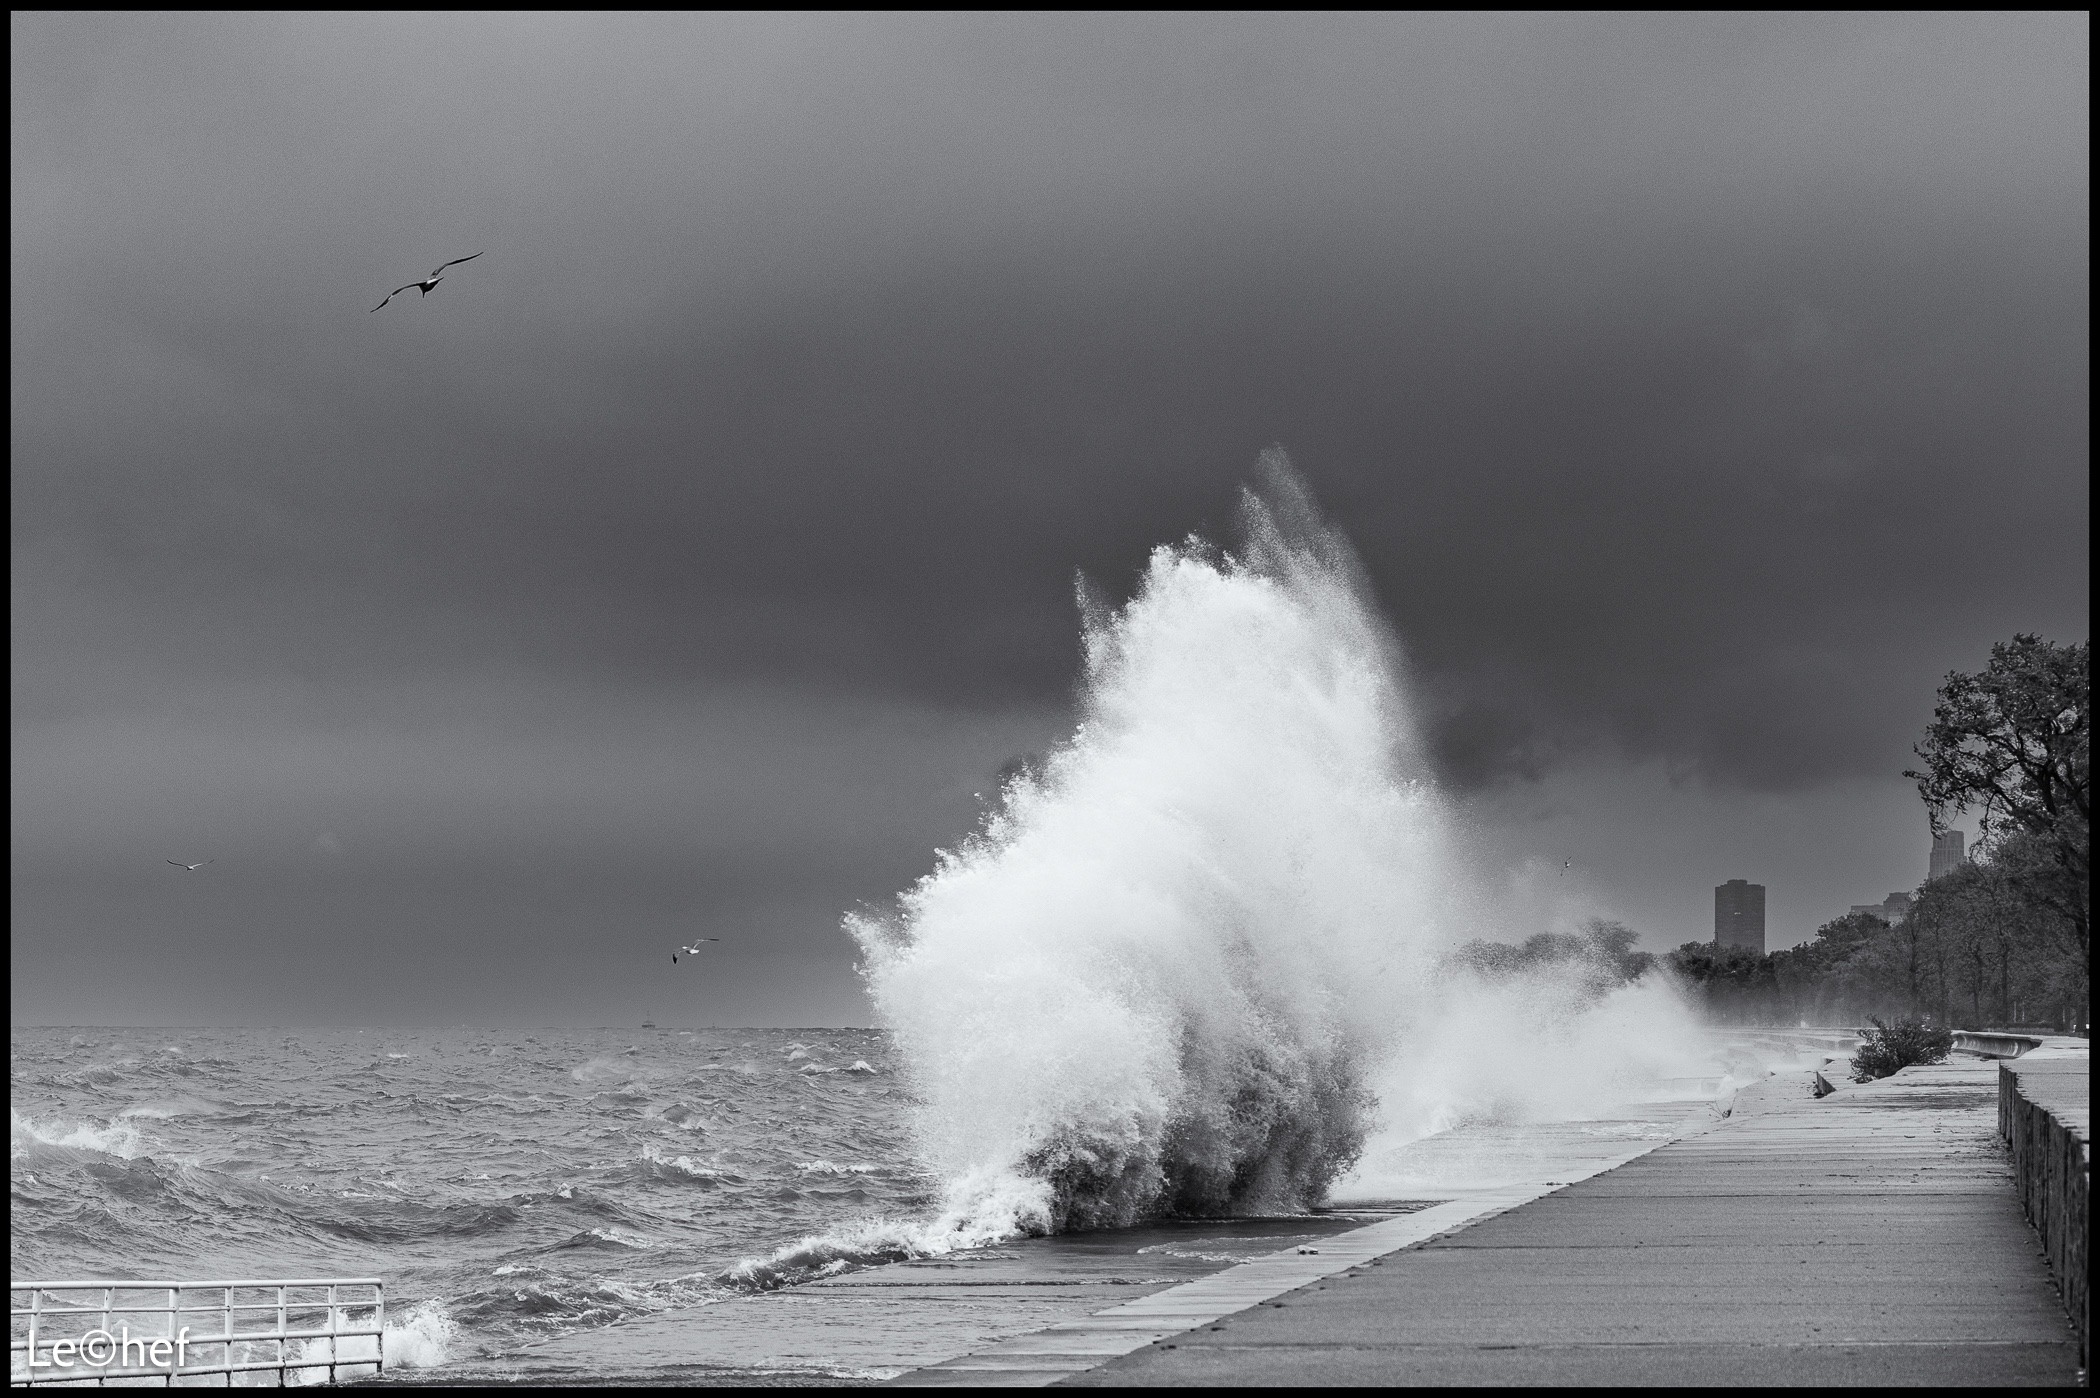
Lofoten. Storms. Dusk. Atmosphere.
 121 points
 -
This one took some time to put together. Some unbelievably cold weather endured, down to -15 at times due to the elevation and clear night sky. Plus, some really tough hiking through knee deep snow several times to get the shot set up right. And then to sit and wait and hope that some cars drove over the 2300m high mountain pass in the night, not asking for much eh 😁 by the way, hardly any did... I then hiked down and back up to the mountain (Ra Gusela) to illuminate it with a bright head torch. But, it was worth it and was a lot of fun. We hiked up here several times over 24 hours for sunrise and sunset too. A stunning place up at Pass Giau
102 points
-
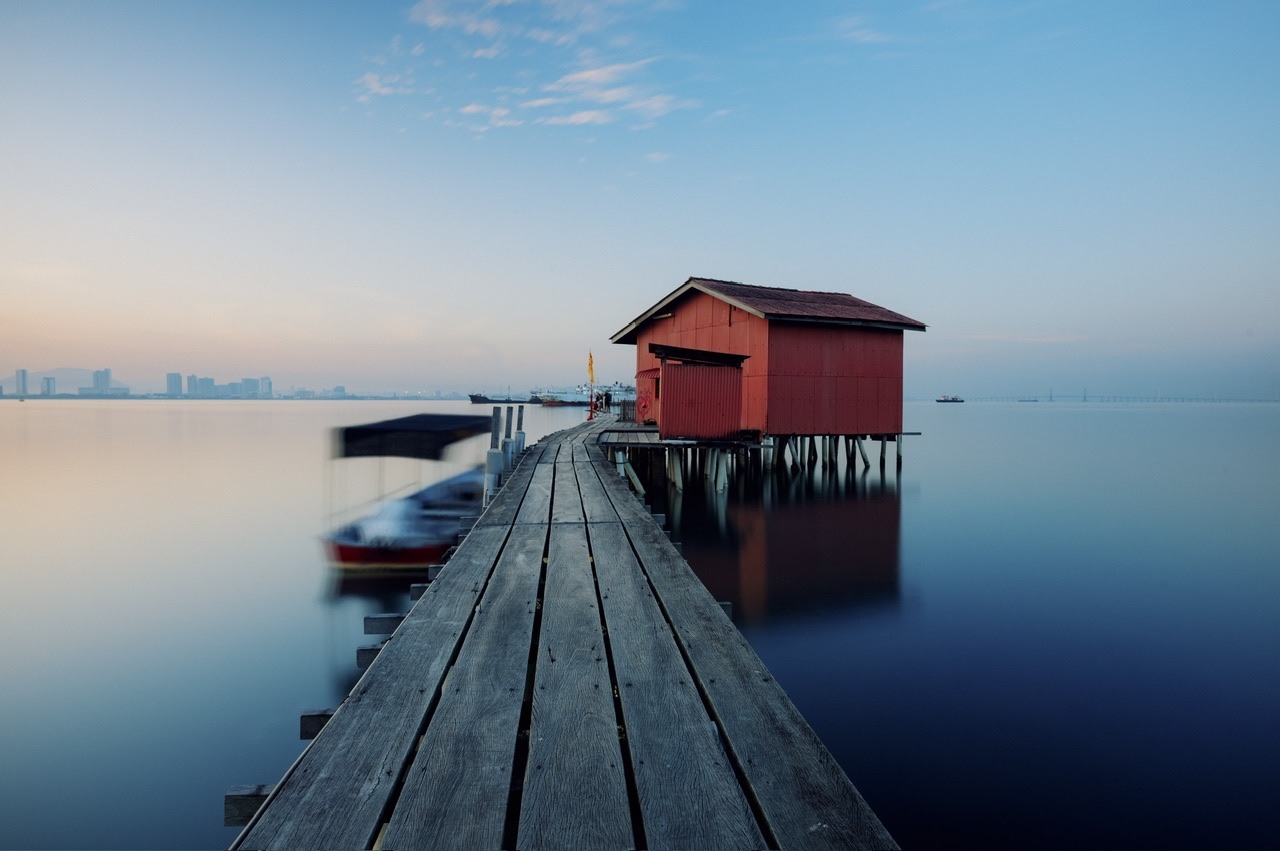
Patagonia. SL3 APO 75mm
99 points
-
Whilst the SL3 is my 'main' camera, the 43mm Q3 and the 28mm Q3 are absolutely awesome for landscapes. Personally I like tighter framing for most pictures to the 43mm would be the one I would keep if I had to chose one only. But, the 28mm is a little more flexible.
97 points
-
93 points
-
92 points
-
Leica M10, 90mm Elmarit, ND, tripod. Dull rainy days are perfect for autumn colour. Please click for a better view.
89 points
-
Off We Go! I’ve been looking forward to writing this for a long long time. The very concept of an ‘M’ camera with an EVF has provoked real passion amongst the Leica internet forums. Perhaps the arguments now aren’t quite as furious as they were 5 years ago, but there are still some pretty firm opinions. I’ve always been in favour of the concept - not to replace the existing M rangefinder of course, but as another way of shooting M mount lenses. Opinions have changed at Leica over the years, and by making this camera a new branch of the Leica M11 range of cameras they have very sensibly treated it as a toe in the water. If it isn’t a success then they can draw a line under it. Leitz Cafe Leica M EV1 with 35 APO Summicron It has been in beta testing for a long time with various firmware iterations, and the test forums have been full of interesting observations, both for and against the camera. This article is, to a large extent, a result of those discussions and insights, so a big thank you to everyone (you know who you are!) I feel that if we weren’t already friends then we have become friends after the 6 months of testing. The M EV1 has led me to spend a lot of time in considering how one operates a camera, between analogue and digital focusing, and contrarily between symbolic and representational information. I’m not sure that it has a huge bearing on the actual photographs, but it is an interesting subject, especially today when there is so much concentration on user-experience with respect to the user interface. Stormy Weather Leica M EV1 with 35 APO Summicron Those who have been advocating such a camera have often thought that it would be valuable for long time M users whose eyesight is not what it used to be, and for whom rangefinder focusing is getting problematic. I also thought there was a big potential market for younger photographers who have fallen in love with the iconic image of the M cameras . . . but who, when presented with a rangefinder are rather dismayed. Stormy Weather Leica M EV1 with 35 Summilux FLE So, although I hope to cover all the bases in this article, rather than a direct review, it is more a discussion about the idea of an EVF based M, how it is to operate, and who it is actually for. Note: when I say ‘Viewfinder’ I mean the M EV1, and when I say ‘Rangefinder’, then I’m talking about the traditional M Rangefinder (at least, that’s the intention!) The Mothership Leica M EV1 with 35 APO Summicron What’s in a name? If you google it you’ll find that M stands for Messsucher which is the German name for a rangefinder. This probably was the case (although Leica have always kept their head down) but it could just as well refer to the M mount of the M cameras. At any rate, times change, and there has clearly been some serious consideration about what to call the new camera. It was rumoured to be called the M11-V, not the M EV1. Personally I thought E11 would have been a good name, and perhaps it wouldn’t have antagonised the traditionalists quite as much. On the other hand it does rather disconnect it from the M history, which is obviously a bad thing. So, perhaps M EV1 is a good name - implying that it’s the first of a new branch of M camera, and let's hope that it is. Summer Blues Leica M EV1 with 35 APO Summicron Whilst talking of names, the prototype name for the M EV1 has been Elsie, after Elsie Kuhn-Leitz (1903-1985) the daughter of Ernst Leitz II, she was imprisoned by the Gestapo after she was caught helping Jewish women cross over into Switzerland. She was released after some tough questioning, and later on in the war was again in trouble with the authorities for helping to improve the living conditions of 700 or so Ukrainian slave labourers who had been assigned to work at the plant during the 1940s. Oranges and Lemons Leica M EV1 with 35mm Summilux FLE More than that (well, perhaps less than that!) Elsie was the name of my paternal grandmother, sadly I don’t remember her, but she was a powerful and much loved woman with a mass of curly red hair and it’s nice to be reminded of her existence every time I pick up the camera. Giorgio Leica M EV1 with 35 APO Summicron What is it? There have been rumours predicting a Leica Q with an M mount ever since the Q arrived on the market in June 2015, but there simply isn’t room within the Q body for a shutter (the Q uses a leaf shutter in the lens) - and the flange distance for the M would make for a very fat lens mount! So this still isn’t a Q with an M mount , it’s an M camera with an EVF in the place of the rangefinder, otherwise it’s fundamentally identical to a standard M11. Leica have resisted putting a faux viewfinder window or a logo - or anything else, so the place where the rangefinder window is on the front of an M11 is simply blank. More than that, because of the space needed for the EVF the ISO dial has had to be removed, which will perhaps upset some people - the ISO dial does look lovely, with it’s nod back to the old MP re-wind knob, but honestly speaking, auto ISO with careful settings is always the way to go, making the dial a little superfluous - and if you must be all manual, then setting the ISO in the quick menu is, well, quick! You can also set ISO to the thumbwheel. Yellow Leica M EV1 with 75 APO Summicron The camera weighs about 45 gms less than a standard black M11, clearly EVFs are lighter than rangefinders. This isn’t a huge amount, but it’s noticeable and significant, as with all M cameras it still feels wonderfully solid and well made. I think that it’s beautiful. - simple and pure - everyone who I’ve talked about it thinks it’s a lovely thing. The blank front doesn’t sound perfect, but actually it looks really good. There is the red dot, and the round window which estimates the aperture and the square red window for the self-timer. The Leica M EV1 with the 90mm Elmarit M iPhone 16 Pro Max Bucket of Colour Leica M EV1 with 35 APO Summicron The only other difference is the frame line lever which has converted into a double function device. This can be configured each way for either Focus Peaking, Magnification or Digital Zoom - or it can be turned off. As with the other functions holding it down for a period allows you to select which of the available options becomes the default; This can also be saved in the user profiles. The M EV1 has Content Credentials as the Leica M11-P, but is otherwise more like the standard M11, with 64Gb of internal memory and a normal Gorilla glass toughened rear screen (it seems pretty tough to me, six months of my use and there are no scratches or scuffs on the screen). Classic and Modern Leica SL3 with 28-70 f2.8 Vario Elmarit Asph If you would like more information about the M11 in general, then you could look at my M11 article from January 2022: Leica M11 For more on Content Credentials there is my article on the M11-P here: Leica M11-P M EV1 with the 35 Steel Rim reissue and the Perfect Rock & Roll strap Leica SL3 with 28-70 f2.8 Vario Elmarit Asph The EVF The Visoflex 2 has an OLED monitor with 3.68 million dots and a 0.73x magnification, whilst the EVF of the M EV1 has 5.76 million dots and a 0.76x magnification. The refresh rate is 60 fps,. The specification of the electronic viewfinder makes it seem likely that it is the same as found in the Q3. At any rate, apart from the tilting of the Visoflex 2, the monitor in the M EV1 is better in every way. The viewfinder window and the dioptre adjustment button/dial look like the Q3 although the housing had to be adjusted to fit the M camera. The dial pops out for adjustment when you give it a push, it has a range from -4 to +2 and will be a very welcome addition for glasses wearers. Rear view with the excellent Leica thumb grip Leica SL3 with 28-70 f2.8 Vario Elmarit Asph New in firmware 2.6.0 The M Ev1 comes with firmware version 2.6.0 this update doesn’t just relate to the M EV1, but will be available today in a firmware update for all the M11 variants. This firmware has a number of bug fixes, mostly to do with stability. In addition there are three important changes: Dust Protection via Leica FOTOS app This is something which can now be activated via FOTOS, it had been requested by a number of users, especially those using the M11-D. A Storm in the Mountains Leica M EV1 with 35 APO Summicron Lens List Editing You can now edit the lens list even if you have a coded lens attached (which you could not before). In addition to this, if you edit the lens list it will be available to all profiles. There was a bit of heart searching about this, because most camera settings can be assigned to profiles individually. (So that you could assign a different list to each profile). Trouble was that’s a bit of a balls-ache if you add a new lens and need to update all the profiles - and so Leica decided (quite rightly) that one would want all the uncoded lenses available in all of the presets. Better than this, if you save the user profiles to disk, then the lens profiles are also saved. New Arrivals Leica M EV1 with 35 APO Summicron Turning your grey skies Blue (Or your magenta skies green or yellow!) There have been some complaints about magenta tint with all the M11 variants: Although I thought it would be good to have a solution to this problem, I also felt very strongly that you can’t just change the colour on a camera 3 years after it’s been released. Most photographers (even if they were not sure in the first place) will have developed a workflow to make the colours that they like; Personally I’m really happy with the colours - I accept that there is more magenta in grey skies than is usual with competitive cameras, but I feel that Leica is closer to the truth and other cameras have too much cyan! Leica have come up with a really elegant solution to this problem. The white balance in your camera will not change . . . . unless you decide to change it! There are two new options in the White Balance Menu: White Balance Adjustment . . . on/off White Balance Adjustment Sailing Away Leica M EV1 with 35 APO Summicron Choosing the second option with the first switched on allows you to move between green and magenta on the vertical axis and yellow and blue on the horizontal (reflecting the Tint option in Lightroom). You can use the touchscreen to move the sliders and a double tap centres it again. Using Daylight (sunny) and changing white balance 15 clicks towards green (from magenta) will change the tint value in Lightroom from +22 to +15. This change is applied to both fixed white balances (daylight for example) and Auto White Balance. Better than this, you can make specific changes for different User Profiles. I have one for Landscape and one for Portrait (where the original base WB values are such a triumph). Poppies at Aghios Pavlos Leica M EV1 with 35 APO Summicron Blue Pillar Leica M EV1 with 75 APO Summicron Of course this also allows you to create your own colour profiles, which are transferred to DNG and Lightroom whether you want vivid or muted (or something wild). You could even save different sets of profiles for different circumstances, export them to disk and re-import them when required. Although the initial impetus for this change might have been dissatisfaction from users about the magenta, Leica have taken this seriously and produced a really useful new feature White Balance Adjustment will also be available via FOTOS. White Balance Adjustment in camera White Balance Adjustment in FOTOS (same settings for each) Focusing with an EVF vs a Rangefinder This is a really big subject! What is certain is that in different circumstances the different methods have different advantages (or disadvantages). Symbolic or Representational? Whilst one would think of the traditional rangefinder as being ‘analogue’, the actual focusing is done by maths and mirrors, mechanics and machining, and is very much symbolic. It will always give you a result, with any lens, but without reference to the aperture. The Long and Winding Road - Don't Slip! Leica M EV1 with the 75 APO Summicron The Rangefinder Whilst it always seems almost miraculous how accurate it is, using a rangefinder can become challenging with very fast lenses when wide open (the Noctiluxes for instance). Generally speaking as you stop down, and the depth of field gets greater, the rangefinder becomes more and more reliable. The other issue is wide angle lenses where the rangefinder window doesn’t cover the whole of the image area, and telephoto lenses where the image is only a tiny part of the rangefinder window. On the other hand, of course with longer focal lengths this allows you to ‘see around’ the subject outside the framelines. And So? Leica M EV1 with 75 APO Summicron Oh Really? Leica M EV1 with 75 APO Summicron The EVF The EVF on the other hand is a proper representation of what is, and what is not in focus. What’s more it shows you exactly what you are going to get in the final image; you have an accurate representation of the exposure and also the depth of field (unlike most mirrorless cameras, with the M EV1 you have stopped down metering). Also, there are the focusing assistants; Focus Peaking, Magnification, and if you want to ‘look around the subject’ for a small sacrifice in megapixels you can use the digital zoom to put framelines in the viewfinder, and for those of us with aging eyes there is a diopter adjustment for the viewfinder. Full frame: 60mp 1.3x crop: 39mp 1.8x crop: 18mp It seems like a bit of a no-brainer: EVF Advantages Seeing the whole image Seeing the depth of field Seeing what is in focus Seeing the exposure Dioptre adjustment Ability to use framelines in crop mode Focus peaking Magnification Focusing accurately wide open The same with all M mount lenses Rangefinder Advantages Seeing around the subject Fast, easy focus confirmation Seeing the Natural Light The Wonderful Heritage The Death of the Rangefinder? In the face of all that, it’s hard not to believe that M users will all quickly get themselves M EV1 cameras and that will be the beginning of the end for the traditional rangefinder. Will those on the forums who are so steadfastly opposed to an EV M be quickly converted? Of course, like most things it’s nothing like that simple; the reason the rangefinder is still popular after nearly 75 years is not just a function of nostalgia or a desire for beautiful objects. The Long and Winding Road Leica M EV1 with 90mm f2.8 Elmarit M Seeing around the Camera That’s it, with a rangefinder you see around the camera, not through it. I guess some would call it ‘getting the camera out of the way’. With a rangefinder M you feel involved with your subject, not with your camera. Before the M EV1 I might have imagined that the reason for this was because the viewfinder window was on the top left, so (if you are ‘right eyed’) you can look at the subject with your left eye, which, indeed, you can, with both cameras. But it isn’t the same - using one eye to look through a magnified (or de-magnified) image in the M EV1 and the other to look at the world just doesn’t really work. Unbolting the sun Leica M EV1 with 90mm Elmarit M John In Blue Leica M EV1 with 35 Summilux FLE Speed of focusing There is more to it than that: Whilst getting accurate focusing wide open is easier with the electronic viewfinder you will generally need to zoom in (one button press) to confirm the focus, in lots of situations that isn’t too much of a problem, but it isn’t quick and it disturbs the bit of one’s brain which is doing the composing. That’s wide open - if you stop down a bit with the M EV1 it can be very hard to see what is in focus and what isn’t, whereas with the rangefinders symbolic rectangles this is still just as fast and easy. Peugeot Leica M EV1 with 35 Summilux FLE Canary Bird Leica M EV1 with 35 Summilux FLE In fact, the focusing is always faster with the rangefinder, this is especially the case with wide angle lenses with a big depth of field, where it can be really hard to see where the optimal point of focus is with the EVF, but it’s also true of standard lenses, again, especially if you stop down a bit. Of course, you can always zone focus with either camera, perhaps interestingly this is not something I ever do with the traditional rangefinder (I always think it’s easier to do it ‘properly’), but I have found myself using it a bit with the M EV1, probably because it’s hard to focus when the lens is stopped down. The Lovely Ladies of Brane Moor Leica M EV1 with the 35 Summilux FLE Testing Elsie, and talking about it amongst the other testers has made me really understand what a wonderful thing the rangefinder is, it is fast, involves you with the subject and it gets the camera out of the way, and although you can focus more accurately with an EVF it certainly takes longer and has an effect on the spontaneity. It’s an interesting thought that SLR cameras which quickly outsold rangefinders in the 1960s disappeared almost completely as soon as decent mirrorless cameras came on the scene, but I’m sure that the optical rangefinder is here to stay. Beer and Bikes Leica M EV1 with the 35 Summilux FLE So, what about the M EV1? Well, in fact it’s a fantastic camera, with lots going for it, but the one thing it isn’t, is a replacement for a rangefinder camera. I guess perhaps it’s not the right camera for street photography, or for photojournalism; situations where things happen fast and your subject is moving about. On the other hand, when things aren’t happening fast, and you have time to take advantage of the excellent focus assistance options then the M EV1 really comes into its own. I’ve been using it a lot with the WATE (Wide Angle Tri-Elmar 16-18-20) the 35mm APO Summicron and my 90mm f2.8 Elmarit M. This is a nice tidy kit covering all the bases - and of course the image fills the viewfinder, whatever the focal length. Sfakian Sunrise - see you next year! Leica M EV1 with 75 APO Summicron Real World shooting with the M EV1 For our recent visit to Crete I shot almost exclusively with the M EV1, using the WATE, the 35 APO Summicron and my all-time favourite lens, the 75mm APO Summicron. It was a really good experience, and, for this kind of shooting, better than using an M11, and that’s even with my years of practice with a rangefinder. I used the 75 a lot for close up images, and also for people in restaurants and bars. Considering that you can crop so well with 60MP it effectively gave me a focal range from 16mm to 135mm in 3 lenses. Tethered Leica M EV1 with 35 APO Summicron Aghios Pavlos Poppies Leica M EV1 with 35 APO Summicron I also used it at a wedding, and for some family group photographs and it performed really well in both circumstances (although there were fast moving situations where an M11 would certainly have been better.) I’ve also been using it for close up photography, notably with the lovely 35 APO Summicron, where the rangefinder of the M11 is limited to 0.7 metres and the lens will focus to 0.3 metre. Aghios Pavlos Leica M EV1 with Wide Angle Tri-Elmar at 16mm Elsie and the SL3 for M lenses I spent a weekend shooting the SL3 with M lenses (to see how that compared to Elsie) Of course the SL3 is almost 400 gms heavier than the M EV1, which is certainly not insignificant (indeed, nearly twice as much). Being able to use the joy stick is a positive advantage and the eye point of the viewfinder means that the image looks bigger than the M EV1. . . . . . . . . and you can always stick on an AF lens . . . . . . and you save a couple of grand as well! Emma and the Yellow Hydrang Leica M EV1 with 35 Summilux FLE Hydrangea Leica M EV1 with 35 Summilux FLE The SL3 has image stabilisation, but I really haven’t found this a problem with either the M11 or the M EV1, If there might be an issue then I use auto-ISO, Aperture priority and set the shutter speed limit to 1/(4f) so that it’s 4 times the focal length. I really don’t have an issue with camera shake. I use the SL3 quite a lot, but truth be told I almost never use M lenses under normal circumstances, because . . . why? There are so many good Auto Focus lenses for the SL system. This has been an interesting experiment, but it hasn't changed my opinion of the M EV1, which I think is a great idea and which lots of people will really love. Serious Leica M EV1 with 35 Summilux FLE Cutting the Cake Leica M EV1 with 50 f1.2 Noctilux So - who is it for? A couple of years ago I wrote a memo to Leica about the possibility of a Leica with an EVF: I identified two demographics. The obvious groups were oldies (like me) who find rangefinder focusing difficult (not me yet!), and for younger photographers who fancied an M, but were not enamoured with the idea of getting to grips with a rangefinder. After 6 months my feelings have changed a bit and I think it’s much more complicated. Certainly I’m still sure it will be popular with new Leica users who don’t feel like learning how to use a rangefinder. Blowing up a tempest Leica M EV1 with 35 APO Summicron I’m not so sure it’s the right answer for those who are finding it difficult to focus a rangefinder, I guess if they have found the Visoflex 2 to be easier, then this will be better still, but I’m not so convinced there is a way to make manual focus easy with poor eyesight; maybe it’s time to buy a Q3? (Or better still a Q3 43) On the other hand I think it’s a wonderful camera for travelling with a diverse set of M lenses, fantastic for portraits and perhaps wedding photography as a companion for an M11. Family Gathering Leica M EV1 with 35 APO Summicron The Future Clearly this is a first step, Leica have taken existing technology and created a new camera. It’s a great deal more than just an M mount camera with an EVF, and as I hope you’ve gathered from all this blathering it really is a different thing from a traditional M camera. There are lots of things which could be included in such a camera in the future, the obvious thing being some form of focus confirmation. The technology certainly exists for this, but how to do it is much more interesting and complicated. Perhaps a rectangular section like the existing rangefinder, or maybe a confirmation light, or arrows. I hope there will be further Leica M EV cameras, but I also hope that they will stay close enough to the rangefinder versions to be used as complementary cameras rather than as competitive ones. One thing is for certain - as Stefan Daniel says in the fascinating interview with Chats & Bill (in links below) "Leica is currently working on new evolutions of the opto-mechanical rangefinder. We are merely listening to our valued customers and responding, but we will never give up on seventy years of storied Leica M history" Nobody needs to fear that this is any kind of slippery slope! Beach Muscovies Leica M EV1 with 35 APO Summicron The same . . . but different So that whilst using the M EV1 is quite different from using a normal M, it is useful in different circumstances. Of course the image quality and the menus are all the same, so the obvious thing is to have both an M11 and an M EV1! Although that sounds flippant, I do feel that the most important use of the M EV1 is as a second camera to use with wide angle and telephoto lenses alongside an M11. At any rate I’m certain that it’s another brave experiment from Leica. Whilst Christoph Mueller, the M product manager tells me that “it’s not an experiment, but a bold and well-considered decision to expand the M experience”. Hard to argue with that! Sfakian skies Leica M EV1 with 35 APO Summicron Elsie is a camera which will be loved by lots of travel photographers as a primary camera and many more Leica photographers as a second camera. It’s a great addition to the M portfolio, and a new chapter in the history of the M, but of course, the rangefinder will always be at the heart of the M system, no matter what. Refreshingly, it’s also a bit cheaper than an M11. Acknowledgements First of all, the bunch of great characters who have been arguing and joking about the M EV1 for the last six months - it’s been fun, and you have all contributed to this article in one way or another: Elmar Streyl, Alex Uehlinger, Huw John, Siegfried Günther, Olivier Touron, Samuel Gillilan, Milan Swolfs and of course Leon Baumgardt; always the coolest compere! Fishing Tackle Leica M EV1 with 75 APO Summicron At Leica, Stefan Daniel has, as always been wonderfully helpful and enthusiastic. Christoph Mueller has put so much effort and attention to this project and if it’s a success then it will be very much a feather in his cap! Thanks are also due to Marke Gilbert for helping me not to sound like AI! Most important is Emma, who not only puts up with me testing the cameras and complaining about them, and complaining about having to sit down and write the articles, but also proof reads them, makes valuable comments and turns my ramblings into something sensible. Tackle Leica M EV1 with 75 APO Summicron Links Elmar Streyl will have his own excellent report up at the Leica User Forum. Chats Chaterjee and Bill Rosauer interviewed Stefan Daniel and the article is here: https://chatsphotog.com/musings/f/leica-m-ev1-interview-mit-stefan-daniel My old friend Sean Reid will also be publishing at least one article about the M EV1 at https://www.reidreviews.com/
89 points
-
Kodak Ultramax & 35:1.4v2 , MP
88 points
-
88 points
-
Absolutely thrilled and delighted that my image "Winter In Yosemite" (below) won the best pint in the East Anglia Federation of Photography's annual print championship. Taken with the SL (type 601) with the 16-35mm Vario-Elmarit. https://photographybytomlane.com
85 points
-
Alpilles, France Leica M 262, Summilux 50mm ASPH
83 points
-
First day of the year, sunset from my balcony. The hills were partially frozen, and the fog covered the city completely…
83 points
-
Valencia M11-P, 21 SEM
82 points
-
76 points
-
Berlin Friedrichstraße in all its morning glory:
76 points
-
The wintery desolation of Iqaluit, Nunavut. December 2024 M11, 28mm Summicron, f/4.8, iso 320, 1/180th
75 points
-
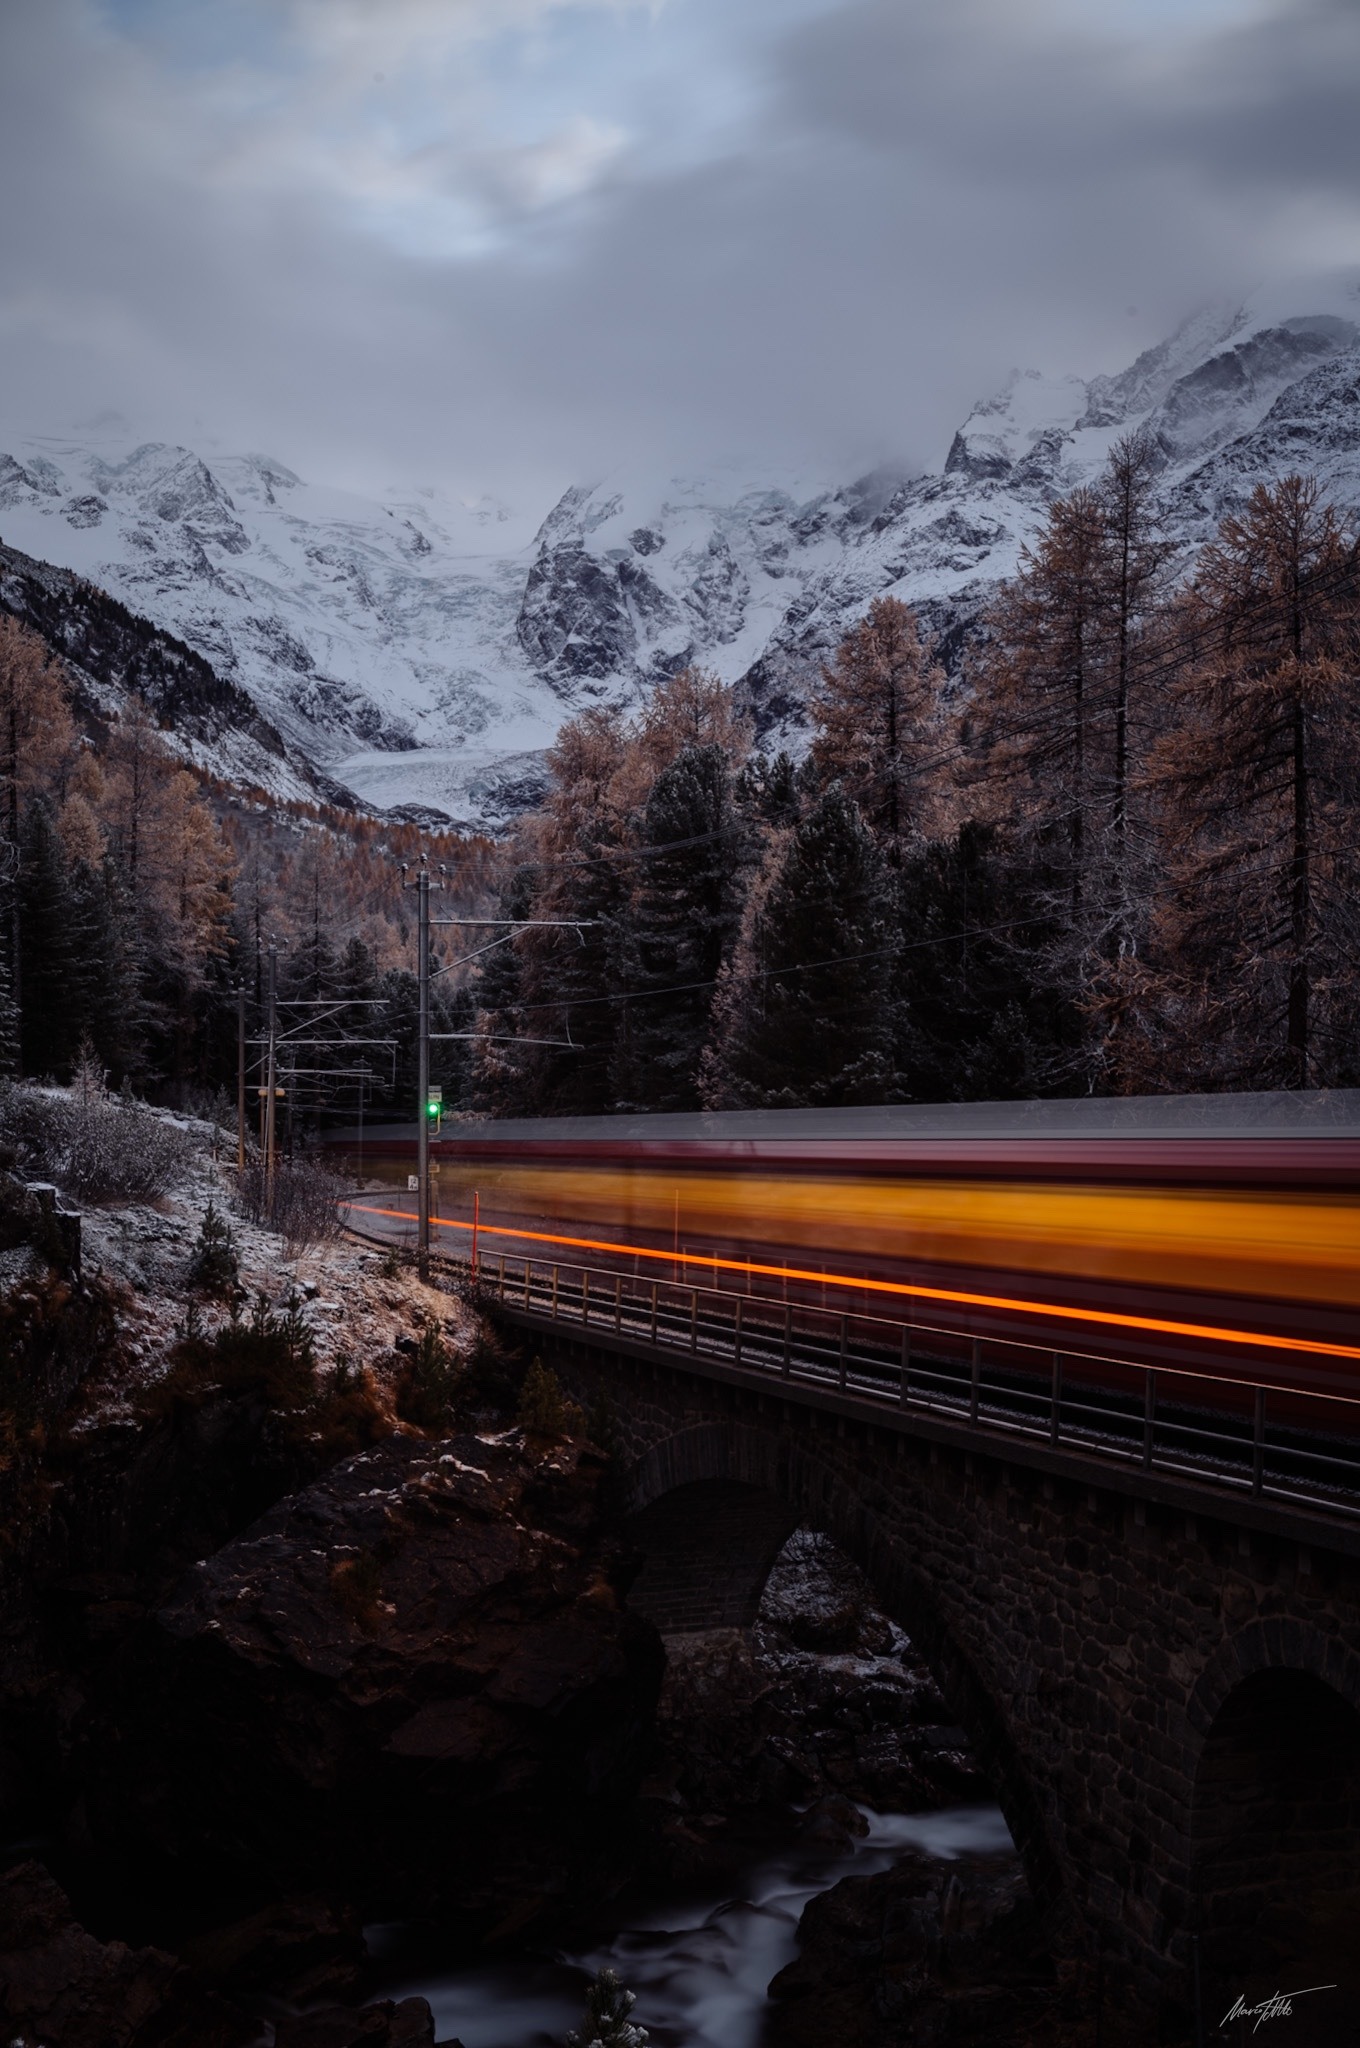
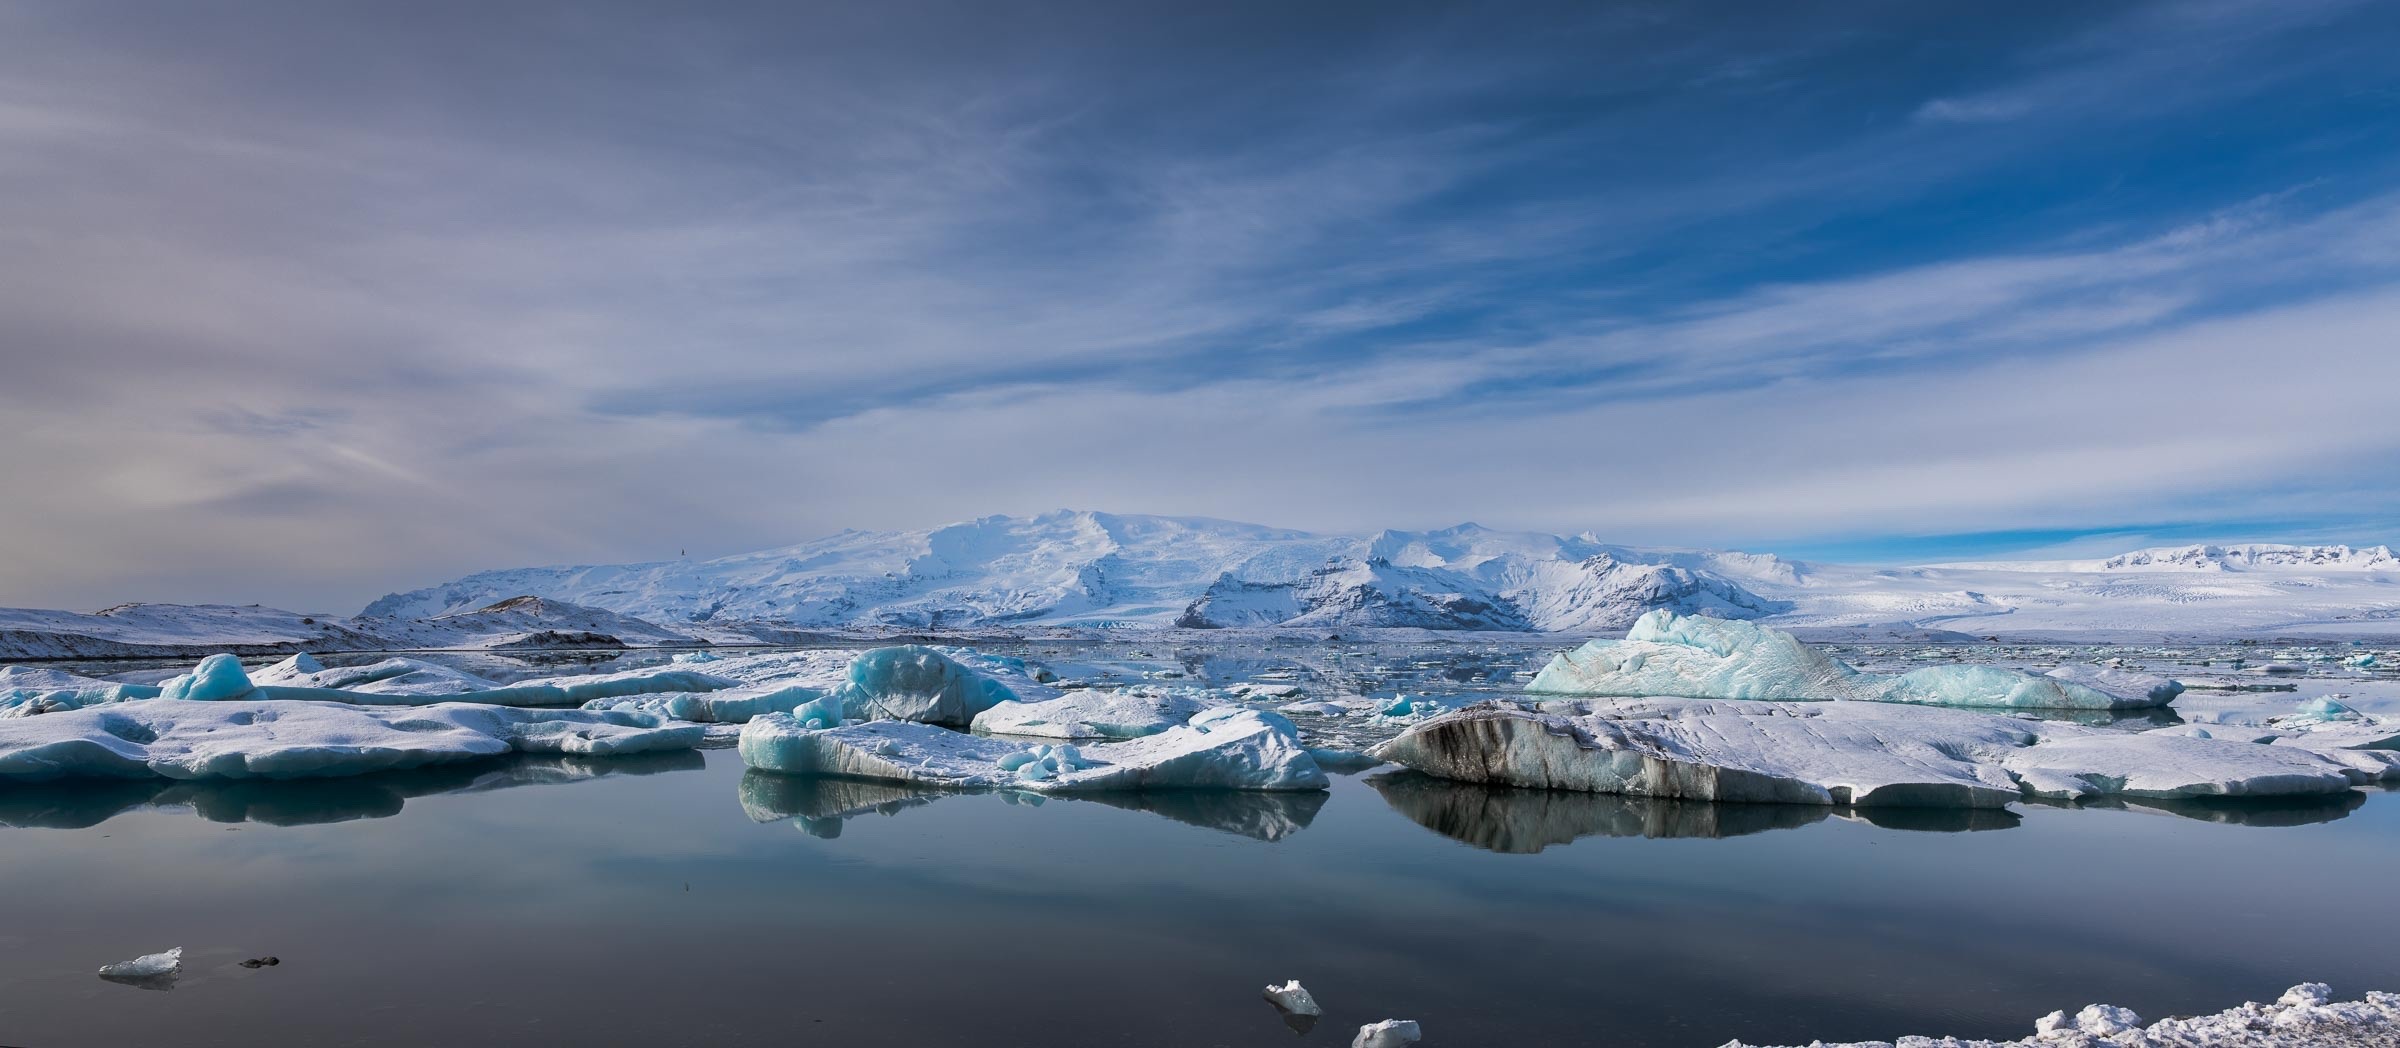
M EV1 with Summicron M 28, Morteratsch Glacier in Switzerland tonight.
74 points
-
74 points
-
71 points
-
Ostinden and Sakrisoya
67 points
-
Bette. M240 with 50/1 Noctilux.
66 points
-
On February 20th, 2025, Leica announced a new member of their successful 'classic' series where they have resurrected old lens designs and remade them with modern manufacturing and tolerances. So far they have released four lenses: 28mm Summaron (2016) 90mm Thambar (2017) 50mm Noctilux f1.2 (2021) 35mm Summilux (steel rim version 1) (2022) The fifth is the 50 Summilux, a lens that was the mainstay of many a photographer's kit for many, many years. The four previous lenses were faithful reproductions of the original lens, but this time it's a little different. I have had a copy of the lens to test since May last year, and just like the 35mm Steel Rim and the f1.2 Noctilux I've fallen very much in love with it. First of all I'll have a look at the history of the original lens, then I'll talk about the new lens. History The original Leica 50mm Summilux was produced between 1959 and 1961. It was released in two versions, a black lacquered version in brass and aluminium in very small numbers and a chrome plated brass version with a scalloped focusing ring. There were about 19,600 made in what was probably the shortest manufacturing run of any of the M lenses (just over two years). It was 'designed' by Walter Mandler and Erich Wagner and it was constructed of 7 elements in 5 groups, with elements 2 and 3 cemented together. It was released in both screw and M mounts, the M mount version weighed 360 g. It was very similar in design and performance to the lens it replaced, the 50mm f1.5 Summarit, but with updated glass. The Summarit was designed by Otto Zimmermann and manufactured from 1949 to 1960. This lens was based very closely the Xenon and on an original design by Taylor,Taylor & Hobson from 1936. Professor John Cheng from Hong Kong recently posted this picture of his lovely silver and black paint version 1 lenses. The black paint lens is in brass with its reverse scalloped focus ring in aluminium alloy, and with a brass mount. He has kindly given me permission to show them here. In 1961 the version I was replaced with the version II designed by Walter Mandler. The new lens was still 7 elements in 5 groups, but this time elements 2 and 3 were separate, but elements 6 and 7 are cemented. Once again, there were black (11113) and chrome (11114), but this time it was black anodized on aluminium (275 g) or chrome plated brass (380 g), both had knurled focus rings. Leica didn't acknowledge the new design until 1968, perhaps because they didn't want to upset people who had already bought the inferior version I, or maybe they just didn't update the design in the catalogues. This basic configuration continued in production until 2004, there were updates in 1969 and more significantly in 1992, when it was changed from a 43mm filter to a 46mm filter, the clip on lens hood was replaced by a telescoping hood and the minimum focusing distance was reduced to 0.7 metres (this is usually known as version III). However the optical design remained the same, making this lens one of the longest running Leica lenses in production, with about 62,000 being made overall. Appearance The lens body of the new lens is very much reminiscent of the version 1, although with it's chrome over brass construction it is now heavier at 417 g. Unlike some of the original lenses it has a normal (rather than reversed) scallop. It's a beautiful object, and although heavy, it balances very nicely on a modern digital M camera Handling My copy is an early prototype; the eagle eyed will notice that the exif information for the lens is not right, because mine had the wrong 6 bit coding (it was a mirror image!). However, it handles beautifully, the aperture click stops are just perfectly weighted, and the focus ring is delightfully smooth and tactile (I just can't bring myself to say "buttery-smooth" . . but it certainly is!). The only thing which might be less than perfect for modern users is the rather long focus throw, especially when getting down to 0.7 metres for close up work. Performance Sadly, I haven't managed to get hold of any of the original lenses to do a comparison, but in the knowledge that this time around, rather than trying to reproduce the quality of the version 1 (as they did so successfully with the steel rim), Leica realised that perhaps it wasn't quite as much of a classic as the version 2 and 3 and have tried to make this lens a synthesis of all the good things about all 3 versions of the pre-Aspherical Summilux. So the optical formula of the lens is the same as that of version 2/3 i.e. with elements 2 and 3 separate, but elements 6 and 7 are cemented. Then Peter Karbe was called in to help, his concept was to make, in effect, 2 lenses, one which had the lovely gentle bokeh of the version 2 and 3, but which, when stopped down had more of the performance of a modern lens. This was done by using different glass and new coatings that weren't available when the lens was first designed. Hopefully the images here and in the attached gallery will give you an idea of the qualities of the new lens. As you stop down it becomes very sharp (in much the same way as many classic lenses), but on the whole I've shot it wide open, because that's what I like to do, and because that is when lenses really show their character. I think that the bokeh is lovely - quirky but not agitated, and whilst the lens characteristics might not be quite the same as the original lens I do think it has a real classic feel about it. As you would expect, it isn't quite as sharp in the corners as modern lenses (even when stopped down) and whilst surprisingly resistant to flare, there are some circumstances when flare can happen. The 50 Summilux Aspherical (from 2004 onwards) also has a floating element, which greatly reduces focus shift, something this lens is subject to. It's quite interesting to look at MTF curves for the versions 1 and 2/3 together with the modern Asph lens and the remade non aspherical lens. Leica with Peter Karbe certainly have been doing some magic here, and the figures for the new classic are getting towards being as good as those of the modern Aspherical lens. Conclusion Assessing a classic lens like this is a little difficult - clearly comparing it to modern lenses is badly missing the point, on the other hand it must have a character of it's own, and be capable of taking photographs which are both interesting and technically good. It should also be a satisfying object. This new classic is cheaper than the modern 50 Summilux, and as such seems to me like an excellent deal. With the classic 50 Summilux Leica have produced a lens which is delicious to use and produces great images which have a lovely bokeh when wide open, and great acuity when stopped down a little. The handling and mechanics of the lens are a joy, and it's just a great experience to shoot with it. In short, another excellent addition to their classic range of lenses, it will be interesting to see what comes next! Acknowledgements Leica history is not my strongest side, so I have reached out to a number of people during the course of writing this article, and I'd like to thank the following: Frank Dabba Smith for his wonderful Leica BIG Pocket book, for his emails and his permission to use the MTF graphs, the poor scanning is entirely my responsibility! Ivor Cooper at Red Dot cameras in London for his generous gift of the Leica Big Pocket book. Also Stefan Daniel, Christoph Mueller, Bill Rosauer, Marke Gilbert and William Fagan for help and advice, and finally to Professor John Cheng from Hong Kong for generous permission to use the photograph of his lovely version 1 lenses.
66 points
-
Reworking some old stuff. M240, 105-280 R.
66 points
-
I photographed this SpaceX launch a couple of weeks ago from a nice location at the base of the San Jacinto mountains. The timing was perfect for getting the deep blue dusk sky with the rocket and it's trail illuminated by the setting sun on the other side of the mountains. The only problem is that Elon Musk wasn't in the capsule--just StarLink satellites. D-Lux 8
66 points
-
Most Leica shooters tend to be either 35mm or 50mm photographers. When you think of a Leica 50mm lens, the names Summicron, Summilux, and Noctilux immediately come to mind—each defining the speed of the lens. The Summicron, at f/2, is the slowest of the three, the Summilux sits in the middle at f/1.4, and the Noctilux is the fastest, featuring lenses faster than f/1.4. In Leica’s terminology, Summilux refers to any lens faster than f/2 but not exceeding f/1.4—for example, the Q has a 28mm Summilux lens with an f/1.8 aperture. The 50mm focal length is often regarded as the classic choice. It provides a natural perspective and was the preferred focal length of legendary photographers like Henri Cartier-Bresson. Its versatility makes it ideal for everything from landscapes to portraiture. Personally, I am primarily a 50mm shooter. As a portrait photographer, I naturally frame most of my shots in portrait orientation—it’s how I see the world, and it aligns with how most people consume images today through smartphones and social media. I own multiple Leica 50mm lenses and often bring two different ones to a shoot. For color work, I might use a Summilux ASPH or a newer Noctilux, while for monochrome photography, I lean towards a classic Noctilux f/1 or a slower Summicron Rigid. My preference for 50mm over 35mm comes from the slight compression it offers, which I find more flattering for portraits. The way I shoot is instinctive—I pick up a camera with a 50mm lens and immediately know what my frame will look like. Beyond the technical aspects, I have a deep appreciation for vintage lenses, which is one reason why Leica often involves me in beta-testing their heritage line of M lenses. This series began with the 28mm f/5.6 Summaron, followed by the 90mm Thambar f/2.2, the Noctilux 50mm f/1.2, and more recently, the Steel Rim 35mm f/1.4. Having had the privilege of using both the original versions and their modern reissues, I always enjoy comparing their characteristics. So, I was surprised when Leica asked me to field-test the 50mm Summilux Pre-ASPH. Unlike the Noctilux 50mm f/1.2 or the Steel Rim 35mm f/1.4, the Pre-ASPH Summilux 50mm remains relatively affordable on the used market—at least in the silver chrome version. With Leica’s current 50mm lineup, which includes: 50mm Summilux ASPH (with closer focusing) Noctilux 50mm f/0.95 Noctilux 50mm f/1.2 50mm APO-Summicron 50mm Summicron f/2 Where does the reintroduced 50mm f/1.4 Pre-ASPH fit in? To me, it’s closer in character to the 50mm Noctilux f/1.2 than to the 50mm Summilux ASPH. But before diving deeper into the reissue, let’s take a step back and explore the history of the Summilux 50mm. The History of the 50mm Summilux Pre-ASPH One of the most fascinating aspects of the 50mm Summilux is how little its design has changed across different versions. Throughout its history, the Summilux 50mm has consistently been regarded as a strong performer. The current production model, version 5, now offers close focusing down to 0.45m. For this review, I’ll focus on the history of the Pre-ASPH version. While the Pre-ASPH Summilux underwent several mechanical refinements over the years, its optical formula remained unchanged. Despite advancements in lens technology, this classic lens continues to be highly sought after, admired for its distinctive rendering, smooth bokeh, and signature Leica glow. From a design point of view the 35mm Summilux v1 Steel Rim and the Summilux 50mm Pre-ASPH v1 and v2 are my favorite lenses by far. 50mm Summilux Version 1 (1959 - 1961) Leica introduced the 50mm Summilux Pre-ASPH in 1958 as its fastest 50mm lens at the time. It was an evolution of the 50mm Summarit f/1.5, featuring a brighter f/1.4 aperture for improved low-light performance and better depth of field control. With one of the shortest production runs of any Leica M lens, the Summilux Version 1 was primarily produced in silver chrome over brass. A small number of black paint versions were made on request, making them highly collectible. These black paint variants came in different finishes—some were fully painted, while others had a mix of aluminum and brass components. The most sought-after black paint models featured a full brass mount. The standard chrome brass version weighs approximately 325 grams. One distinctive feature of the V1 Summilux is its rare E43mm filter thread. Original Leica E43 UV filters are becoming increasingly difficult to find, so if you come across one, it’s worth picking up. The lens has 10 diaphragm blades, contributing to its smooth and aesthetically pleasing bokeh. Optically, the design of the V1 was similar to the Summarit 50mm f/1.5, but it introduced Lathanum glass to improve flare resistance. Additionally, it had better coatings compared to its predecessor. However, due to the softness of its coatings, many surviving copies show cleaning marks or haze. If you own one, avoid cleaning the lens with a cloth to prevent damage. Key Features: Minimum focus distance: 1 meter Filter size: 43mm (E43) Glass: Lathanum glass Lens hood: XOOIM, separate bayonet-style hood The Reverse scallop The reverse scallop focus ring is a distinctive design feature found on certain versions of the Leica 50mm Summilux Pre-ASPH, particularly early Version 2 models. Unlike traditional scalloped focus rings, which have recessed grooves for grip, the reverse scallop design features raised ridges with inverted knurling. This unique design has sparked discussions among Leica collectors and users. Some photographers appreciate its ergonomic feel, as the raised ridges provide a comfortable and precise grip for manual focusing. Others, however, find it less intuitive than the standard scalloped or tabbed focus rings found on later models. While the reverse scallop Summilux is mechanically and optically identical to other V2 Pre-ASPH lenses, its distinctive focus ring makes it a sought-after piece among Leica enthusiasts. If you're considering one, it’s worth handling in person to see if the grip suits your preference. Version 2 (Pre-ASPH, 1961–1995) At first glance, the Version 1 and Version 2 Summilux in chrome over brass look almost identical. However, the most significant upgrade in the V2 is its new optical design, which offers noticeable improvements over the first version. Interestingly, Leica did not officially acknowledge this optical redesign until 1966—something that would surely drive today’s Leica enthusiasts crazy. Some users claim that the V2 introduces more distortion compared to the V1, but after testing both extensively, I haven’t observed this in my own experience. Given that the V2 was in production for 34 years, it’s clear that Leica made substantial refinements to the lens over time. The V2 also retains 10 diaphragm blades, ensuring a similar out-of-focus rendering to its predecessor. Key Features: New and improved optical design Same barrel design as Version 1 until 1965 Minimum focus distance: 1 meter Filter size: 43mm Aluminum barrel for black anodized versions after 1968 Image Quality & Rendering: Version 1 vs. Version 2 At f/1.4, both versions of the Summilux 50mm Pre-ASPH deliver a dreamy, soft rendering with a distinctive glow around highlights. The lower contrast compared to modern lenses contributes to a classic, filmic look that many photographers appreciate. While sharpness improves significantly when stopped down, these lenses are prized not for technical perfection but for their unique character and organic feel. Handling & Practical Considerations Both versions utilize a bayonet-style hood, which, while effective, can add bulk when attached. Without the hood, the lens remains compact, but some users find the external hood design less convenient than built-in alternatives. Additionally, the 43mm filter thread may be a factor depending on your lens setup. If you already own other 43mm filter lenses, it’s a seamless fit. However, if your other lenses use 46mm or 49mm filters, you may need step-up rings to maintain consistency in your kit. The Summilux Pre-ASPH Transition Model Between the second and third versions of the 50mm Summilux Pre-ASPH, Leica introduced a transition model that incorporated design elements from both. While it retained the optical formula of the V2, it featured mechanical improvements that foreshadowed the V3, including a more refined focusing mechanism and subtle barrel design changes. This model is relatively rare and often overlooked, but it represents an interesting evolution in the Summilux lineup, bridging the gap between the classic rendering of earlier versions and the improved handling of later models. Version 3 (Pre-ASPH, Late 1995 – 2005) The third version of the 50mm Summilux Pre-ASPH maintains the same optical formula as its predecessors but introduces improved mechanics and usability. The most notable change is its ability to focus down to 0.7 meters, compared to the 1-meter limit of V1 and V2. Key Features Minimum focus distance: 0.7 meters Filter size: 46mm Lens hood: Built-in sliding hood Image Quality & Rendering Like the previous versions, the V3 Summilux Pre-ASPH maintains a smooth, organic rendering, making it a great choice for portrait photographers. Some users feel it has slightly better contrast and sharpness compared to earlier versions, despite using the same optical formula. Handling & Practical Considerations The built-in sliding hood makes this version more compact and practical, though some photographers argue that it’s not very effective. Additionally, the 46mm filter size makes it more compatible with other modern Leica lenses. The New 50mm Summilux Pre-ASPH Reissue Leica’s reissue of the 50mm Summilux Pre-ASPH is based on the Version 2 design, retaining its core characteristics while incorporating modern refinements. Yet, it is more than just a revival—it is an homage to the evolution of this legendary lens, seamlessly blending the finest elements from three generations. The outer geometry harks back to the elegance of Version 1, the optics draw from the celebrated Version 2, and the close-focus function is inherited from Version 3. It is, in essence, the quintessential Summilux Pre-ASPH, distilled into a single form. Crafted in brass with a chrome finish, the reissue has a more substantial build, giving it a premium feel. It is slightly wider than the original Pre-ASPH, resembling the Noctilux 50mm f/1.2 in proportions, though it remains a bit shorter. One notable design change is the omission of the waffle-pattern engraving near the M scale and red dot, replaced by a straight-line texture—a minor aesthetic difference that some enthusiasts may notice. The lens now features the more common E46 filter thread, an upgrade from the E43 filter found on the original, making it more convenient for filter compatibility. With an aperture range from f/1.4 to f/16, the reissue measures 45mm in length without the hood and extends to 71mm with the hood attached, with an overall diameter of 58mm—slightly wider than the original V1 and V2 models, which were approximately 51mm. The reissue also carries more weight, coming in at 417g, compared to the 340g of the original. One significant upgrade is the increase from 10 to 12 diaphragm blades, resulting in even smoother, more refined bokeh—something I’ll explore in more detail later. While staying true to the classic rendering of the original, the reissue brings subtle but meaningful refinements that make it a compelling option for both collectors and shooters. For context, the Leica Noctilux-M 50mm f/1.2 ASPH. measures approximately 52mm in length without the lens hood and 79mm with the hood attached, with a diameter of about 61mm. It weighs around 405 grams. In comparison, the reissued 50mm Summilux Pre-ASPH is slightly more compact in length but has a similar weight, offering a different balance and handling experience. Which Leica Lens? I am a photographer, not a reviewer. I don’t focus on brick wall tests or technical discussions; instead, I judge lenses based on how they perform in real-world shoots. Having used many Leica lenses extensively, I have developed a strong sense of how they fit into the Leica lineup and how they translate into my photography. Every week, I get questions from social media followers asking which Leica lens or camera they should buy. For a first Leica lens, I often recommend the 50mm Summilux ASPH or the 35mm Summilux, as they are versatile and well-rounded options. However, many photographers soon realize that Leica lenses are like paintbrushes—each one offers a different tool for creative expression. I frequently carry multiple focal lengths to a shoot, but I tend to rely on a 50mm for most of my work. Sometimes, I even bring two 50mm lenses because each has a unique look. For the Leica M11 Monochrom, I often choose the Noctilux f/1 or the 50mm Summicron Rigid, while for color work, I prefer the 50mm Noctilux f/1.2 ASPH. Each 50mm has its own distinctive rendering, making lens selection a crucial part of my creative process. So why choose the new 50mm Summilux Pre-ASPH over other Leica 50mm lenses? During discussions with Murat, the Product Manager for M lenses, and Christoph, the M Product Manager, it became clear that some Leica shooters—including myself—are looking for a compact, fast lens with character. The Summilux Pre-ASPH was also introduced as an economical option for those who want a fast lens without jumping into the Noctilux series. Initially, when Leica briefed me about this lens, I wasn’t overly excited—I often gravitate toward more obscure lenses like the 73mm Hektor or the 66mm Elcan, or rare collector’s pieces like the 35mm Summilux Double ASPH. How Does It Differ from the Original? After testing the 50mm Summilux Pre-ASPH V2, I noticed some key differences between the original and the reissue. The original has more pastel tones, lower contrast, and is slightly softer compared to the reissue. A major limitation of V1 and V2 was the 1m minimum focusing distance, while the new version focuses down to 0.7m. While I rarely need close focusing for my work, this difference can be significant for certain applications. Performance at f/1.4 and Beyond In terms of sharpness, the new Summilux Pre-ASPH is sharper than the Noctilux 50mm f/1.2 wide open. Even at f/1.4, it holds a noticeable sharpness advantage. The lens also excels in color reproduction, particularly in the greens and reds. I took it to the Royal Gardens in Brussels, and it performed beautifully, capturing lush greens and delicate floral backgrounds with an elegant softness. The skin tones rendered by this lens are particularly gentle and natural, striking a perfect balance between sharpness and softness. Unlike the Noctilux 50mm f/1.2, which some find overly soft, the Pre-ASPH retains just the right amount of detail without becoming clinical. The lens has a dual character—wide open at f/1.4, it’s dreamy and ethereal, but stopped down to f/2.8, it becomes razor-sharp and highly versatile. This makes it suitable for a wide range of photographic applications. Where the Pre-ASPH Excels: Bokeh & Handling One of the highlights of this lens is its bokeh. The rendering is creamy and smooth, yet it remains non-distracting and well-controlled. I used this lens continuously during my field testing, and I often felt that it could be the perfect all-in-one lens. It’s neither too heavy nor too large, it focuses close enough for portraits, and it renders backgrounds beautifully. Compared to the ASPH Summilux or the 50mm APO, it’s sharper but retains a softer, more organic look, particularly on skin tones. Comparing to the 50mm Summilux ASPH Of course, the 50mm Summilux ASPH is a much more modern lens in every way. It offers closer focusing at 0.45m, has less vignetting, higher contrast, and is sharper wide open. A key difference is that the ASPH version also controls chromatic aberrations better, significantly reducing purple fringing, which is more visible on the Pre-ASPH. Does this make the Pre-ASPH a lesser lens? Absolutely not. The Pre-ASPH Summilux is for the romantics—the portrait photographers like myself who love swirly, pleasing bokeh. It offers a more nostalgic, filmic look that some may prefer over the technically perfect rendering of the Summilux ASPH. Can It Be Your Only 50mm? Yes. The Pre-ASPH Summilux has a dual personality—wide open, it’s full of character and atmosphere, but stopped down, it sharpens up beautifully with excellent contrast. It’s a lens that adapts to different needs, making it a fantastic one-lens solution for many photographers. Can It Handle High-Resolution Sensors? Many assume that older optical designs struggle with high-resolution digital sensors, but that’s not the case here. Every image in this review was shot with the Leica M11-D, proving that the Summilux Pre-ASPH holds up beautifully even at 60MP. I even printed a portrait of Thais with the Lamborghini Urraco, which was displayed at the Leica Store Beaumarchais during my exhibition "Echoes of Elegance: A Timeless Journey." The detail and rendering clearly held up, even in large-format prints. Like the V1 and V2, the reissue still has some vignetting wide open, but this only adds to the lens’s character. By f/2.8, most of the vignetting disappears. Personally, I like a slight vignette—it draws the viewer’s attention to the subject and enhances the overall composition. In the end, the Summilux Pre-ASPH reissue is an incredibly well-balanced lens, combining the best aspects of vintage rendering with modern usability. Whether you’re drawn to it for its history, its aesthetic, or its unique optical qualities, this lens has something special to offer. The Proof of Concept I combined this lens with the Leica M11-D, and although I also own the M11 Monochrom, I found myself strangely attached to using it with the M11-D. The color combination of the sensor of the M11-D and this lens is a match made in heaven. If someone were to ask me, "Milan, if you could pick only one lens for your M?"—this might hit all the spots for me. It has tons of character, but when stopped down, it becomes a high performer. The bokeh is one of the most beautiful I have ever seen, and it is very gentle on skin tones. Once a year, there is an opportunity to visit the Royal Gardens of the Royal Family in Brussels. It was my second time there, and visitors are even allowed to bring a camera. I followed my usual "one camera, one lens" philosophy, bringing only this lens paired with the M11-D. The camera brought out some of the most pleasant colors, and the backdrop of flowers and plants resulted in gorgeous bokeh. The model for the day was my lovely fiancée, who usually assists with lighting but occasionally agrees to pose as well. The smooth tones and natural colors required only minimal editing on the skin. While I have not tested this lens with a film M camera, I can imagine it would pair beautifully with Kodak or Fuji film. The only downside is a bit of purple fringing when shooting wide open, but it’s more controlled compared to the Noctilux f/0.95, which, while a much faster lens, is also an ASPH lens. For another shoot, I brought the lens into a setting that truly suits my style of photography—combining model Thais with a rare 1974 Lamborghini Urraco. This car, an often-overlooked gem in Lamborghini’s history, embodies a perfect mix of elegance and raw performance, making it an excellent subject for this lens. The combination of vintage Italian automotive design and the Summilux’s rendering resulted in a series of timeless images. While most of the shoot was done using the Medium Format Leica S3, I also had the M11-D with this lens as a backup. The results? The model definitively chose some of the shots taken with this lens. It was easy to focus, allowing me to switch from the heavy S3 to the Leica M11-D, giving my back and shoulders some much-needed rest. One of the advantages of using the M11-D with this lens was its ability to shoot wide open even in full sun and artificial light, thanks to the high shutter speed of the electronic shutter. A specific challenge during this shoot was photographing through the car’s windows. The S3’s autofocus often struggled in such conditions, whereas the M11-D, paired with this lens, made manual focusing a breeze—even with natural sunlight and Harlowe LED lights filtering through the glass. Overall, this lens exceeded my expectations, proving itself as both a character lens and a high performer when stopped down. It handled beautifully in both natural light and more challenging artificial setups, cementing its place as one of my go-to lenses for my M-series cameras. Final Thoughts – A Worthy Addition? So, who should buy this lens? If you love classic Leica rendering but want modern usability, the new 50mm Summilux Pre-ASPH is an excellent choice. It offers a unique balance—dreamy at f/1.4, razor-sharp at f/2.8—making it an ideal all-in-one 50mm. Would I personally buy it? Absolutely. It’s a fantastic lens that blends vintage charm with modern precision—exactly what I look for in a Leica lens. Through the Archive’s Lens: A Glimpse into Leica’s Legacy At the beginning of this review, I mentioned a few of my favorite lenses—each with its own story, character, and place in Leica’s rich history. As for what’s next in the heritage line, only time will tell. For those with a passion for Leica’s past, the Leitz Park archive is a treasure trove of extraordinary pieces, where some of the most special and storied lenses can still be seen and appreciated. It's a place where history comes alive, offering a rare glimpse into the evolution of Leica’s craftsmanship. Of course, this is merely a reflection, not a suggestion of future plans. But isn’t it wonderful to dream? Special thanks to Christoph Mueller and Murat Akkus from Leica Camera for their support and great conversations. A huge thank you to my fiancée Aliya for letting me take her shots, having the patience for my gear reviews, and tolerating me bothering her to pose. And finally, a big thank you to Thais for the amazing shoot we did—couldn’t have asked for a better collaboration! About Milan Swolfs Milan Swolfs is a fine art portrait photographer born in Antwerp, Belgium, renowned for his exquisite visual signature in the burlesque and vintage styles. His work captures the timeless Hollywood glamour of the 1920s and 1930s, showcasing both women and men in bold, confident expressions with a delicate and glamorous touch. He began his career photographing the biggest burlesque events in Europe before shifting his focus to fine art photography. An ambassador for Leica Camera, Milan's work has been published in LFI (Leica Fotografie International), Medium Format Magazine, and Viewfinder. He held his first solo exhibition, "Light of Seduction," at the Leica Store in Porto in 2022. By the end of 2024 until January 2025, Milan had the privilege to present his new work at the Leica Store Beaumarchais in Paris. The exhibition was called “Echoes of Elegance: A Timeless Journey.” Milan’s portraits are artistic celebrations of individuality and classic beauty, evoking the charm and allure of a bygone era. You can find more of Milans work on: Instagram his website
65 points
-
Q2M In the Mountains of North Carolina Kay - in the Mountains
64 points
-
A garden in Kagoshima, Japan.
64 points
-
M6 Reissue, 28mm Summicron-M, Tri-X.
64 points
-
Prior to retiring I occasionally did band photos for album covers and posters. This was a local group called Firetown, which was very popular in this area for several years. I became friends with two of the members, Duke Erickson (2nd from left) and Butch Vig (far right) and used to hang out at their recording studio occasionally where they produced songs for Nirvana, Smashing Pumpkins, the Foo Fighters and several others. In 1993, Butch, Duke and another Madison musician named Steve Marker, signed up a Scottish singer named Shirley Manson and formed the rock group, Garbage. They hit it big and went on several world tours over a 30 year period, performing at huge sold out venues. I think their last tour was in 2022 but I wouldn't be surprised to see them do another. M6/28mm Elmarit/Tri-X
63 points
-
Emanuelle, Sigma BF, 2.8/28-70 Contemorary Thanks for watching!
61 points
-
Balloon World - Berlin
61 points
-
Haines, Alaska.
59 points
-
Storm inbound (Q3 43)
59 points
-
Dies ist eher ein Essay als ein Review. Die Leica M EV1 ist etwas Neues, sie ist anders als die bisherigen M-Kameras. Aber ist sie etwas ganz anderes? Der Name M EV1 suggeriert das vielleicht. EV dürfte für den elektronischen Sucher stehen, über den sie verfügt; die Zahl 1 dürfte dafür stehen, dass sie die erste ihrer Art ist und, dass weitere folgen. Aber ist die Leica M EV1 trotz des anderen Namens und trotz des elektronischen Suchers (EVF) nicht doch eine richtige M? Sie fühlt sich an wie eine M, sie sieht aus wie eine M und sie bedient sich (fast) wie eine M. Also muss es doch eigentlich eine M sein! Ganz so einfach ist die Antwort nicht. An dem fehlenden Messsucher werden sich die Geister scheiden. Ich werde im Folgenden versuchen zu begründen, warum die M EV1 vielleicht sogar die Zukunft der M einläutet. Das ist eine gewagte These, die nicht verschleiern soll, dass ich eine durchaus wechselvolle Haltung zu einer M mit EVF im Allgemeinen und zur M EV1 im Besonderen habe. Rufe nach einer M mit EVF gab es schon lange. Es gab sie auch schon weit vor der SL-Baureihe. Damals waren die EVF schlecht. Man merkte sofort, dass man auf einen Monitor schaut und nicht auf die wirkliche Welt wie bei einem optischen Sucher. Mit der SL im Jahr 2015 wurden die elektronischen Sucher so gut (Leica war hier Vorreiter und lange Spitzenreiter), dass sie für mich akzeptabel waren. Das bedeutete aber nicht, dass ich einer M mit EVF etwas abgewinnen konnte: Zwar war jetzt eine qualitativ akzeptable, alternative Suchertechnik vorhanden, warum sollte man diese Alternative aber bevorzugen, gab es doch immer noch den meiner Meinung nach besseren optischen Messsucher? Außerdem können EVF-Anhänger ihre M-Objektive auch an eine SL adaptieren oder, wenn es um Kompaktheit geht, eine Q benutzen. So dachte ich lange Zeit. Als Leica fragte, ob ich die M EV1 ausprobieren wolle, äußerte ich diese Skepsis sogleich, man gab mir die Kamera dennoch (oder vielleicht deswegen). Ich durchlief dann einen längeren Annäherungsprozess, bei dem ich durch die Nutzung und durch die Diskussionen im Kreis der Tester nicht nur wichtige Erkenntnisse über meine Art des Fotografierens gewonnen habe, sondern bei dem meine Sicht auf die M EV1 deutlich differenzierter geworden ist und ich den Nutzen der Kamera und die Chance, die in ihr liegt, erkannt habe. Um das näher darzulegen, muss ich die Kamera aber zunächst beschreiben. M11 als Basis Kurz zusammengefasst hat Leica bei der M EV1 den Messsucher weggelassen und an seiner Stelle den Sucher den Q3 bzw. SL3 eingebaut. Basis ist eine M11 mit all ihren sonstigen Merkmalen: 60 MP BSI-Sensor mit Triple Resolution Technologie (Möglichkeit auf 36 MP bzw. 18 MP zu reduzieren) 64 GB interner Speicher plus SD-Kartenslot Monitor aus Gorilla-Glas Leica Content Credentials USB-C Anschluss zum Aufladen der Batterie und Herunterladen der Fotos über PTP Low Energy Bluetooth (für Zeitsynchronisierung, Geodaten, Fernauslösung und Hintergrundübertragung von Vorschaubildern) Extrem haltbarer und widerstandsfähiger Schwarzlack 484 g mit Batterie (Gewicht M11 schwarz: 530 g) Dieselbe Höhe wie die M11 EVF Der Sucher hat folgende Spezifikationen: 5.7 MP (5760000 Dots); das ist dieselbe Auflösung wie bei Q3 bzw. SL3; der Visoflex 2 der M11 hat 3,7 MP 60 B/s Vergrößerung 0,76-fach bei Seitenverhältnis 3:2 Bildabdeckung 100 % Austrittspupillenlage 21 mm Einstellbar von -4 dpt bis +2 dpt Augensensor für automatische Umschaltung zwischen Sucher und Monitor Kein spezielles Frontglas Es gibt zwar EVF mit noch besseren technischen Werten, aber inzwischen ist ein allgemeines Niveau erreicht, bei dem das visuell kaum einen Unterschied macht. Ich jedenfalls empfand den EVF der M EV1 als sehr gut. Brillenträger wie ich können das Sucherbild ohne Weiteres überblicken - ein großer Vorteil gegenüber dem Messsucher der klassischen M in seiner bisherigen Form. Es gibt anders als bei dem Messsucher allerdings eine Dunkelpause für eine kurze Zeit nach der Auslösung (im Serienbildmodus nur nach dem ersten Bild, nicht bei den folgenden Bildern). Ohne die Dauer messen zu können, würde ich sagen, die Dunkelpause ist deutlich zu spüren und wohl länger als bei manchem Konkurrenten. Mich stört das nicht, für mich ist es eher ein weiteres Signal für die erfolgreiche Auslösung (und bei elektronischem Verschluss die einzige Rückmeldung). Auf die systembedingten Nachteile (und Vorteile) eines EVF gegenüber einem optischen (Mess-) Sucher gehe ich später im Analyseteil ausführlich ein. Der EVF ist sehr aufgeräumt. Alle Anzeigen (mit Ausnahme der Wasserwaage, der Gitterlinien und der Clippingwarnung) liegen außerhalb des Bildes. Auch wenn man jegliche Anzeige abschaltet, erscheint nach halbem Druck auf den Auslöser (und dadurch bewirkter Belichtungsspeicherung) immer die Info von ISO, Verschlusszeit und Belichtungswaage/Belichtungskorrektur. Bei permanent eingeblendeter Informationsleiste kommen Batteriestand und Belichtungsart (A für Automatik bzw. M für Manuell) hinzu. Leider werden beim rückseitigen LCD-Display nicht alle Informationen außerhalb des Bildes angezeigt, sondern teilweise an dessen Rand durch ein halbtransparentes Overlay, so dass man Teile des fotografierten Motivs nicht sehen kann. Ich mag das gar nicht, es stört die Kontrolle des Bildaufbaus. Mir ist natürlich klar, dass das Bild deutlich kleiner dargestellt würde, wenn alle Informationen außerhalb angezeigt würden. Ein guter Kompromiss wäre vielleicht, auf den halbtransparenten Hintergrund der Infoleiste zu verzichten und einfach weiße Zahlen anzuzeigen. Dadurch wäre das Bild hinter dem Text besser zu erkennen. Der EVF zeigt das volle Bild (100 %) an, das aufgenommen wird, nicht mehr und nicht weniger. Bei einem Messsucher sieht man immer noch ein wenig (bei 28 oder 35 mm Objektiven) oder viel mehr (bei Brennweiten über 50 mm) von der Umgebung des aufzunehmenden Bildes, weil der optische Sucher bei der M vom Sensorbild unabhängig ist und einen Bildwinkel hat, der fast dem eines 24 mm Objektivs vergleichbar ist. Bei einem EVF ist das anders. Prinzipiell kann er nicht mehr zeigen als das Objektiv erfasst. Allerdings hat die M EV1 einen sogenannten Digitalzoom, der ganz ähnlich funktioniert wie bei der Q3. Man kann einen Crop von 1,3 oder 1,8 wählen (im Menü oder indem man eine Funktionstaste mit dem Digitalzoom belegt). Dann wird nicht das Bild im Sucher gecroppt und vergrößert wiedergegeben, vielmehr wird das gecroppte Bild mittels eines Rahmens angezeigt. Man sieht also noch etwas von der Umgebung. Wenn man JPG fotografiert, wird nur das gecroppte Bild gespeichert. Wenn man DNG fotografiert, wird das volle Bild gespeichert und nur das Preview enthält den Crop. Man kann ihn also später wieder beseitigen. Das Scharfstellen funktioniert bei der M EV1 genauso wie bei einer M11 mit dem Visoflex 2. Man kann in der Vollansicht des Bildes scharfstellen, man kann die Sucherlupe in zwei Stärken manuell oder automatisch dazuschalten und man kann zusätzlich das Focuspeaking nutzen. Zum Focuspeaking gibt es im Menü zwei Einstellungen, deren Bezeichnung eher kontraintuitiv ist: hoch und gering. Hohe Empfindlichkeit bedeutet, dass die Kamera schon auf geringere Kontraste reagiert, also tendenziell mehr Bereiche durch rote Farbe als scharf kennzeichnet. Geringe Empfindlichkeit bedeutet, dass der Motivkontrast etwas höher sein muss, die Strukturen also feiner, bevor sie rot hervorgehoben werden. Ich bevorzuge die Empfindlichkeitseinstellung „gering“. Der Vorteil ist, dass der Bereich mit dem höchsten Kontrast kleiner ist und die Scharfstellung zuverlässiger wird. Der Nachteil ist, dass bei geringerem Kontrast unter Umständen überhaupt nichts hervorgehoben wird, obwohl es schon – jedenfalls einigermaßen – scharfe Bereiche gibt. Die Sucherlupe kann man manuell aktivieren, wenn man eine der Funktionstasten entsprechend belegt hat. Ich persönlich finde die Taste rechts neben dem Sucher dazu am besten. Der Bildfeldwähler ist dafür aber ebenfalls sehr gut geeignet; man kann den Daumen kurz vom Objektiv nehmen und den Hebel nach rechts drücken. Alternativ dazu wird die Sucherlupe bei entsprechender Einstellung im Menü automatisch aktiviert, wenn man fokussiert. Denn auch die M EV1 hat im Inneren an der Oberseite des Bajonetts die Abtastrolle, die wir von den M-Kameras mit Messsucher kennen. Während sie aber dort hauptsächlich zur Entfernungsmessung dient und die Aktivierung der Sucherlupe nur ein Nebennutzen ist, ist Letzteres bei der M EV1 der Hauptnutzen. Eigentlich ist es ein guter Ansatz, die Sucherlupe einschalten zu können, wenn man die Entfernung am Objektiv ändert. Leider funktioniert das nur sehr träge. Man hat schon einiges bei der Entfernung verstellt, wenn dann endlich die Lupe anspringt. Man kann das durch die Lupe vergrößerte Feld mittels der Wipptaste auf der Rückseite der Kamera verschieben. Leider lässt sich das Feld nicht so einfach wieder zentrieren. Man kann die Zentrierung einer Funktionstaste zuweisen oder die Kamera aus- und wieder anschalten. Andere Möglichkeiten gibt es bisher nicht. Ein schneller Doppelklick auf die Wipptaste wäre meines Erachtens ein guter Weg; man müsste dann nicht eine Funktionstaste „verschwenden“. Bedienung Die äußeren Bedienelemente der M EV1 stimmen mit denen der M11 überein. Es gibt aber Unterschiede bei der Funktion. Am augenfälligsten ist hierbei vielleicht zunächst eine Kleinigkeit, nämlich das kleine Fenster unterhalb des Verschlusszeitenrades. Dieses Fenster ist für den optischen Messsucher essenziell. Dort werden mittels Triangulation zwei Bilder übereinandergelegt, um scharfzustellen. Eines dieser beiden Bilder wird durch das kleine Fenster in den Sucher gespiegelt. Eine Kamera ohne optischen Messsucher braucht derartiges nicht. Bei der M EV1 dient es deshalb nicht zum Fokussieren, es enthält vielmehr die LED für den Selbstauslöser. Diese LED hätte man sicherlich auch anderswo unterbringen können. Ich vermute, die jetzt gewählte Stelle hat Design-Gründe. Die Front sieht harmonischer aus. Dann stutzt man beim zweiten Blick über das, was bei der M11 (und früheren M-Kameras) der Bildfeldwähler ist. Diesen Hebel beizubehalten ist eine recht geniale Idee, denn der Hebel dient jetzt als frei belegbare Funktionstaste bzw. sogar als zwei Funktionstasten: Funktion 1 bei Drücken nach links, Funktion 2 bei Drücken nach rechts. Natürlich hätte man auch schlichte Tasten nehmen können (wie bei der SL3), aber zur Gestaltung einer M passt der Hebel besser und die Bedienung ist sogar sicherer. Bei der SL3 fragte ich mich immer, ob ich die untere oder die obere Taste unter dem Finger habe. Der Hebel ist viel eindeutiger, links und rechts sind kaum zu verwechseln. Mit folgenden Funktionen lässt sich der Hebel belegen, wenn man ihn in die gewünschte Richtung zieht und dort ein wenig hält: Digitalzoom Fokussierhilfe Focuspeaking Aus Das Focuspeaking auf diese Weise schnell (und unabhängig von einem Info-Profil) aktivieren und deaktivieren zu können, finde ich sehr gut, da es mich als Scharfstellhilfe meist stört. In den eher wenigen Fällen, in denen es hilfreich ist, kann ich es durch kurze Hebelbewegung dazuschalten. Als Belegmöglichkeiten für den Hebel als Funktionstaste fehlt mir aber jedenfalls die Perspektivkorrektur, die Belichtungskorrektur und die ISO-Einstellung. Ein weiterer Unterschied bei der Bedienung ist die FN-Taste neben dem rückwärtigen LCD-Display. Sie lässt sich wie bisher frei belegen. Bei der M11 war sie mit der Aktivierung des Live View (LV) vorbelegt, was viel Sinn machte. Das ist bei der M EV1 nicht nötig, sie ist quasi immer im LV. Die Taste ist jetzt mit der Umschaltung zwischen EVF und rückwärtigem LCD-Display (LCD) vorbelegt. Es gibt hier vier Modi EVF (LCD abgeschaltet) LCD (EVF abgeschaltet) Auto (EVF wird aktiv, wenn man Kamera ans Auge hält, ansonsten ist LCD aktiv); EVF-Extended (wie EVF, aber durch Druck auf Menütaste lässt sich das Menü am LCD-Display steuern, durch Druck auf Play lassen sich die Bilder dort anschauen) Wenn man zwischen den Modi hin- und herschaltet, wird der aktive Modus immer auf dem LCD-Display angezeigt, also etwa auch beim Modus EVF, bei dem das LCD-Display eigentlich abgeschaltet ist. Das ist sehr hilfreich, Leica hat es auf Bitten der Betatester einprogrammiert. Auch wenn ich grundsätzlich EVF-Extended bevorzuge, verwende ich jedoch gelegentlich gerne das LCD-Display. Wenn man dies über die FN-Taste umschalten möchte, muss man immer alle oben dargestellten Modi durchlaufen. Ich würde mir wünschen, dass man die FN-Taste so belegen kann, dass das LCD-Display ein- und ausgeschaltet wird und zwar unabhängig davon, ob der EVF ein- oder ausgeschaltet ist. Das sollte ähnlich funktionieren wie das dargestellte Ein- und Ausschalten des Focuspeaking unabhängig von der Einstellung im Info-Profil. Weißabgleicheinstellung Die Kameras der M11 Baureihe haben eine andere Weißabgleichabstimmung als die Q3 oder die SL3, obwohl derselbe Sensor verbaut ist. Der Weißabgleich der M11 ist etwas in Richtung Magenta verschoben. Darüber gibt es seit langem Diskussionen. Viele mögen es, viele auch nicht. Ich war deshalb der Meinung, Leica sollte den Streit um diese Geschmacksfrage dahin auflösen, dass in der Firmware eine zweite Einstellung für eine neutralere Weißabgleichabstimmung angeboten wird. Diesen Weg ist Leica nicht gegangen, sondern hat sich erfreulicherweise zu einer „großen“ Lösung entschlossen. Man kann die Abstimmung des Weißabgleichs nun mittels eines Fadenkreuzes frei in vier Richtungen vornehmen: green, magenta, yellow, blue. Batterieverbrauch Von Anfang an fiel mir auf, dass die M EV1 mehr Energie verbrauchte als die M11. Das ist ein Pferdefuß, aber man kann den Mehrverbrauch begrenzen. Dann hat die M EV1 eine gute Batterielaufzeit. Bei allen EVF-Kameras, die ich bisher ausprobiert habe, hat mir nie gefallen, dass der EVF in der Standardeinstellung nach sehr kurzer Zeit automatisch in den Standby-Modus wechselt und immer wieder aktiviert werden muss (was allerdings praktisch verzögerungsfrei möglich ist). Bei der M EV1 beträgt die Standard-Standby-Zeit für den EVF 30 sec. Anfangs habe ich die automatische Abschaltzeit auf 5 min verlängert. Damit kam ich gut zurecht, ich musste den EVF beim Fotografieren kaum jemals aktivieren, wenn ich die Kamera an das Auge nahm. Dass dadurch der Energieverbrauch steigen würde, habe ich allerdings nicht vermutet. Denn ich habe auch deshalb immer die Einstellung EVF-Extended verwendet, weil ich dachte, dass dies Energie sparen würde: Wenn das Auge nicht am Sucher ist, zeigt der EVF kein Bild an und verbraucht keine Energie. Das war ein Trugschluss. Die normale M11 verliert in einer Stunde etwa 10 % ihrer Akkukapazität, einfach weil sie eingeschaltet ist, Fotografieren kostet nicht viel mehr Energie. Bei der M EV1 sind es ca. 15 %, wenn der EVF nach 30 sec in den Standby-Modus wechselt. Das ist nicht so sehr viel mehr als bei der M11. Wenn der EVF jedoch nicht im Standby-Modus ist (egal ob er ein Bild anzeigt oder nicht), sind es ca. 30 %. Nachdem ich das herausbekommen habe, habe ich die Abschaltzeit des EVF wieder auf den Standard von 30 sec gestellt. Dann ist der Energieverbrauch gegenüber der M11 nur moderat höher. Im Schnitt kann ich mit der M EV1 zwischen vier und sechs Stunden am Stück fotografieren. Während dieser Zeit ist die Kamera selbst selten im Standby (automatisches Abschalten steht auf 30 min), ich nutze immer den Low Energy Bluetooth zur Übertragung der Geodaten und zur Übertragung aller Bilder als Vorschau auf das iPhone. In dieser Zeit fotografiere ich zwischen 80 und 150 Fotos. Design Das Design der Kamera war sicher eine Herausforderung für Leica, die mir aber gut bewältigt erscheint. Die M EV1 hat kein Sucherfenster, genau wie die Leica MD-2 aus den 1980er Jahren (und deren Vorgänger, die Leica MD), die vornehmlich an Mikroskope angeschlossen wurde oder dazu diente, analoge Telefon-Gebührenzähler der Post zu fotografieren. Die MD-2 Kamera kam mir wegen des fehlenden Sucherfensters immer wie blind vor. Diesen Eindruck vermittelt mir die M EV1 nicht. Auch wenn ich immer noch M-Kameras mit Sucherfenster bevorzuge, muss ich doch sagen, dass Leica die Aufgabe, der M EV1 ein ansprechendes Design mitzugeben, gut gemeistert hat. Die Kamera sieht nicht „leer“ aus, sondern schlank, modern und aufgeräumt. Leider fehlt das ISO-Rad. Das war aber keine Design-Entscheidung, sondern dem Einbau des EVF geschuldet. Analyse: Sucher Ein Sucher hat zwei wesentliche Funktionen. Die wichtigere von beiden, die Basisfunktion sozusagen, ist es, den Bildrahmen bestimmen zu können: Welcher Ausschnitt der Wirklichkeit wird vom Sensor/Film erfasst und wird Inhalt des Fotos. Diese Funktion erfüllt der optische Sucher der M-Kameras gut, wenn auch nicht sehr gut. Je nach Entfernung zum Objekt muss man sich eher am inneren bzw. äußeren Rand des Leuchtrahmens orientieren. Außerdem kann es durch die unterschiedlichen optischen Axen von Sucher und Objektiv zu Perspektivenverschiebungen kommen, die sich bei näheren Entfernungen auf den Bildaufbau auswirken können. Der EVF erfüllt diese Funktion hingegen perfekt: Alles, was im Sucher zu sehen ist, kommt auf das Foto; auch die Perspektive stimmt. Die weitere Funktion eines Suchers ist die Vorvisualisierung des späteren Bildes: Wie genau zeigt der Sucher das Bild an, das ich aufnehme und später sehe? Dabei spielen die Umsetzung von Lichtstimmung, Farben und Kontrasten eine Rolle. Bei der Vorvisualisierung ist der EVF klar im Vorteil. Der optische Sucher zeigt die genannten Parameter so, wie das Auge sie ohne Sucher wahrnimmt. Das stimmt in vielfältiger Weise nicht mit dem überein, was der Sensor wiedergibt. Der Sensor kann Kontraste nicht annähernd so erfassen wie das Auge; sie müssen komprimiert werden. Farben werden ebenfalls anders umgesetzt als durch das Auge und der „Weißabgleich“ des Auges liefert andere Ergebnisse als der Weißabgleich des Sensors. Die Belichtungssteuerung tut ein Übriges. Je nach tatsächlichen Verhältnissen kommt das aufgenommene Bild der Wirklichkeit teilweise nahe, teilweise ist es aber sehr weit entfernt vom mit dem Auge (durch den optischen Sucher) Wahrgenommenen. Der EVF hingegen basiert auf den Informationen des Sensors. Er gibt deshalb die Wirklichkeit prinzipiell mit denselben Transformationsschritten wieder, wie sie auch für das Bild relevant sind. Von daher visualisiert ein EVF das spätere Bild deutlich besser als ein optischer Sucher. Wunder darf man allerdings auch von einem EVF nicht erwarten. Der EVF setzt nämlich die Sensorinformationen nicht genauso um wie es später ein RAW-Konverter oder eine JGP-Engine macht. Auch hat der EVF ggf. eine eigene Belichtungssteuerung und einen eigenen Weißabgleich. Lichtstimmung, Farben und Kontraste werden also (etwas) anders angezeigt als sie später am heimischen Rechner zu sehen sind. Außerdem ist es eine alte Weisheit, dass sich die Qualität eines Bildaufbaus nicht vollständig in einem Sucher beurteilen lässt; man braucht offenbar die Darstellung auf einem Monitor bzw. auf Papier mit einer gewissen Größe und einem gewissen Betrachtungsabstand. Das sind aber angesichts der erreichten allgemeinen Qualität von EVF eher kleinere Einschränkungen gegenüber dem Messsucher, was die Vorvisualisierung angeht. Sie werden den Erfolg der M EV1 nicht hindern. Die Geschichte zeigt vielmehr, dass sich im Lauf der Zeit immer die Suchertechnik etabliert hat, die die bessere Vorvisualisierung ermöglicht. So hat sich schon vor längerer Zeit der Spiegelreflexsucher gegenüber dem optischen Leuchtrahmensucher durchgesetzt und so hat sich gerade in diesen Jahren der EVF gegenüber den Spiegelreflexsucher durchgesetzt. Der Leuchtrahmensucher, wie ihn die klassische M hat, erfordert ein wesentlich höheres Maß an Vorstellungsvermögen und Erfahrung, um das fertige Bild im Kopf vorzuvisualisieren, als der EVF. Der EVF bietet insofern das einfachere Fotografieren. Schon deshalb wird die M EV1 viele Interessenten haben. Hinzu kommt, dass der EVF Brillenträgern einen besseren Überblick bietet als der Messsucher. Der 35 mm Rahmen des Messsuchers ist mit Brille schwierig zu überblicken, der 28 mm Rahmen ist praktisch gar nicht auf einen Blick zu erfassen. Um dem abzuhelfen lässt man das Auge entweder hin- und herwandern oder man ergänzt die Bildränder im Kopf – etwas, das mit ein wenig Erfahrung erstaunlich gut gelingt. Ähnlich gut gelingt die Ergänzung des Bereichs, der im Sucher durch das hervorstehende Objektiv verdeckt wird. Trotz seiner Schwächen gehört der optische Messsucher nicht zum alten Eisen. Die Arbeit mit ihm spricht immer noch viele (oder jedenfalls genügend) Fotografen an. Manche wollen im Sucher die Welt sehen, wie sie ist, und nicht auf einen Monitor schauen; manche wollen sich das spätere Bild zunächst nur in ihrer Phantasie vorstellen; manche wollen sich überraschen lassen. Die meisten werden aber wohl den Prozess des Fotografierens möglichst einfach halten und sich nicht ablenken lassen wollen. Die Einfachheit passt eher zum Konzept der M Fotografe. Ein weiterer Vorteil des Messsuchers liegt darin, dass man immer ein wenig mehr sieht, als aufgenommen wird. Das hat für die Bildgestaltung Vorteile, weil man schon vorher in gewissen Maß vorhersehen kann, ob sich ein Verschwenken zur Verbesserung des Ausschnitts lohnen kann. Vor allem aber kann man frühzeitig erkennen, ob sich jemand oder etwas in das Bild hineinbewegt. So kann man sich für den richtigen Aufnahmezeitpunkt besser vorbereiten. Schließlich liegt ein erheblicher Vorteil des optischen Suchers darin, dass er (jedenfalls nach dem gegenwärtigen technischen Stand) mit hohen Kontrasten und großer Helligkeit (sprich mit hellem Sonnenschein) sehr viel besser zu recht kommt als ein EVF. Dieser hat dafür seine Stärken bei Dunkelheit. Analyse: Scharfstellen Ich muss zunächst kurz schildern, wie ich zur M gekommen bin. Trotz (damals noch) guter Augen hatte ich immer Schwierigkeiten, mit Hilfe der Mattscheibe der Spiegelreflexkameras scharfzustellen. Schnittbild und Mikroprismen brachten mir nichts, das hellere Bild der später aufkommenden Lasermattscheiben nur wenig. Autofokus war dann eine große Hilfe. Schließlich entdeckte ich noch eine weitere für mich wunderbar funktionierende Möglichkeit der Scharfstellung, nämlich die Leica M mit ihrem Messsucher. Kein Raten mehr, ob das Bild auf der Mattscheibe wirklich scharf ist; die beiden Bilder im Messsucher in Übereinstimmung zu bringen, empfand ich als einfach, präzise und sehr schnell. Es funktioniert unabhängig von der Brennweite und der eingestellten Blende gleich gut. So ist es im Ansatz immer noch. Aber inzwischen ist mein rechtes Auge, mit dem ich durch den Sucher schaue, schlechter geworden, weil sich zunehmend ein grauer Star bildet. Nach meiner Selbstbeobachtung reicht eine Sehkraft von gut 80 %, um mit dem Messsucher gut scharfstellen zu können. Bei weniger funktioniert es für die meisten Motive immer noch anständig, insbesondere wenn klare Kanten vorhanden sind und das Licht einigermaßen gut ist. Feinere Strukturen (etwa Scharfstellen auf das Auge) führen aber oft zum Raten. Das Scharfstellen mit dem EVF ist anders. Ohne weitere Hilfen ist es für mich wie früher beim Scharfstellen auf der Mattscheibe. Ich kann nicht wirklich beurteilen, ob das Bild richtig fokussiert ist. Manchmal hilft ein leichtes Grisseln des Bildes, das den Mikroprismen der früheren Glasmattscheiben ähnlich ist. Bei diesem Grisseln handelt es sich aber nicht um eine eingebaute Scharfstellhilfe, sondern um ein physikalisches Phänomen, dessen Hintergründe ich nicht erklären kann. Da es nicht bei jedem Motiv auftritt und schwer zu erkennen ist, taugt es auch nicht als zuverlässige Hilfe. Focuspeaking kann nützlich sein, dies aber nur, wenn die Bereiche hohen Kontrasts nicht zu groß sind; ansonsten sind zu viele Bereiche rot. Gute Unterstützung bietet Focuspeaking nur bei einigermaßen offener Blende und kurzen Entfernungen. Manchen gelingt es offenbar, dass Focuspeaking ähnlich zu nutzen wie beim Arbeiten mit hyperfokaler Entfernungseinstellung; die roten Bereiche werden als solche mit ausreichender Schärfe interpretiert. Meine Sache ist das nicht. Die beste Scharfstellhilfe der M EV1 ist die Sucherlupe, insbesondere in ihrer maximalen Vergrößerungsstufe. Mit Ihrer Hilfe konnte ich - selbst mit meinen schlechteren Augen - praktisch jedes Motiv hinreichend sicher scharfstellen. Auch hier gilt aber wie beim Focuspeaking, dass das Scharfstellen umso leichter fällt, je geringer der Bereich der Schärfentiefe ist. Es gelingt also umso besser, je offener die Blende, je kürzer die Entfernung und je länger die Brennweite ist. Praktisch gesprochen: Mit meiner Lieblingsbrennweite 35 mm ging es mühelos und sicher bis Blende 4, ab Blende 5,6 war mehr Aufmerksamkeit erforderlich, ob der optimale Schärfepunkt getroffen war. Die Nutzung der Sucherlupe hat allerdings ihren Preis: Sie kostet Zeit. Das Scharfstellen dauert länger als mit dem Messsucher. Mit dem Messsucher bin ich sehr schnell: Ggf. kurzes Verschwenken der Kamera auf den Punkt, auf den scharfgestellt werden soll; Drehen am Objektiv; ggf. Korrigieren des Ausschnitts; Auslösung. Die Sucherlupe muss man hingegen erst aktivieren. Die automatische Aktivierung ist - wie oben dargestellt - träge, die manuelle Aktivierung erfolgt über eine Funktionstaste, nach der man erst greifen muss. Das Suchen des Fokuspunktes ist oftmals schwieriger als beim Messsucher, da man den extrem vergrößerten Bildausschnitt verschwenken oder die Sucherlupe bewegen muss. Die eigentliche Scharfstellung gelingt auch nicht so schnell wie beim Messsucher, da die Beurteilung der Schärfe nicht so intuitiv erfolgt wie bei der Übereinanderlegung der beiden Bilder im Messsucher. Nach dem Fokussieren muss man den Auslöser drücken, um zum Vollbild zu gelangen, dann ggf. Korrigieren des Ausschnitts, dann Auslösung. Mich hat dieses Procedere anfangs genervt. Ich empfand es als zu langsam. Vielleicht lag es auch daran, dass ich einen Arbeitsschritt machen musste (die Aktivierung und Deaktivierung der Sucherlupe), der mit dem Messsucher nicht nötig ist. Ich mag generell zu aufwändige Bedienungsabläufe nicht. Mit der Zeit und mit weiterer Übung wurde ich schneller und habe mich an den anderen Arbeitsablauf gewöhnt. Sogar schnelle Streetportraits, die ich gelegentlich machte, gelangen ganz gut. Ich kann nun die Vorteile der Scharfstellung der M EV1 für mich und meine alternden Augen erkennen und nutzen, auch wenn ich den Messsucher immer noch vorziehe. Viele werden meine Vorbehalte gegen die Abläufe bei Nutzung der Sucherlupe nicht verstehen bzw. sie sind für sie irrelevant. Sie nehmen sich - gerade mit einer M - ohnehin mehr Zeit für das Vorbereiten und Aufnehmen des einzelnen Bildes. Wer hingegen wie ich gerne schnell arbeitet, weil er es muss oder weil er es will, der muss diesen Nachteil sorgfältig mit den Vorteilen der Kamera abwägen. In der Gruppe der Tester Zielgruppe Für wen nun ist die M EV1 die geeignete Kamera? Zunächst muss dazu gesagt werden, dass selbst Menschen wie ich, die den Messsucher lieben und ihn gewohnt sind, in der M EV1 eine gute, vollwertige Kamera haben werden. Sie ist aber aus meiner Sicht für bestimmte Zielgruppen besonders geeignet: Fotografen, die an einen EVF gewöhnt sind, aber nie einen Messsucher bedient haben, werden mit ihr einen besseren Einstieg in das M-System finden. Fotografen, die besonderen Wert auf Bildkontrolle und Sucherübersicht legen. Fotografen, die vorzugsweise mit 75 mm (oder länger) bzw. 28 mm (oder kürzer) fotografieren. Fotografen, die gerne den Nahbereich (unter 0,7 m) der moderneren Leica Objektive oder von vielen Voigtländer Objektiven nutzen. Brillenträger Fotografen, die mit dem Messsucher nicht (mehr) klarkommen; das sind insbesondere ältere Menschen mit nachlassender Sehkraft. Fotografen, die den Messsucher nicht mögen, wohl aber das M-System. Bei vielen dieser Punkte könnte man sagen: Das entsprechende Bedürfnis oder Interesse wird jedenfalls ganz ähnlich mit dem Visoflex 2 an einer M11 erfüllt, der technisch nicht viel schlechter ist als der EVF der M EV1. Das verkennt aber, dass der Visoflex 2 die M11 größer, um einiges schwerer und hässlicher macht. Außerdem komme ich mit meiner Nase in das Sucherokular der M11 und verschmiere es mit Nasenfett, wenn ich den Visoflex benutze. Oder man könnte fragen: Warum nicht eine SL? Viele Fotografen lieben die (alten) M-Objektive und verwenden sie bisher an einer SL. Die M EV1 ist die schönere, kompaktere, leichtere und ebenso schnelle Alternative (nur der Messsucher ist bei Nutzung von M-Objektiven schneller). Die M EV1 ist die beste Kamera für M-Objektive, ohne einen Messsucher nutzen zu müssen, wenn man M-Objektive mit einem EVF in einem kompakten, leichten, M-ähnlichen Gehäuse verwenden möchte. Den Formfaktor der M sollte man nicht unterschätzen. Next Level M Was macht eine M aus? Diese Frage hat mich viel beschäftigt. Ist es der Messsucher? Ist es das manuelle Fokussieren? Ist es das Äußere, die Gestaltung? Ist es die Bedienung? Meines Erachtens ist es vor allem die Idee einer bestimmten Art des Fotografierens, die sich in der M verkörpert. Die M nimmt dem Fotografen nur wenige Entscheidungen ab; das für die Bildgestaltung Wesentliche muss bewusst eingestellt werden. Nicht die Kamera macht das Bild, sondern der Fotograf. Während die meisten Kameras suggerieren „Ich mache das Bild für Dich“, suggeriert die M „Stell mich richtig ein“. Natürlich spielt sich das vor allem im Kopf ab, aber mit der immer notwendigen Wahl von Blende und Entfernung hat es auch einen realen, nicht nur in der Ausstrahlung der Kamera begründeten Hintergrund. Außerdem ist die M einfach und einfach zu bedienen; sie kann nicht viel, sie ist nicht überladen, die Bedienelemente sind unmittelbar zugänglich. Kamera und Objektive sind kompakt und dadurch unaufdringlich. Die seit Jahrzehnten vertraute Form tut ihr Übriges. Wie ich oben schon geschrieben habe: Den Formfaktor der M sollte man nicht unterschätzen. Der Misserfolg der M5 hat das sehr deutlich gemacht. Und wie ist es mit dem Messsucher? Braucht eine echte M einen Messsucher? Ja und nein würde ich sagen. Der Messsucher steht für einfaches und schnelles manuelles Scharfstellen. Es gibt ihn schon Jahrzehnte, aber es gab ihn nicht immer. Es brauchte von der Leica I im Jahr 1925 bis zur Leica M3 im Jahr 1954 bis der Messsucher seine jetzige Form und Funktion gefunden hat. Waren die Schraubleicas keine echten Leicas? Wohl kaum! Veränderungen, auch am Messsucher, sind also möglich, ohne den Kern der M zu verraten. Dabei muss aber die Funktion, die der Messsucher hat, erhalten bleiben oder verbessert werden. Das kann ich bei der M EV1 bisher nicht erkennen. Wie ich oben versucht habe zu zeigen, hat die M EV1 gegenüber dem Messsucher Vorteile bei der Bildkontrolle, die mancher vielleicht nicht braucht, die aber dennoch nicht zu leugnen sind. Die M EV1 hat aber auch die dargestellten Nachteile bei der Scharfstellung; hier gibt es keine Innovation. Insofern ist die M EV1 für mich ein Grenzfall, vielleicht ein erster Schritt für eine andere Art M. Eine M EV2 sollte etwas haben, was dem optischen Messsucher auch hinsichtlich der Scharfstellung vergleichbar ist. Seit vielen Jahren lese ich immer wieder, ein elektronischer Messsucher nach dem Triangulationsprinzip, nach dem auch der optische Messsucher arbeitet und bei dem zur Scharfstellung zwei Bilder überlagert werden müssen, sei technisch möglich. Ich kann das nicht beurteilen. Aber ein solches oder ein ähnlich gutes Konzept wäre für mich eine vollwertige M mit elektronischem Sucher. Das wäre Next Level M - ein ähnlicher Schritt wie damals von der Schraubleica zur M-Leica. Eine solche Kamera sollte die M mit optischem Messsucher nicht ablösen. Es könnten vielmehr zwei echte M-Linien nebeneinander bestehen und dieselben tollen M-Objektive nutzen. Mein Fazit: Die Leica M EV1 ist eine sehr gute Kamera, die viele Freunde finden wird. Aber sie ist keine Revolution, sondern eher ein Richtungstest. Leica sollte den Weg mutig weitergehen und wirklich Neues mit der M EV2 schaffen.
58 points
-
From Hunts Mesa. SL-3, 24-90.
58 points
-
A little gem for woodland photography, being a slightly longer focal length than the Q3, it allows for tidier composition and thats a big draw when shooting woodlands. Pro tip, if you want to shoot even lower shutter speeds change the shutter type to electronic. I get about a stop difference in shutter speeds.
58 points
-
Introduction The Leica SL2-S was announced in December 2020 as a faster version of the SL2 with better video features, better high ISO and a smaller price tag. It has a 24mp sensor as opposed to the 47mp of the SL2. It has been extremely popular, especially with videographers and event photographers, who don't need the extra resolution, but did need the nearly 2 stop advantage over the SL2 in terms of ISO. High Summer Leica 24-90 Vario Elmarit 1/500 f4 ISO 400 The Leica SL3 was introduced in March 2024, It sported the same new processor (Maestro IV) as the Q3, and a similar 60mp BSI sensor as the M11 and the Q3. The menu system was both simplified and improved, and made much more consistent and flexible. It seems to me that there are two things which may be interesting to readers, Firstly the changes in the SL3-S with respect to the SL2-S, and secondly the changes with reference to the SL3, which are more subtle, but nevertheless important, and which I'll concentrate on for the main part of the article. Wet Bomb - Leica 75mm APO Summicron SL 1/1250 f2 ISO 2500 A Short Summary of Main Changes over SL2-s Narrower and lighter body New Maestro IV processor New (or upgraded) BSI 24mp Sensor Phase Detect (hybrid) AF system New configurable quick menu screen Simplified and rationalised menu system Much faster shot to shot time with Autofocus enabled Content Credentials If you've been using an SL2-S then it might be worth looking at my SL3 article where I discuss the differences between the SL2 and SL3 in detail: The Leica SL3 Exmoor Pony Leica 24-70 Vario Elmarit 1/125 f2.8 ISO 200 Content Credentials The Content Authenticity Initiative (CAI) is an association founded on November 2019 by Adobe, the New York Times, Twitter and others with the intention of curbing disinformation. The idea is to promote an industry standard for provenance metadata for files defined by the C2PA. The C2Pa is the Coalition for Content Provenance and Authenticity, co-founded by Adobe with Arm, the BBC, Intel and Microsoft and many more, as you can see that big guns are involved in this! Oak Tree Light Leica 24-70 Vario Elmarit 1/1000 f2.8 ISO 640 Whilst the C2PA is tasked with the formulation of an open, royalty-free technical standard for metadata, the CAI sees it's task in the dissemination and promotion of the standard. The idea is to add an additional set of metadata to a file containing information about it's provenance, and edits which may have been made using compliant software. This could apply to a photo, a video or a text file. The base information (added to the metadata by the M11P) shows: The Photographer The Device The location and time of the recording Hammock? - Leica 24-70 Vario Elmarit 1/1000 f2.8 ISO 800 If you edit the file in Lightroom CC or Photoshop 24 (or another compliant program) then the provenance of any edits are also recorded. Leica are the first camera company to implement this in a camera; sadly the first step is a hardware chip, so it won't be possible to make this backwardly compatible for previous Leica cameras. The M11-P was the first camera to have this and I dealt with it in more detail in the article here: The Leica M11-P Scarlett wins - Leica 24-70 Vario Elmarit 1/1000 f3.2 ISO 100 There was no time to implement it with the SL3, but Leica have implemented it with the SL3-S, and as far as I’m aware it’s the first Autofocus camera to have it. There are limitations however as it is not currently available with multiple shot drive modes. There is an interesting article about it here: contentauthenticity.org Leica 75mm APO Summicron SL 1/1250 f2 ISO 160 Video Sadly I’m not qualified to write about video performance, but the big takeaway seems to be the unlimited 6K 'Open Gate' internal recording using the entire sensor. However, Ralf Ilgenfritz has come to the rescue! He is a professional working mostly for German Television. He was on the beta forum and has given me permission to report his first feelings during a real video shoot of an interview with Isabel Allende. This is in his own words: I took the camera to documentary in Arizona and can say that the camera behaves quite well. The weather conditions are quite extreme and I'm shooting 6K. If I compare it to my experiences with the SL3, this feels much safer. And there are no overheating problems. I was a little insecure first and took my Sony A1 as a backup for the long Interview with Isabel Allende. Both cameras were shooting the same picture in 8K(Sony) and 6K(Leica) with 35mm prime lenses (Sony G-Master for the A1 and Sigma 35/1.2 for the Leica) from the same tripod and they were both on Autofocus with open Iris. While I was shooting handheld with the SL2-S and a 35 Summilux M. So the interview ended up being a funny camera test with a lot of 35mm primes and the result was quite surprising. Mrs. Allende's hair is completely white and I had already experienced that the Sony autofocus doesn't really like that and it actually failed after 10 minutes whereas the Leica did the job without any issues for more than one hour. I did not expect that. Ralf's setup with the SL3-S and the Sony A1 So this was the first real production with the SL3-S and in contrast to my experience with the SL3, I would say that the camera works flawlessly for what I do. I shot exclusively 6K 10bit 4:2:0 and in this case I'm sure no one at Arte will notice that it wasn't 4:2:2. They only look at the end product. The problem with the codec usually only arises when you're shooting for producers who don't know you and they get the idea to look at the camera's specs beforehand. Nevertheless, something should happen because otherwise the camera will be even more difficult to sell for television productions than is already the case when 95 percent of people are used to using Sony cameras. The L-Log color of the SL3-S seems to be more similar to the Sony now, whereas the SL2-S looks different and still has the red-face-problems. The Sony picture still seems to be a little sharper, but also a bit too perfect and boring. We like the Leica's picture better. 2 week later I took the camera for a shooting in Ivory Coast where the weather conditions were even hotter and there was still no overheating in 6K mode. The only thing that is really not okay is the battery life in video mode. The SL2-S was acceptable, the SL3-S is not. Isabel and Ralf ISO One of the reasons the SL2-S was so popular was it’s big high ISO advantage over the SL2 (nearly two stops by my tests). It’s actually a little difficult to do proper comparisons of high ISO noise between a 60mp sensor (SL3) and a 24mp sensor (SL3-S). First of all I reshot my earlier comparisons to see whether the SL3-S had an advantage over the SL2-S, my feeling was that the noise was slightly improved with the newer camera, but the dynamic range does seem significantly better, and so does the the colour. Leica SL2-S on the left, SL3-S on the right Worth noting that the light was signicantly better for the SL2-S shot (I didn't have both cameras together) Just as an aside - my first impression of the SL2-S new 200,000 ISO was that it wasn't really useable, but I thought it would be interesting to see how the new AI based denoise function in Lightroom Classic would do with the SL3 at 200,000 ISO. I think you would agree it does a pretty excellent job! It seems to me that you can expect to be able to use 200,000 ISO and get a good result (with a minute or two of post processing). It's worth mentioning that when this image was taken it was almost dark with no artificial light. This is the same Photo - the left hand image is processed using the AI noise reduction in Lightroom Classic This is 100 Crop of the same Photo - the left hand image is processed using the AI noise reduction in Lightroom Classic In comparison with the SL3 I didn’t find a great deal of difference. As we saw, the SL3-S goes up to 200,000 ISO. At 100,000 ISO both cameras are usable, especially with a bit of colour noise reduction applied. Colour and Dynamic range are good. This is with the SL3-S on the left and the SL3 on the right at 100,000 ISO This is with the SL3-S on the left and the SL3 on the right at 100,000 ISO This is 100% Crop of each image But honestly - how often does one need these incredibly high ISO values. Here is a comparison between the two cameras at 12,500 ISO I generally use Auto ISO in my photography, and it's nice to be able to use 12,500 as a maximum ISO and be sure that the images are going to be absolutely okay Full frame of each camera at 12,500 ISO Just to confuse the issue the SL3 is on the left in this image and the SL3-S is on the right 100% Crop at 12,500 ISO The SL3 is on the left, the SL3-S on the right Auto Focus Like the SL3 the SL3-S has Phase Detect but with 779 AF points, more than twice as many as the SL3 In fact it uses hybrid AF with a combination of phase detection, depth map object detection and contrast detection AF. It will also shoot at 30 fps with AFC (the SL2-S maximum with AFC was 5 Fps) This is clearly a great improvement. I've been testing the tracking with our very fast young Pyrenean Sheepdog, and it works pretty well, even at 30 frames a second, it's not infallible, certainly not as reliable as similar shooting with cameras that have a stacked sensor. Uny Wearing her Goose Grass - Leica 70-200 f2.8 Vario Elmarit 1/800 f2.8 ISO 800 It would be nice to have a pre-shoot mode, where 1 second worth of images are saved into the buffer - files being replaced with the newer ones. Fully pressing the shutter will save the files to the card and continue taking them, it's particularly useful for wildlife photography (and taking pictures of our dog mole hunting!) and it's something that most of the competition does have. Seal - Leica 70-200 Vario Elmarit with 2.0x extender 1/800 f8 ISO 800 SL2-S SL3 SL3-S 5 fps AF AF AF 9 fps no AF no AF AF 15 fps no AF no AF e shutter AF 25 fps E shutter no AF - - 30 fps - - e shutter AF With it's 8GB buffer capacity and picture format, the estimated number of images possible before filling the buffer on the SL3-S are as follows Continuous + AF DNG DNG + JPG JPG 2fps 14 bit 1000 1000 1000 5 fps 14 bit 1000 345 1000 7 fps 12 bit 680 255 1000 15 fps 12 bit 175 175 175 30 fps 12 bit 175 175 175 Giraffe - Leica 70-200 Vario Elmarit with 2.0x extender 1/800 f5.6 ISO 640 Lenses When shooting fast moving subjects with AFC it is not just the camera which is responsible for the AF speed, it is also the lenses. Lots of the better Leica SL lenses have big pieces of glass to move about, and the AF is accordingly slower. I have found that the 24-70 and 70-200 (f2.8) do very well and are faster at focusing than the 24-90 or the 90-280 respectively (not that those are too bad). The 35 and 50 summicron Asph lenses are faster than the APO SL Summicrons as well, although for normal purposes these are also quite good. Meerkat - Leica 70-200 Vario Elmarit with 2.0x extender 1/800 f5.6 ISO 200 Readout time and Rolling Shutter The Readout speed of the SL3-S is half that of the SL3, reducing rolling shutter considerably and increasing the AFC speed to 30 frames per second (with the electronic shutter), Of course it also dramatically improves the video performance. Sadness- Leica 70-200 Vario Elmarit with 2.0x extender 1/640 f5.6 ISO 200 Fotos - and Camera to Cloud Like the SL3 the SL3-S has Bluetooth and Wifi connection to the Leica FOTOS app, allowing very fast transfer to mobile devices using MIMO technology. Camera to Cloud functionality will be available via Adobe frame.io sometime in 2025. (It will also be available for the Leica SL3) Meercat - Leica 70-200 Vario Elmarit with 2.0x extender 1/800 f5.6 ISO 250 Multi-Shot Mode handheld Multi-Shot mode has returned, with 48 and 96mp available, there are now two options; On a tripod you can also write out moving objects, and there is the handheld mode, which was not available with the SL2-S. - Sadly I have not time to do it proper justice but it does seem very effective. On the other hand Thomas Walter on the Leica User Forum in his excellent review has looked at it in some detail: Leica SL3-S: ’more light’ - the unbearable lightness of being He feels that, given the right circumstances, the multi-shot mode can produce better images than those directly from the 60mp SL3. In my testing I thought it was very impressive, even handheld in poor English January lighting This is a comparison between normal 24mp (on the left) and multi-shot 96mp (on the right) Here is a 100% comparison of the same shot at 24mp on the left and 96mp on the right Recording directly to external USB Drive There are now 4 methods of recording as Leica have introduced direct USB-C to SSD as a new option: SD Card CF Express Card HDMI With the ability to shoot video for over 90 minutes without overheating it's obviously an important addition. Uni Leica 75 APO Summicron SL 1/1250 at f2 and ISO 800 Battery Life The battery life is rather a disappointment: 315 shots (based on the CIPA standard), but 1040 with the adapted shooting cycle. I took 930 images on a 21/2 shooting session this morning. For stills photography it does seem to do better than my SL3 (which is understandable on the basis of the smaller file sizes) Eagle Leica 70-200 Vario Elmarit with 2.0x extender 1/800 f5.6 ISO 1000 D Leica 70-200 Vario Elmarit 1/640 f2.8 ISO 5000 EVF, LCD, Top plate display The EVF is the same as that in the SL3 and the SL2, at 5.76 million dots, which is in fact 1600 x 1200. you can choose a refresh rate of 60 or 120 fps, presumably the higher frame rate uses more battery. By contrast the Nikon Z8 is 3.69 dots and the Sony A1 9.74. But I have to say, I much prefer the Leica EVF, it seems to be less contrasty and much easier to see than either of the big competitors (or the Olympus OM-1 ii either, which is also 5.76 million dots). The LCD however is improved from the SL2-S with a slight increase of resolution a larger increase in quality and it is now tiltable, something I wasn't keen on to start with, but find myself using a lot. The top LCD is the same 128x128 pixel trans-reflective monochrome panel. but it has the new and improved layout first shown on the SL3. Scottish Bluebell Lumix 100mm f2.8 macro 1/200 f2.8 ISO 320 Kookaburra? Leica 70-200 Vario Elmarit with 2X extender 1/640 f5.6 ISO 4000 Price As of writing this article The SL3-S is £4,500 including VAT, which is noticeably cheaper than the SL3 which currently retails at £5,920. Considering that all the important components other than the sensor are the same this is a remarkable reduction in price. Certainly the SL3-S doesn't show any cutting of corners (unless you count the missing white paint!). Fire! Leica 75 APO Summicron SL 1/3200 at f2 and ISO 100 The Elephant in the Room Leica's advertising material states 'We are excited to introduce the fastest Leica camera ever made'. There is no question that is the case, but in comparison with the competition from Canon, Nikon and Sony the SL3-S certainly isn't as fast: These cameras sport stacked sensors (or even global shutter) with much faster readout time, allowing for faster shot to shot times (or similar ones with larger sensors) together with less rolling shutter. The same is true of the SL3-S video specifications, which are good, but certainly not class leading. Some things could be addressed with firmware updates in the future (here's hoping), but not everything. Whorls within Worlds Leica 70-200 Vario Elmarit with 2X extender 1/800 f5.6 ISO 1600 On the other hand, every camera is a set of compromises, users complain of the low resolution of the Nikon Z9 and Z8 EVF and Sony users complain about overheating using video on the A1, and I'm pretty sure that the colour isn't as 'good' in any of the stacked sensors, whether from Nikon, Canon, Sony or, indeed Olympus. I spoke to Ralf Ilgenfritz on the phone today, and he was heading off to Paris to record some interviews, with his Sony A1ii, A9ii and his Leica SL3-S in his bag, he was pretty sure that he would only use the Leica, because he preferred using it, he loved his 35 Summilux M and shooting with a Leica nobody asked any questions. Mandala Lumix S 100mm f2.8 macro 1/640 f2.8 ISO 250 It's very easy to fall into the trap of thinking that the best specification sheet will mean you take the best photographs / videos, but every camera is a complicated balancing act between features which can be measured, and ones which are less easy to measure . . . . interface, colour, handling, haptics, ease of processing files, available lenses - I really could go on and on! I spent this morning shooting our dog flying through the undergrowth chasing pheasants and squirrels at 30 fps, It was really dark and dingy, and although every shot wasn't great, lots of them were. Uny hunting for moles Lumix 70-300 f4.5-5.6 1/1600 at f5.6 12,500 ISO Conclusion If your job is shooting sports, then you probably wouldn't pick the SL3-S, and I would have said that if your job was shooting video you probably wouldn't pick the SL3-S either (but Ralf has!). But if you are shooting weddings or events as a job then you might easily pick the SL3-S. The combination of the lovely files, the fantastic interface and the ability to shoot good video, together with that certain Leica 'something' is pretty irresistible. Emma tells me that I've given up shooting weddings, but it seems to me that a combination of the SL3-S with an M11 would be a dream team! The Dream Team Leica 24-70 Vario Elmar 1/1000 at f2.8 100 ISO If you are a general photographer shooting anything from street to surfers to sport, landscapes to ladybirds, abstracts to animals, then the SL3-S will not disappoint on any level. Add to this that there are so many great lenses in the L mount environment. Of course the SL3-S is geared to make the very best from your M lenses, something that none of the competition can do as well. And it's a joy to use Attitude Leica 70-200 Vario Elmar 1/800 at f2.8 100 ISO Thanks and Acknowledgements First of all I'd like to thank Ralf Ilgenfritz, who is a fantastic cameraman and a lovely guy, and I feel that his contribution to this article is really pivotal. Thank you especially to Stefan Daniel and Jesko von Oeynhausen at Leica. Soon it will be 20 years! I'd also like to thank Valentino di Leonardo, Matthias Petzke and Nico Koehler from Leica for all their help and enthusiasm. In that context I'd like to thank and welcome Gerrit Gissel to his new job looking after the Leica SL cameras. Sean Reid will be producing a number of articles on the SL3-S in the near future - do look out for them at his website ReidReviews.
58 points
-
Utramax 400 &v2
58 points
-
58 points
-
. - dogwalk - @river_otra, noway M10M & ASM50 .
57 points
-
57 points
-
Same position, ½ hour later
56 points
-
Hello all, I have been an appreciative member of this forum for some time. This past March, I took my third trip to Iceland as a self driving tour, alone, to focus on photography for a week. Early March is my favorite time to visit this fabulous country as Winter is winding down, the crowds and prices are lower, and the combination of light, sky, snow, and landscape is truly a feast for the senses (if a bit cold). I took my Leica SL3 along with several lenses and a Panasonic body for backup. I thought it would be helpful for many here to cover performance issues and other questions I dealt with as I see them come up from time to time in this forum. Cold/Wet Conditions: First, it is cold and very windy, wet, and snowy. Temperatures during my trip ranged from 10-20 F with wind chills well below zero and sustained wind gusts. Terrific for photography and a good test for weather sealing and cold weather management. External battery pack, I purchased the external battery adapter and brought along a separate battery pack. I am pleased to say that I never needed it; I had three standard batteries that I kept in the camera and they worked well even with crazy winds, driving snow, and biting cold. Condensation can be a consideration, I ended up purchasing two rubberized bags for kayaking from Sea to summit that I used along with bag ties. I used these once or twice during the week and they were effective (I have used plastic bags in the past that wore out). Because I would take my camera from the outdoors straight to my vehicle, which was also cold (and then warmed up when running), I did not have to use them as much as I expected. Weather sealing..it works! Please see one of the images as I was photographing under a waterfall or in driving snow. I was somewhat concerned the first time (and hopeful the camera would not need a trip to Wetzlar afterwards). The camera worked flawlessly. Camera Setup and Workflow: I am still trying different configurations of controls to arrive at the best set of user profiles for my landscape work, hand-held, flash, etc. The trip was a great testing ground for this. Tilt/Shift. I use tilt/shift lenses (Canon EF with Sigma adapter). Configuring the top buttons to allow magnification while tilting/shifting became important. Effective use of Tilt requires the ability to check near/far focus magnified at a tilt setting while adjusting helical focus to refine. I used the ISO button for this. Image stabilization was excellent and tested by the driving winds. Even though no indication in the viewfinder…… Manual focus for distant details. This is widely known yet bears repeating. In my experience, manual focus (magnified) is needed for critical focus on very distant details. Back button AF while in MF mode to refine works very well. Hit back button, turn manual focus with magnification until just right Electronic shutter for tripod with no camera shake (stabilization off). Just works though inside with LED lighting, there can be some banding. Manual exposure mode with ISO float in changing light. - when I want a specific shutter speed threshold, aperture, and still be able to influence EV compensation, I ran out of dials on the right of the camera and had to resort to the ISO dial on the left (it still needs firmware refinement IMHO and can be finicky). One note - I find the icons rimming the monitor to be unreliable - sometimes they respond to my touch, other times, they do not. I don’t use them at this time - hopefully a future firmware refinement. The Results and field workflow: Image quality. Simply put, the results are terrific. I was a fan of the SL2 but find the better High ISO performance plus resolution with the SL3 (extra cropping leverage) to be a big step up for the work I do. The print quality is very satisfying. The lenses: not much more to say..I have a full set 21, 35, 75 APO, 24-90, 90-280 APO, plus Canon T/S. The APOs are in a league of their own. I could go out in driving snow with any of them and know that the only issue with a great result would be my failure of seeing.. The APOs are so good that they make the 24-90 seem less performant, even though it is an excellent lens (would buy an updated version in a minute if they ever made one). IPAD workflow with Lightroom Mobile. This was the first trip where I did not take a laptop. Lightroom Mobile, with an apple Pen, was very capable of quality edits, masking, exporting for sending to friends, and synchronizing with my catalog when I got home. Was a real joy to carry less yet have great feedback during the trip and editing that was competent enough to make the grade. The biggest challenge when photographing in Iceland is pushing past the famous locations that are breathtaking to do original work. I had a week on my own which was very helpful and made some progress in this regard. Will need to go again! My biggest regret is that I was not able to meet up with Stuart Richardson, a long time member of this community. He was out of the country while I was there..Next time, Stuart!
56 points
-
After 4 days of continuing raining, we were so lucky to get some sunshine Sigma BF, Lumix 18-40
55 points
-
Here’s a Q3 photograph from Scarista Beach on the Isle of Harris, Scotland. It is 10 sec f/5 ISO 100 on a beautiful, still and gentle evening.
55 points
-
Hello everyone , Hi John , Hi Wayne, a revenant as you say Yes I remember John ..... the film is the best in every way and as a practician , no stress when you take pictures , you take your time .... thanks for this reminder John. I will come back if I have more time because I put photography on stand by for the moment ... I promise I will come back and as you know I love poppies, here is a photo with Kodak Portra 400-Leica M7-90 Apo Summicron Asph (Portra dev in Tetenal homeLab) Best regards Henry PS : Wayne it's Gary who told me you were asking for news of me
55 points
-
6 AM shot 21SEM
54 points
-
I could never use my M9 Monochrom for portrait shootings because of the defect sensor. I was thinking to sell it and to buy a M10M instead. But I really liked the „old“ Monochrome although sometimes it is really a diva. It is a kind of love/hate relationship. But with a new sensor, it works now without any problems and I just love the the results again. Lígia, M9 Monochrom, 2/50 Apo Summicron
54 points

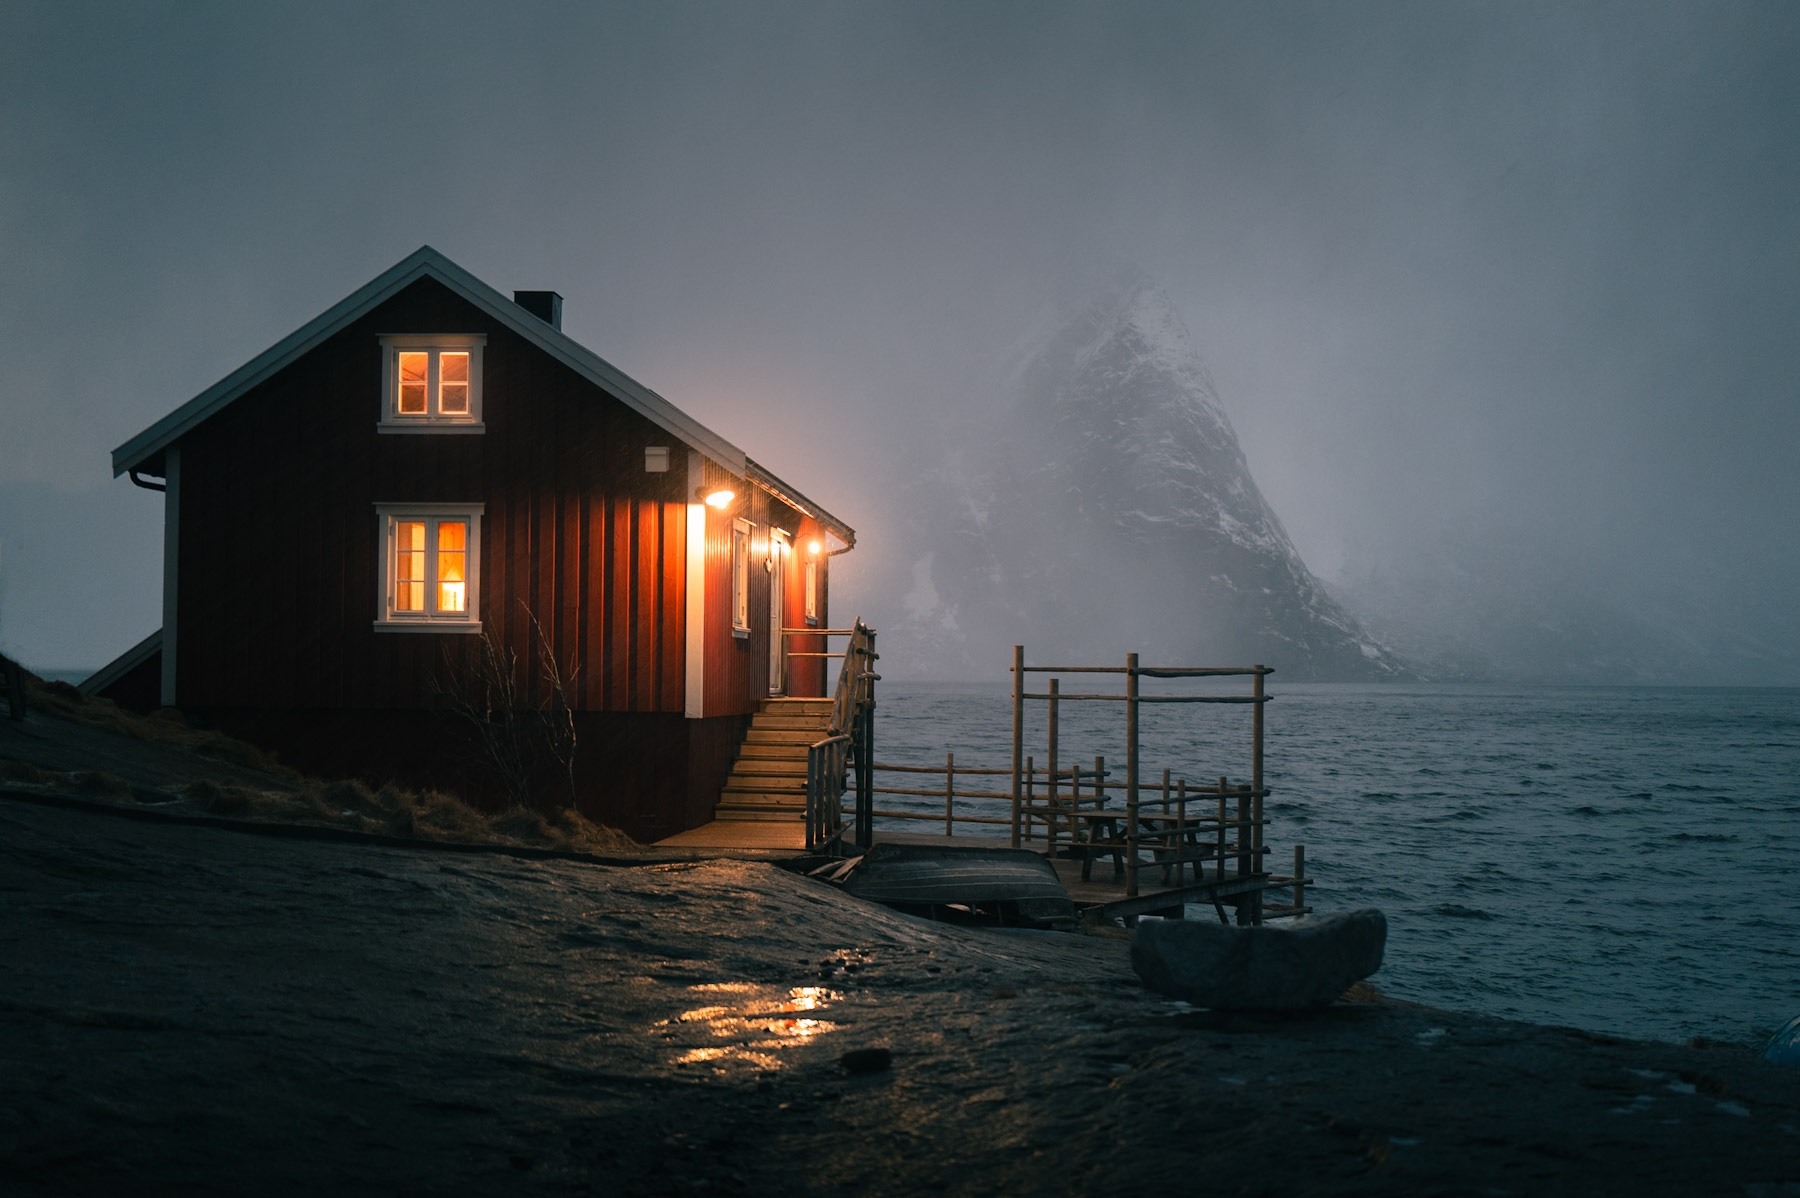
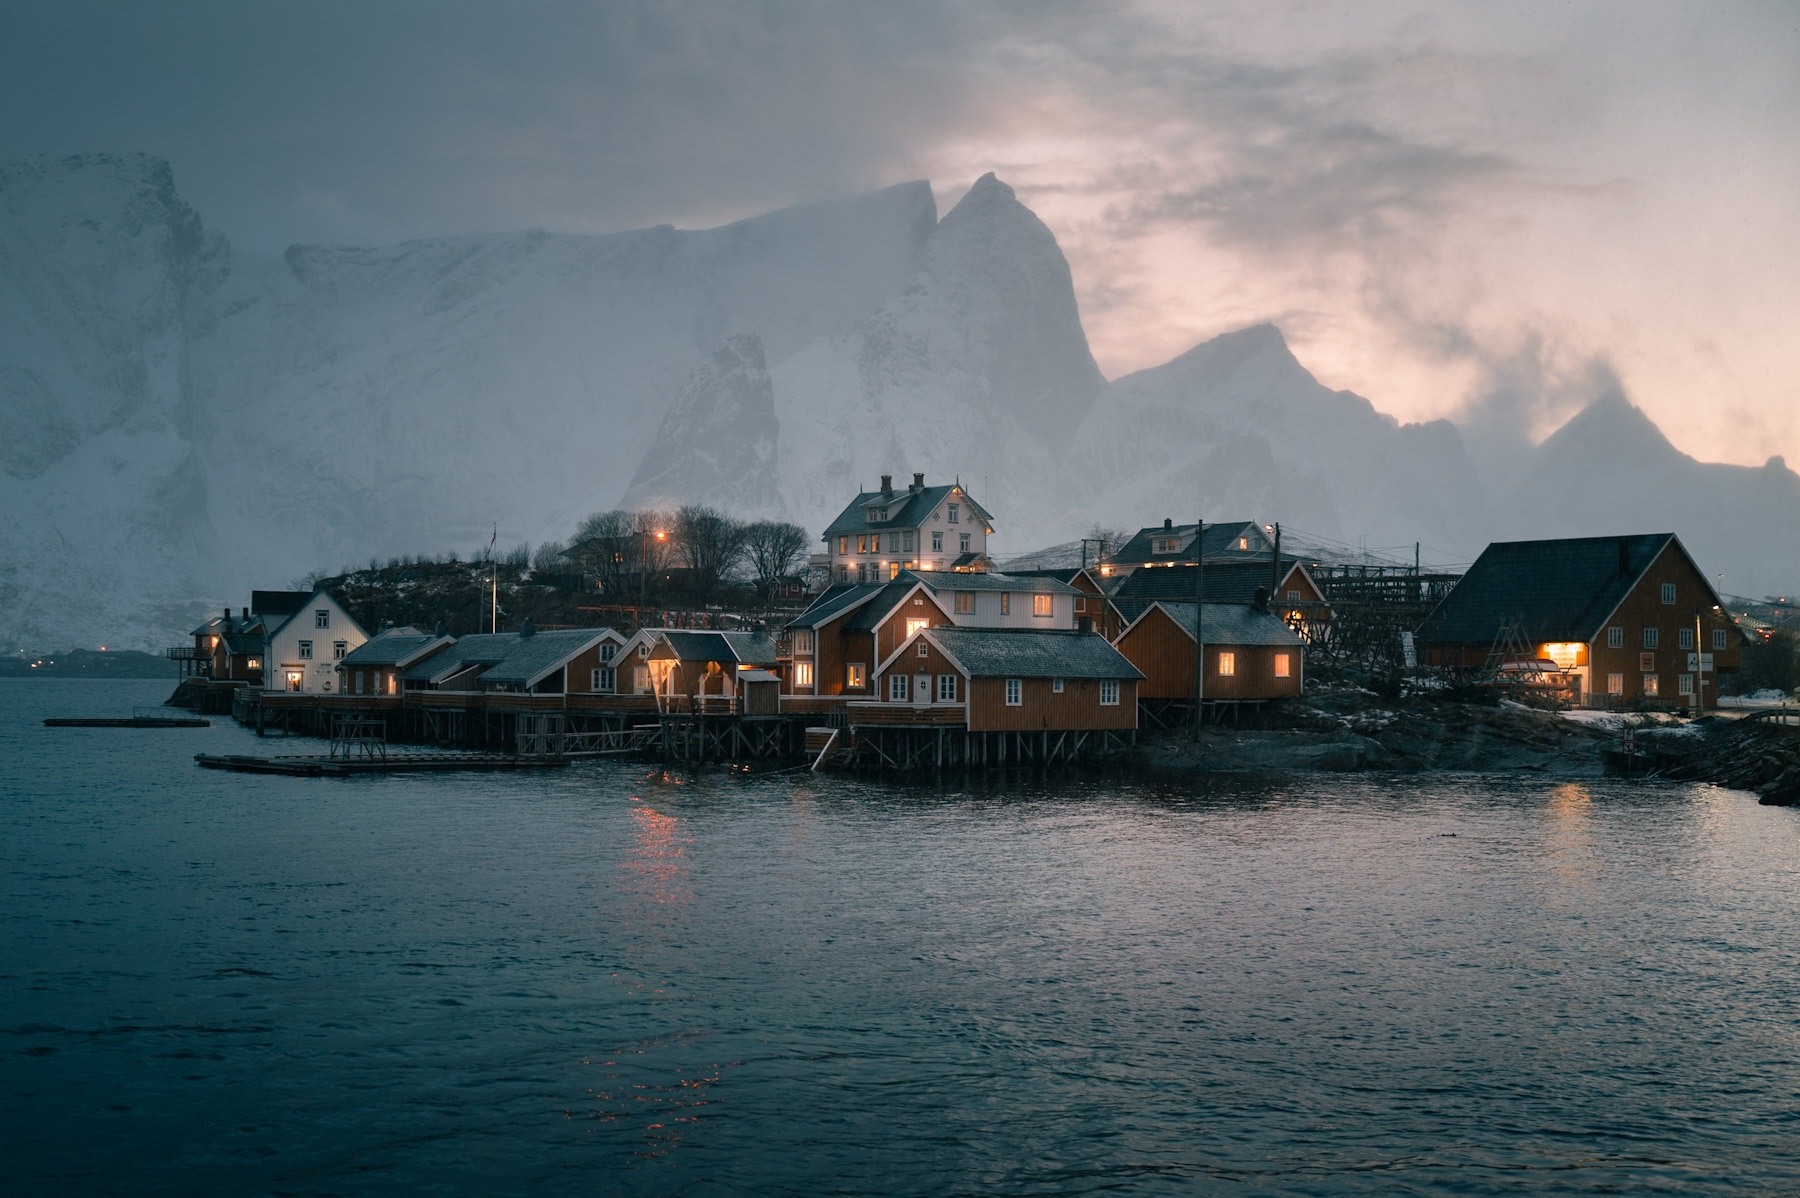
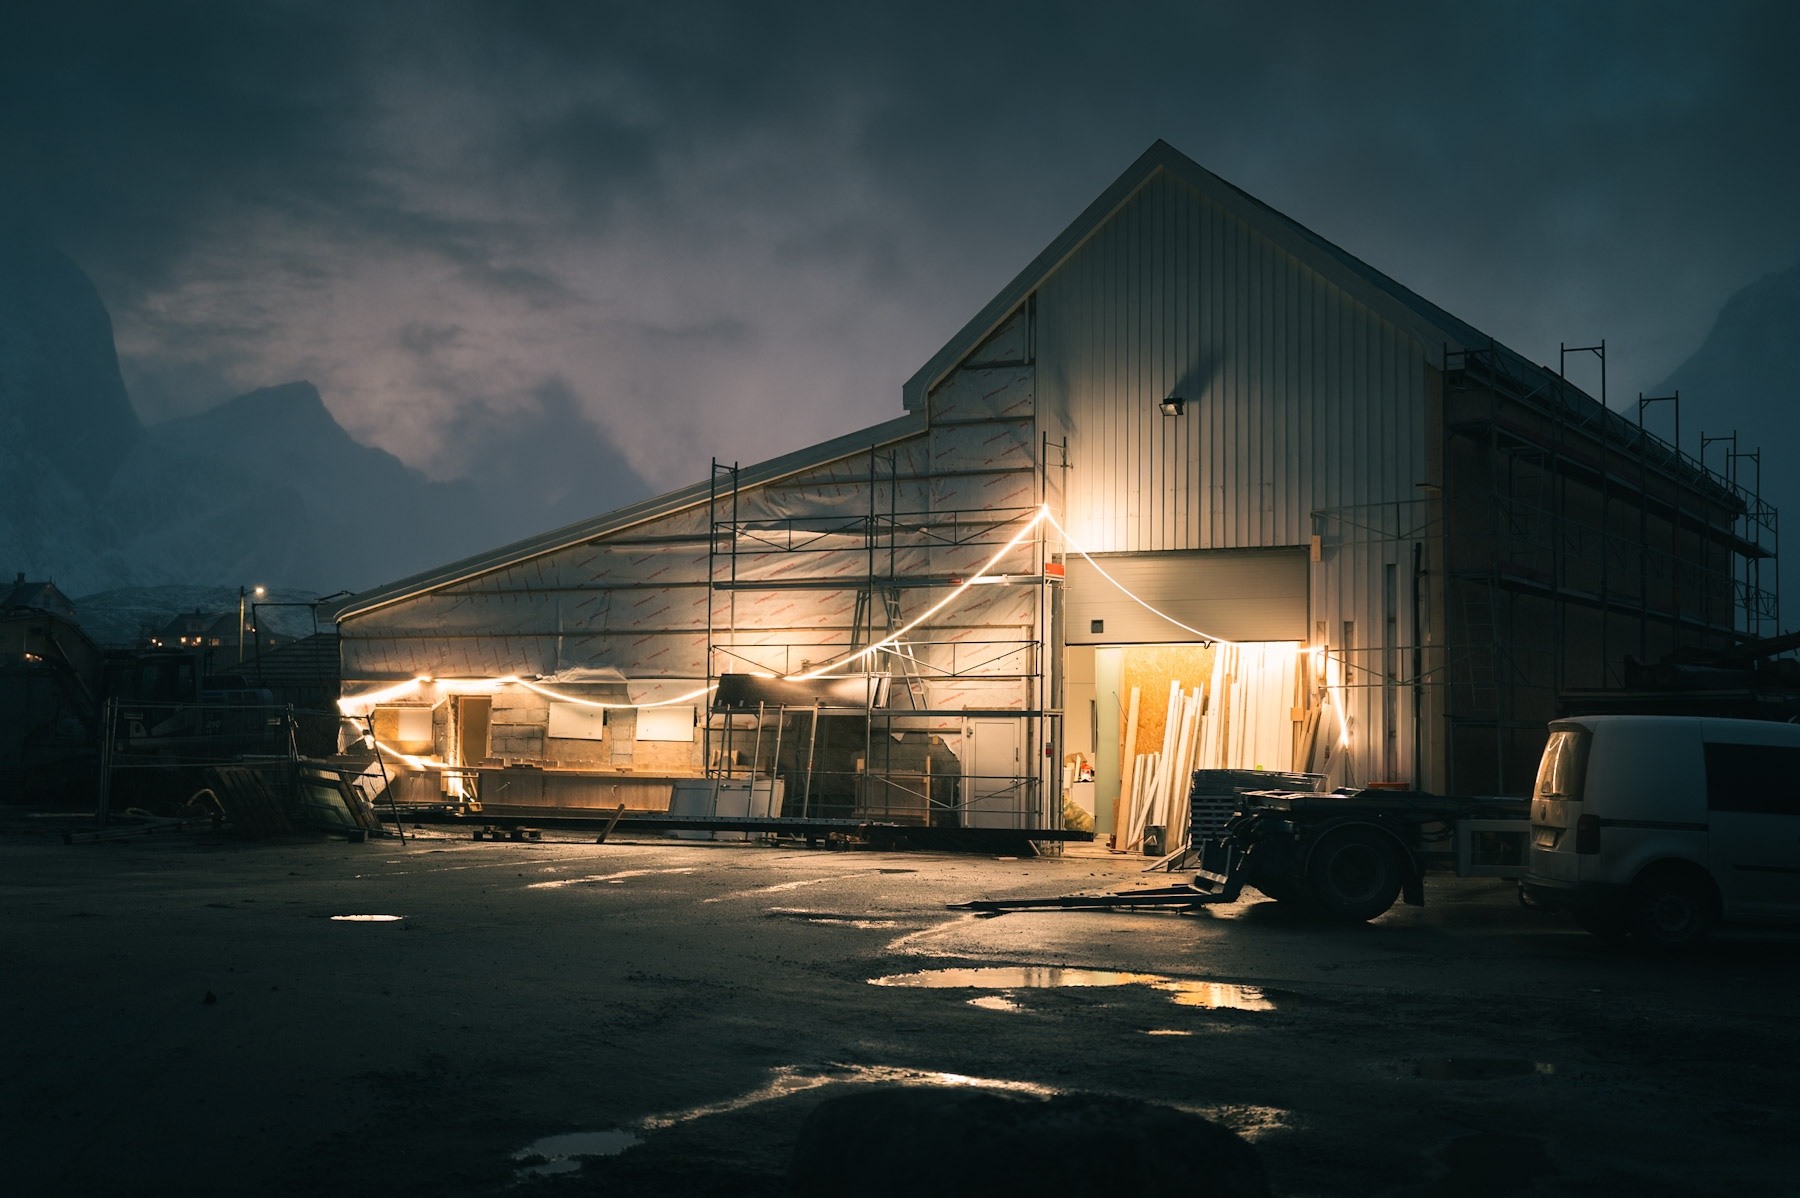
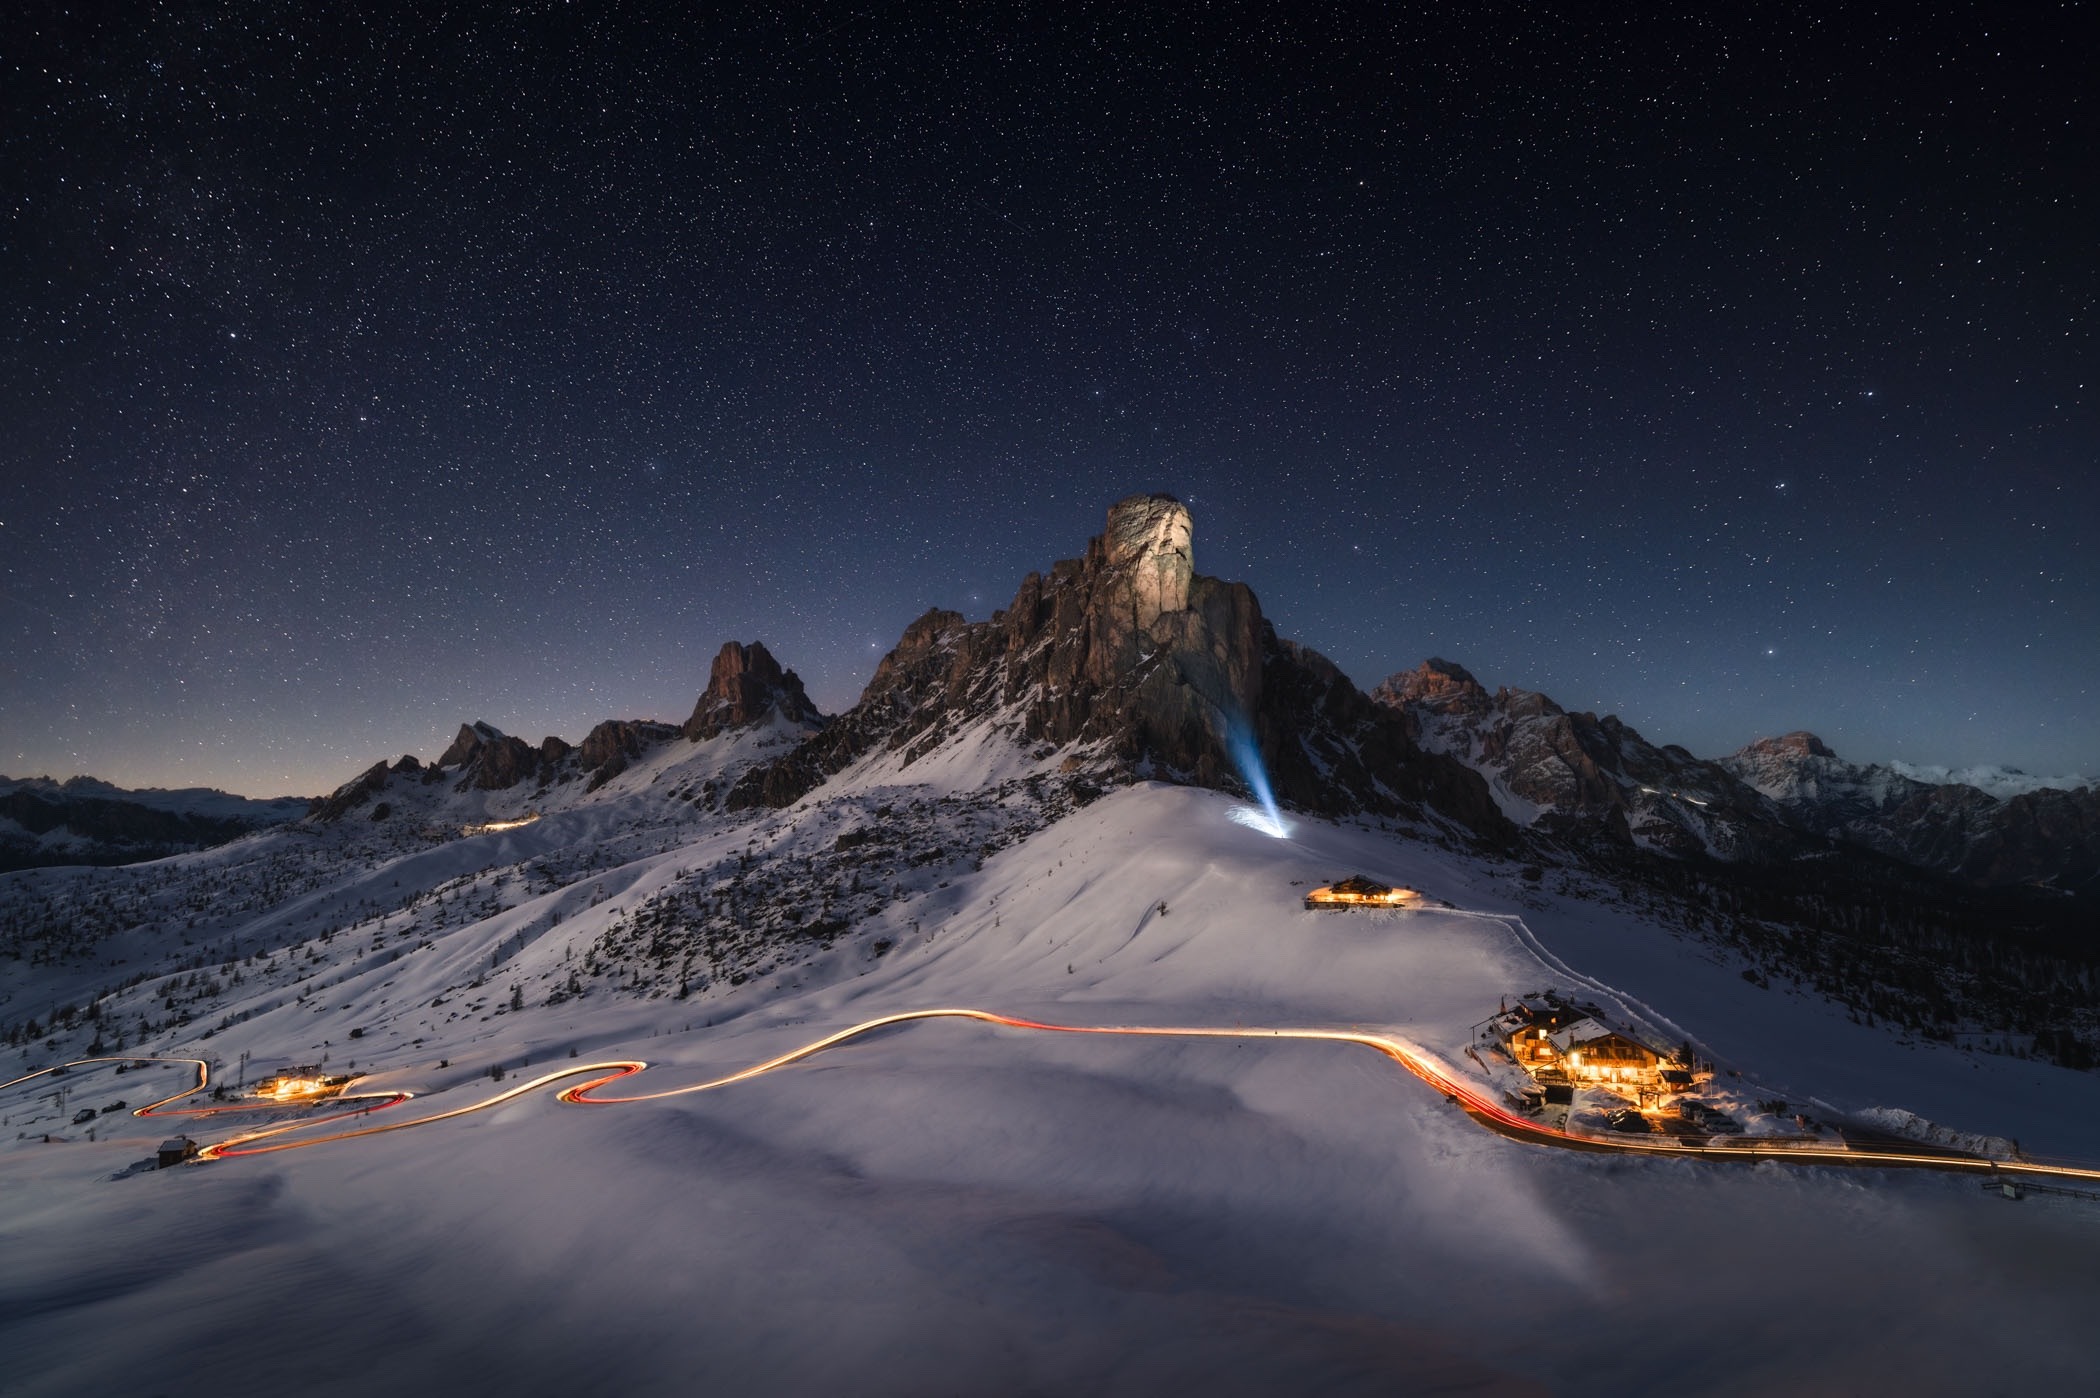


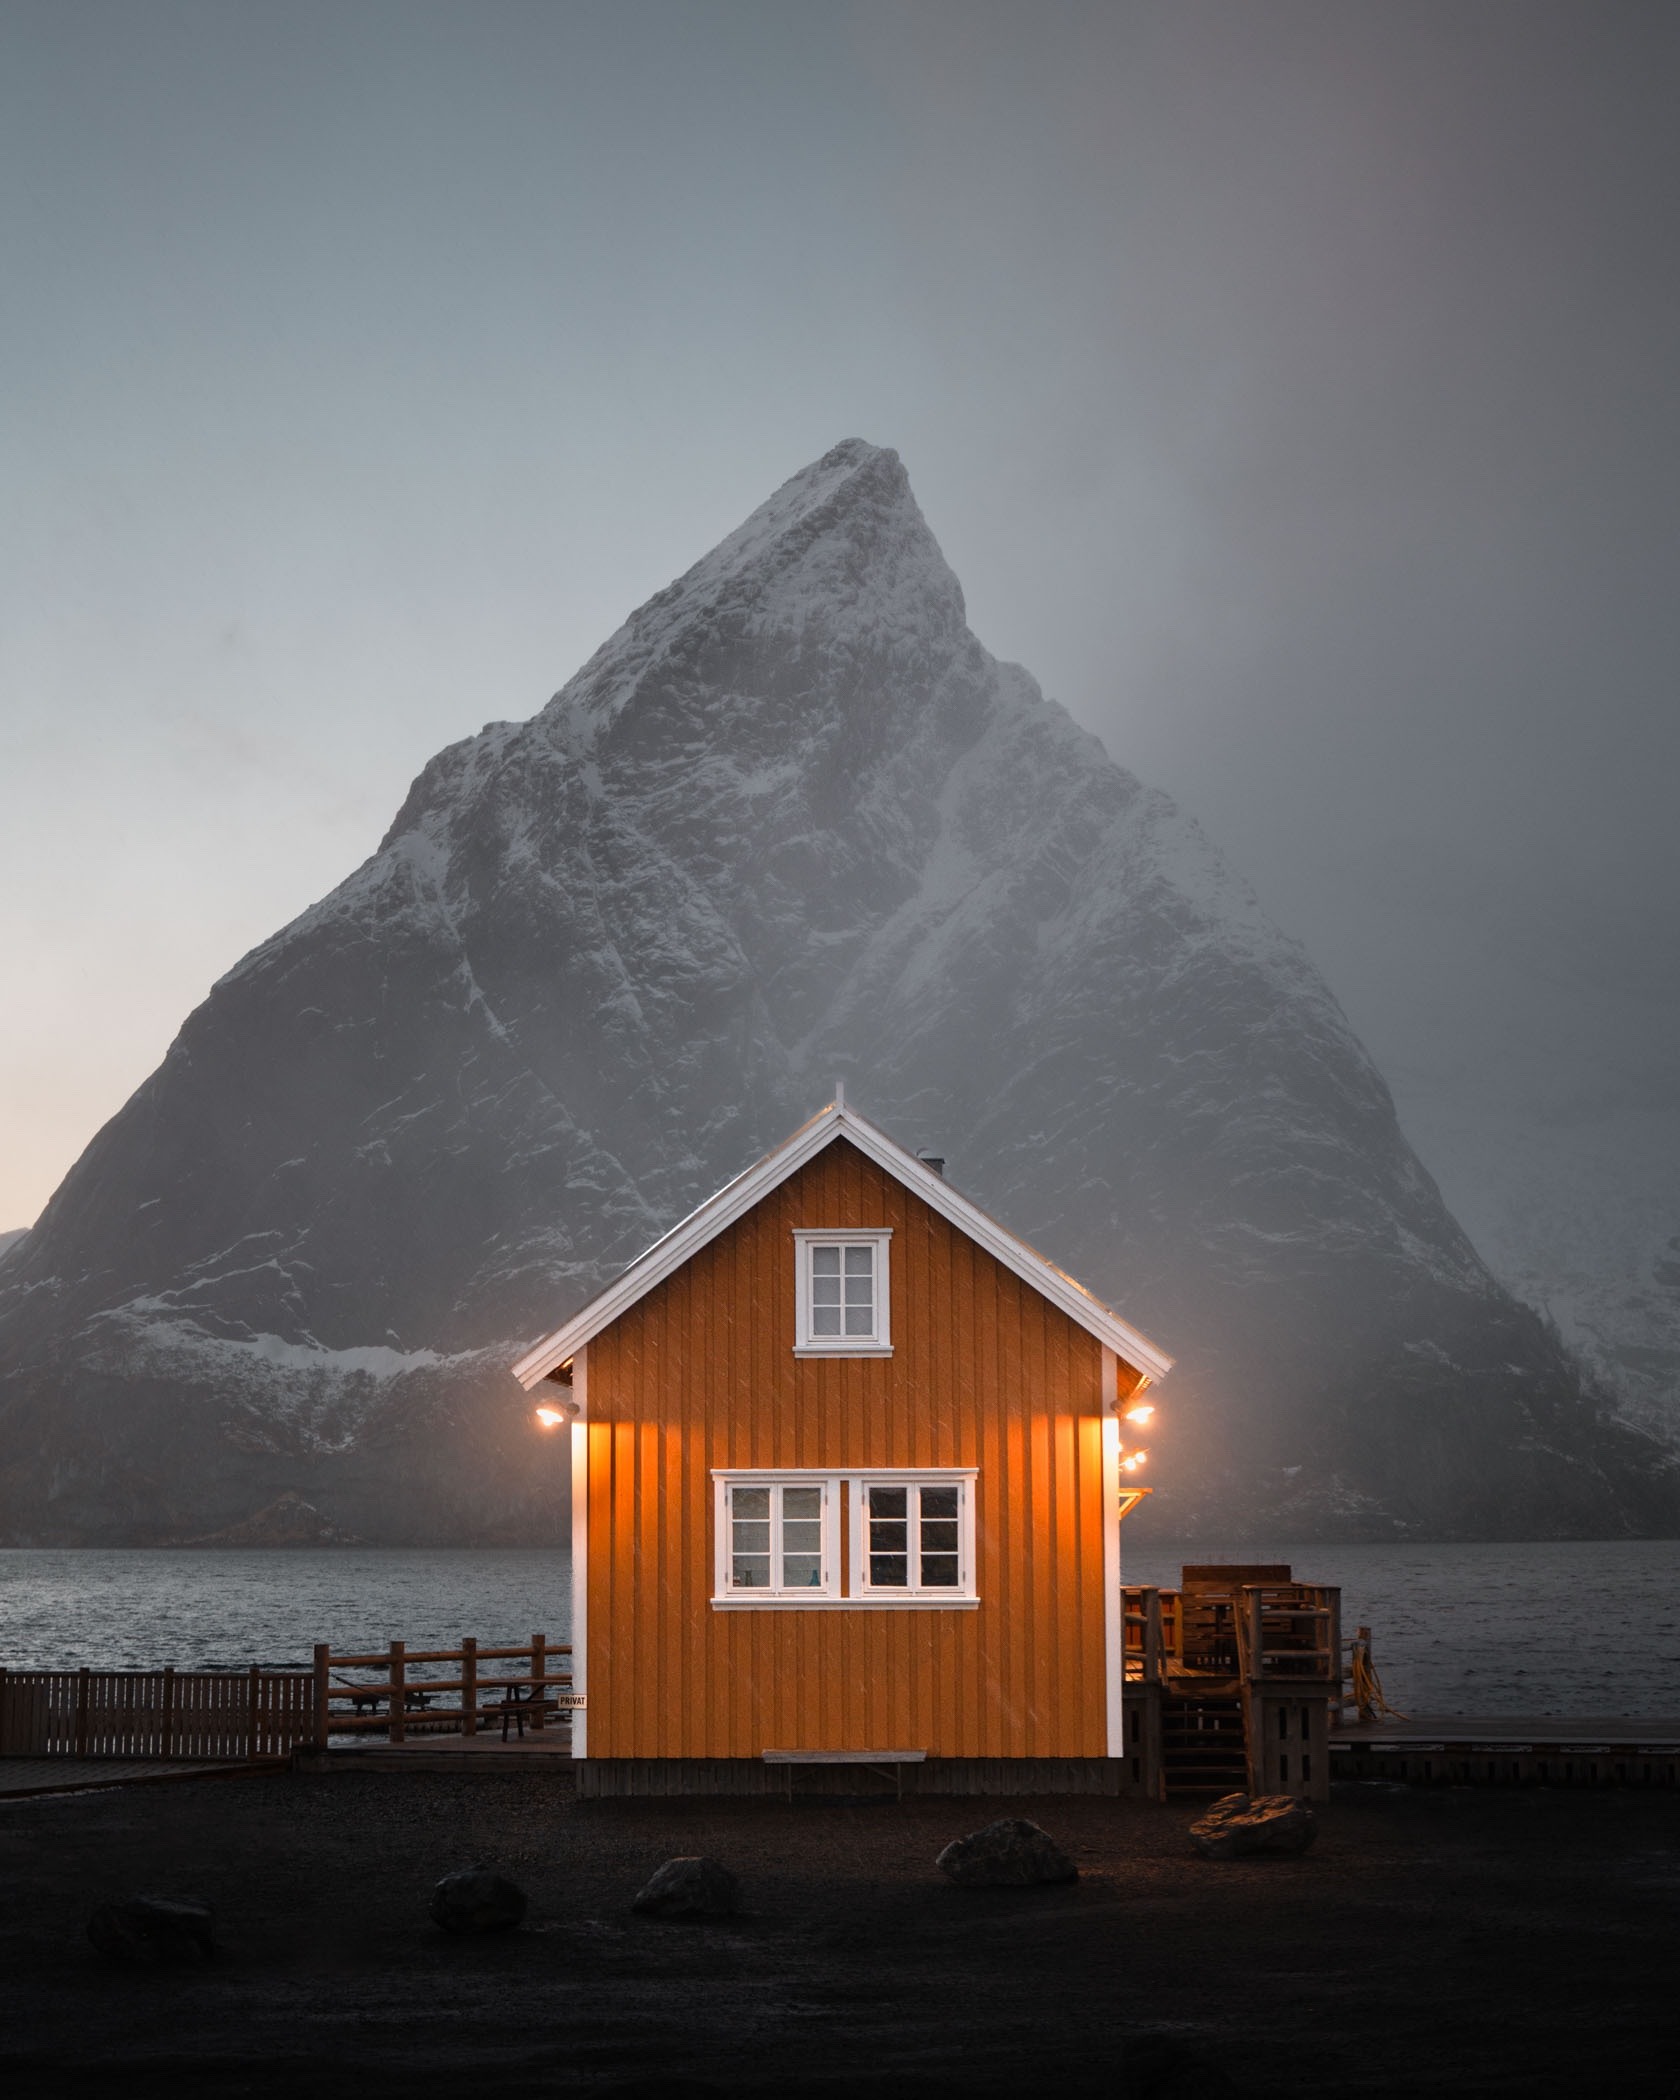

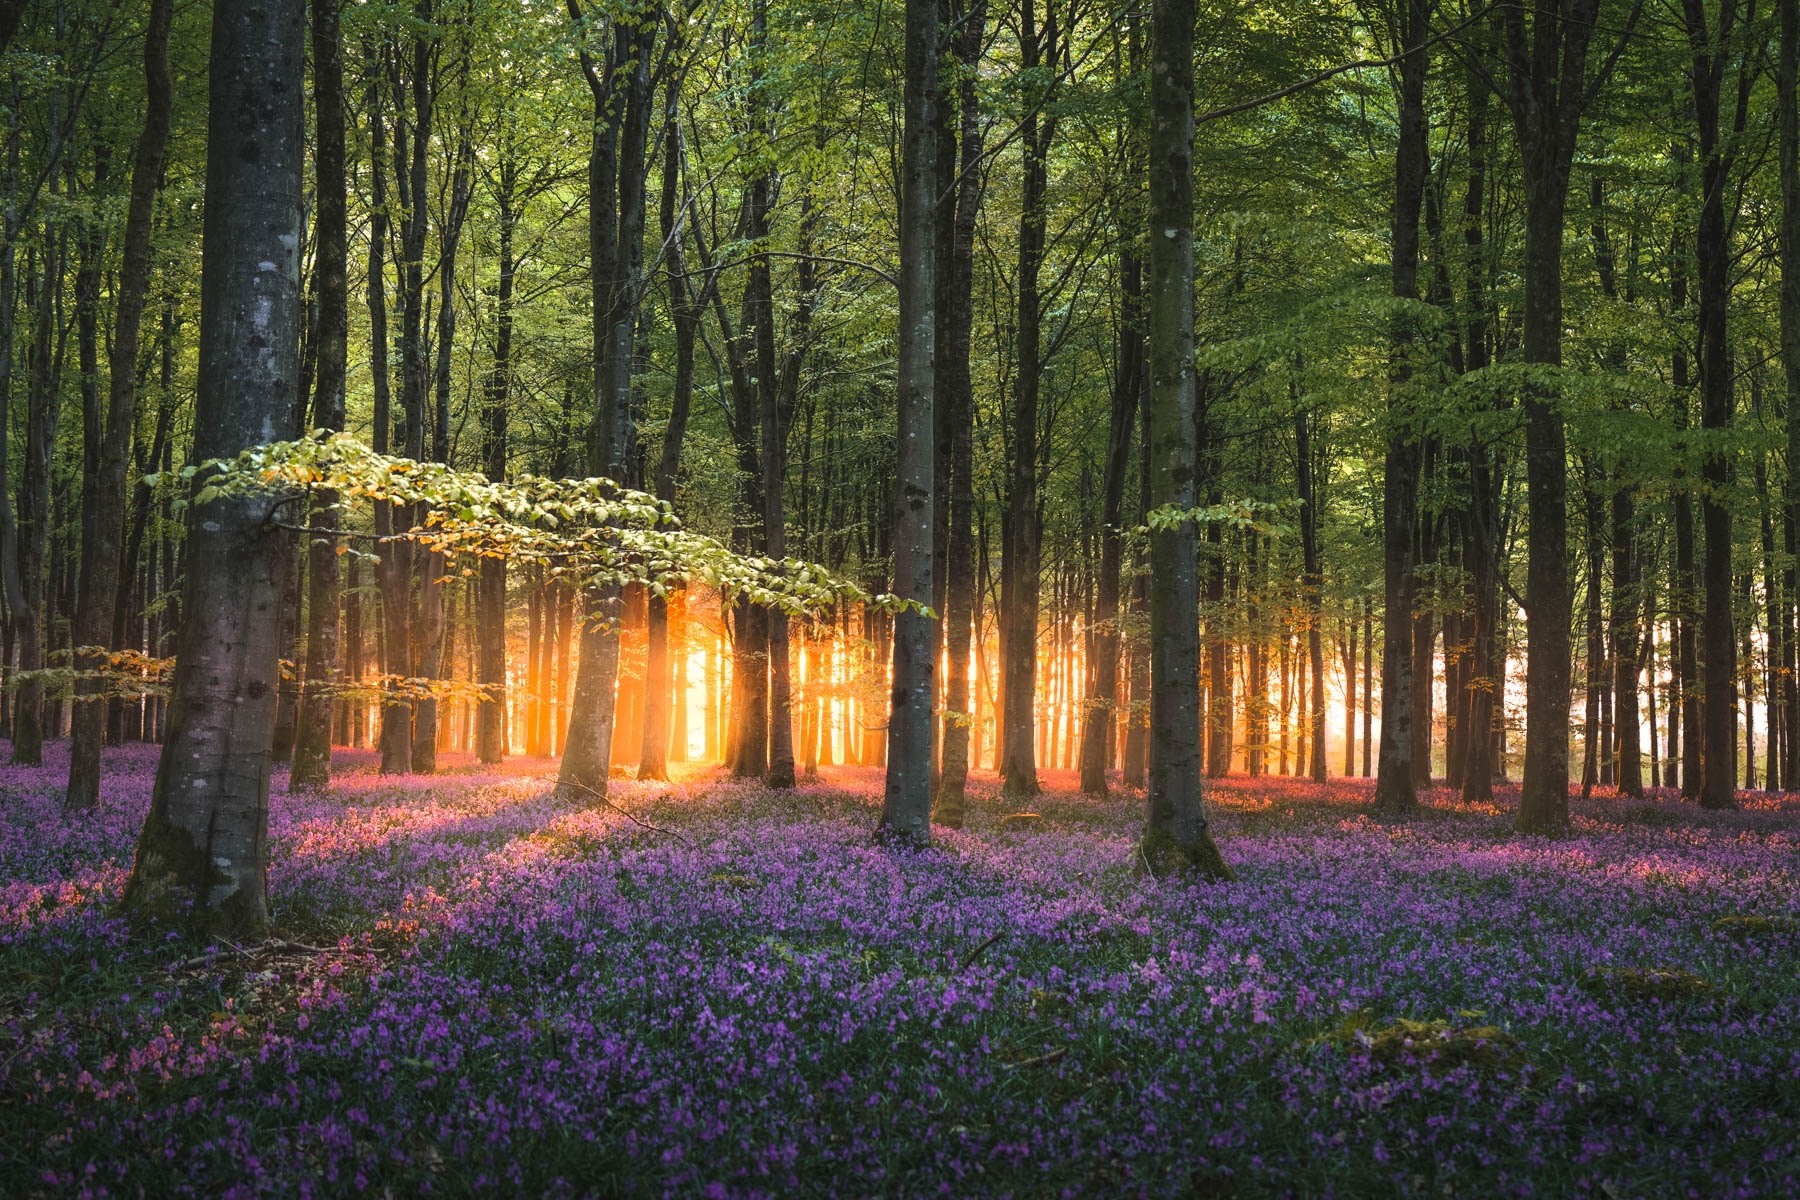


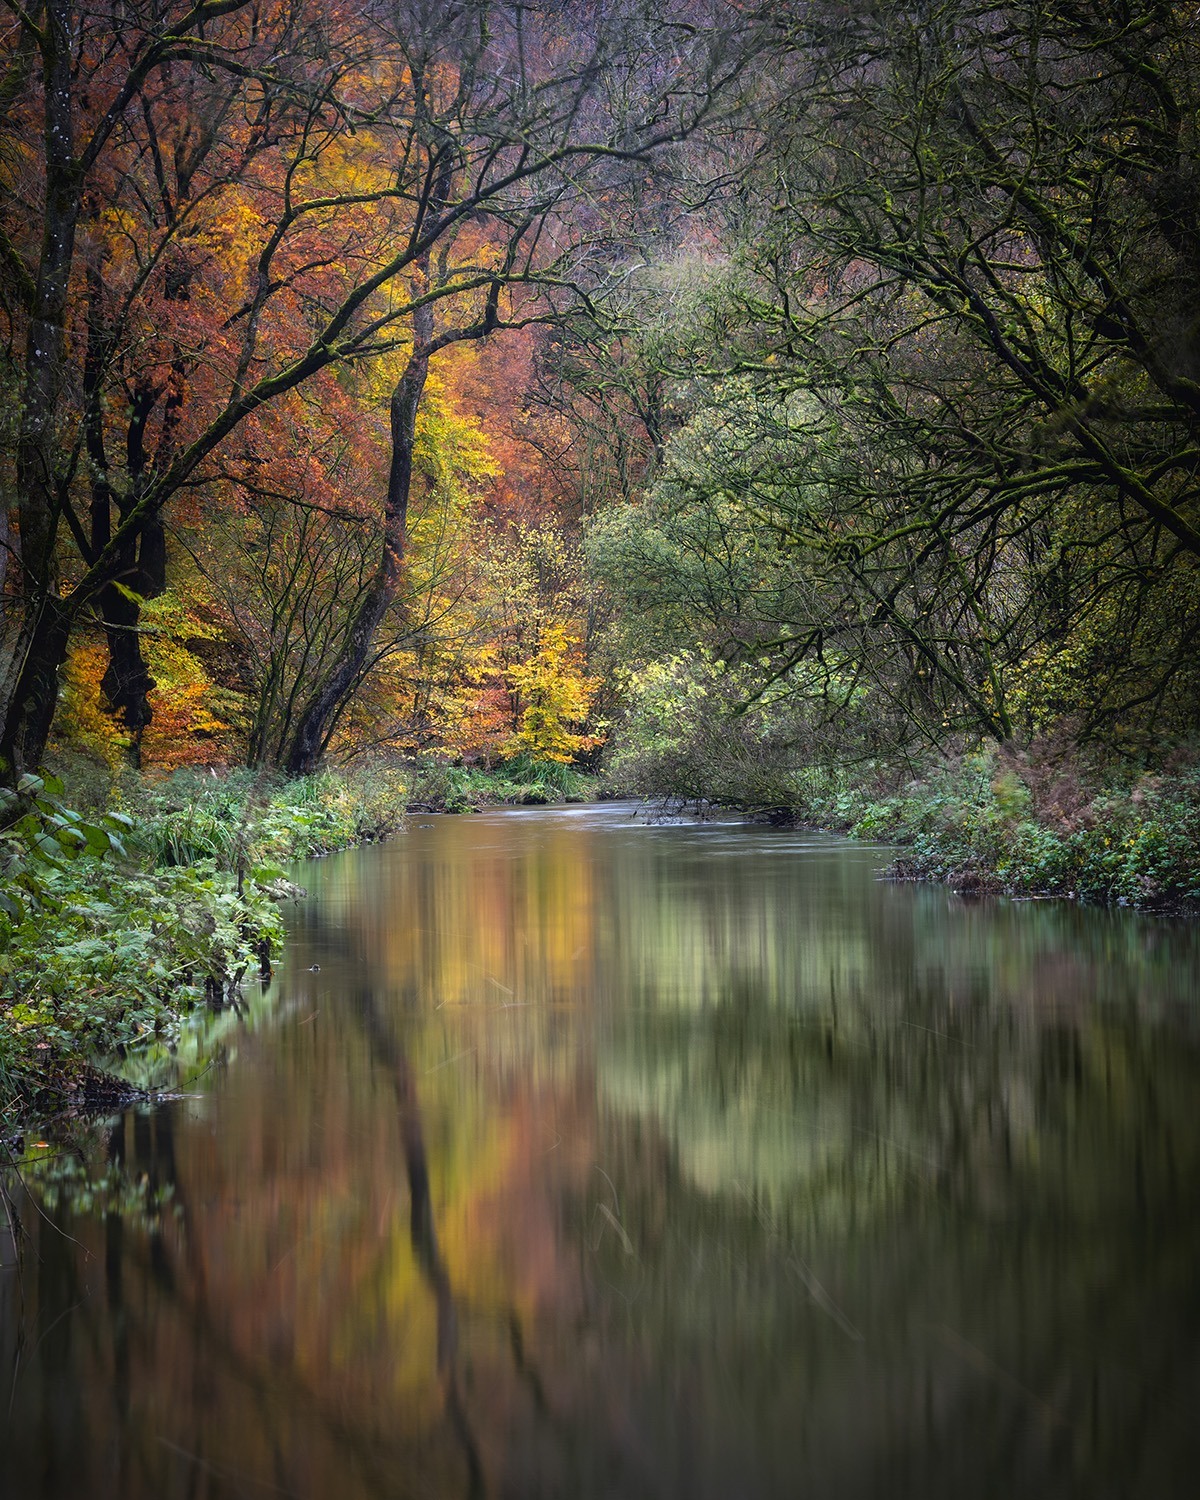

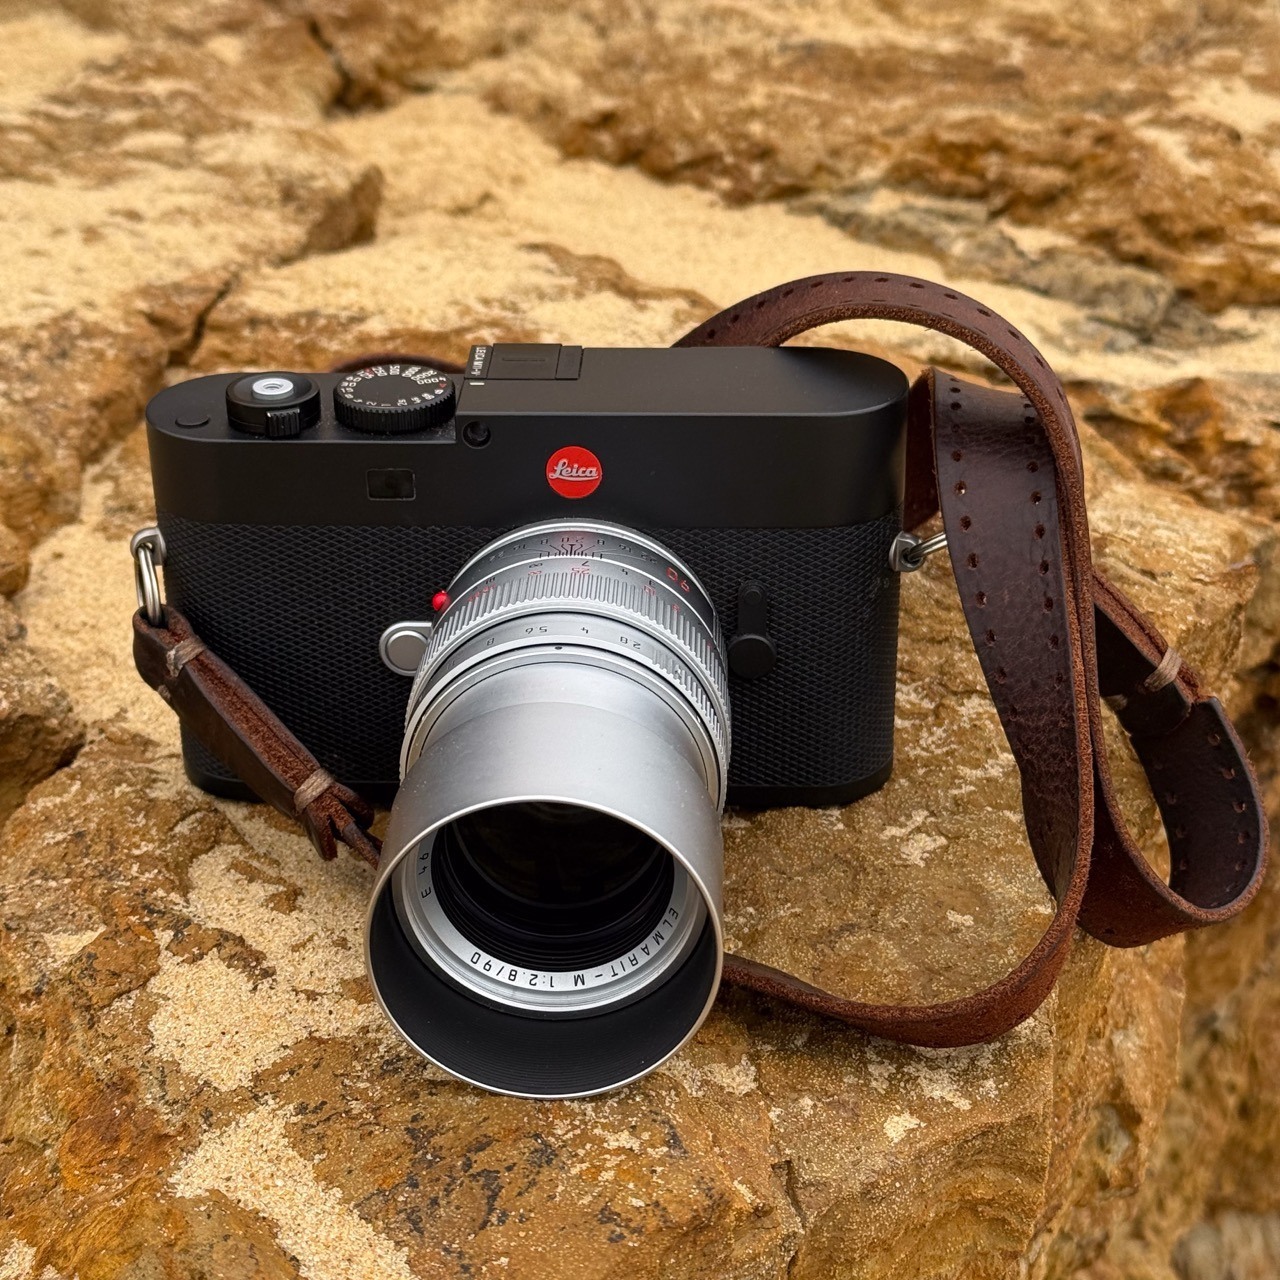

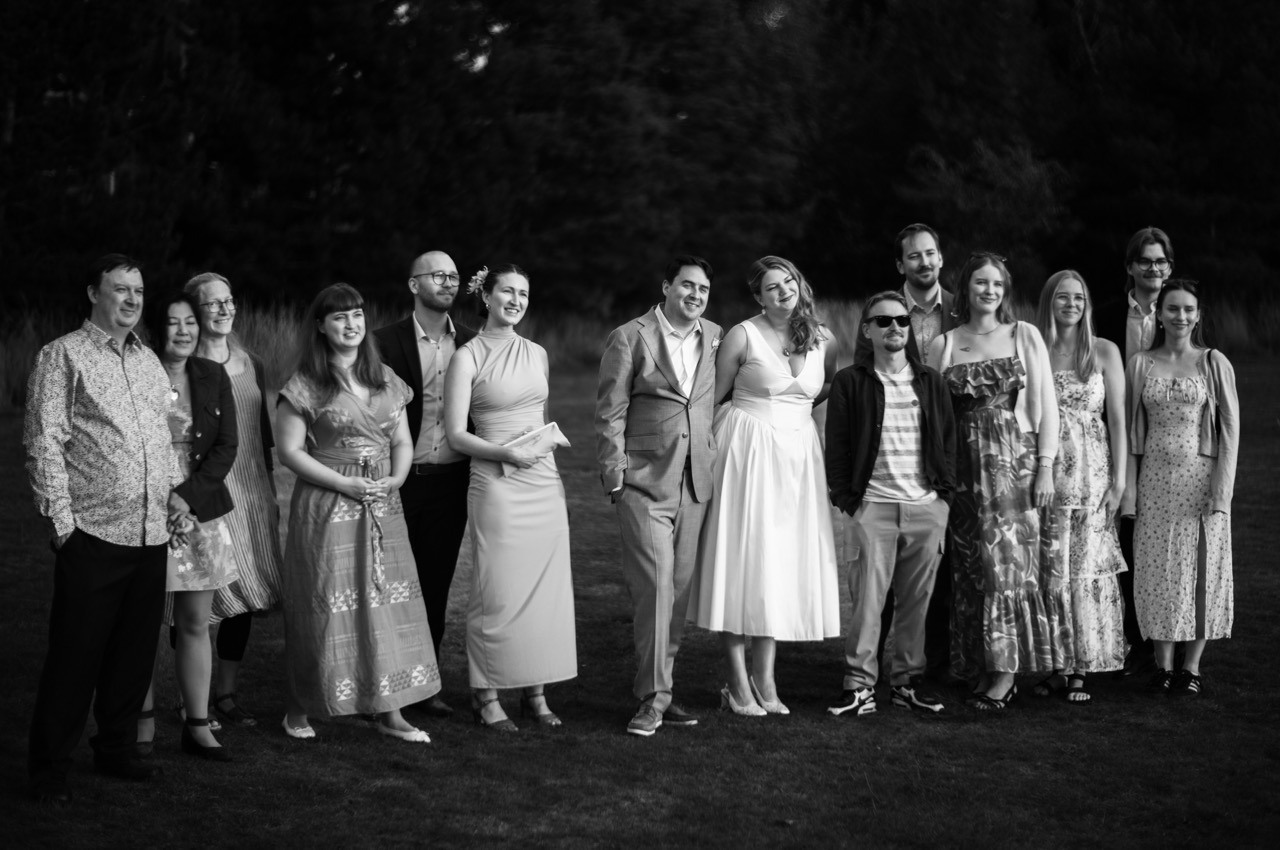


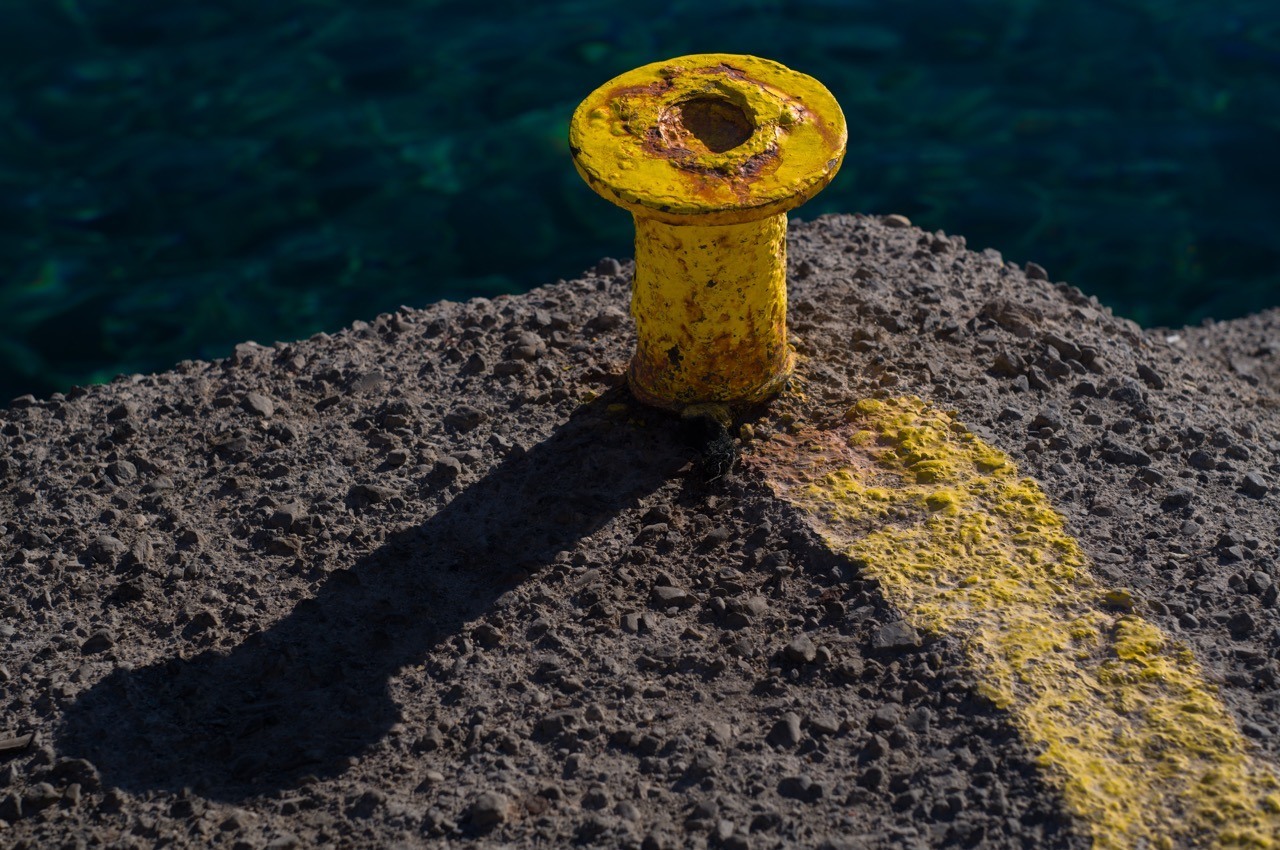

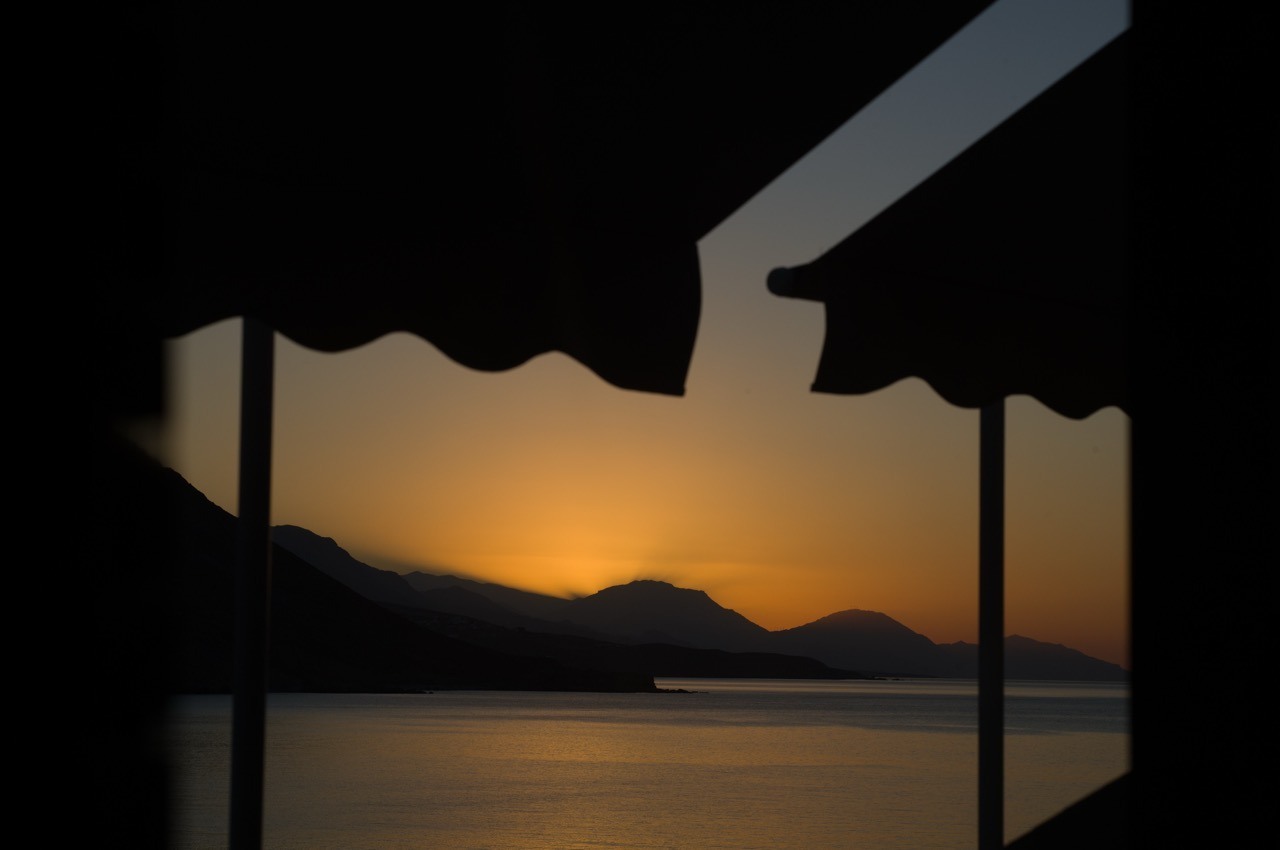
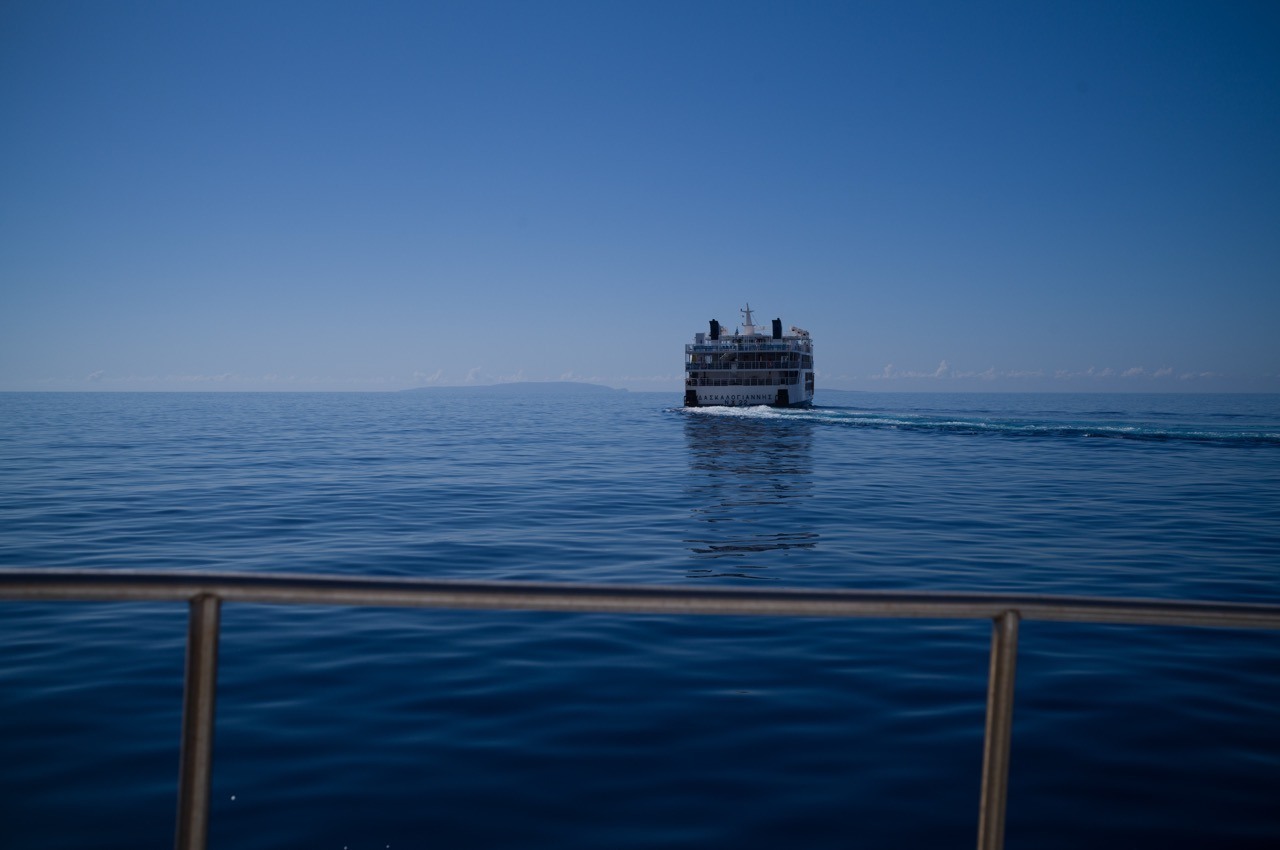
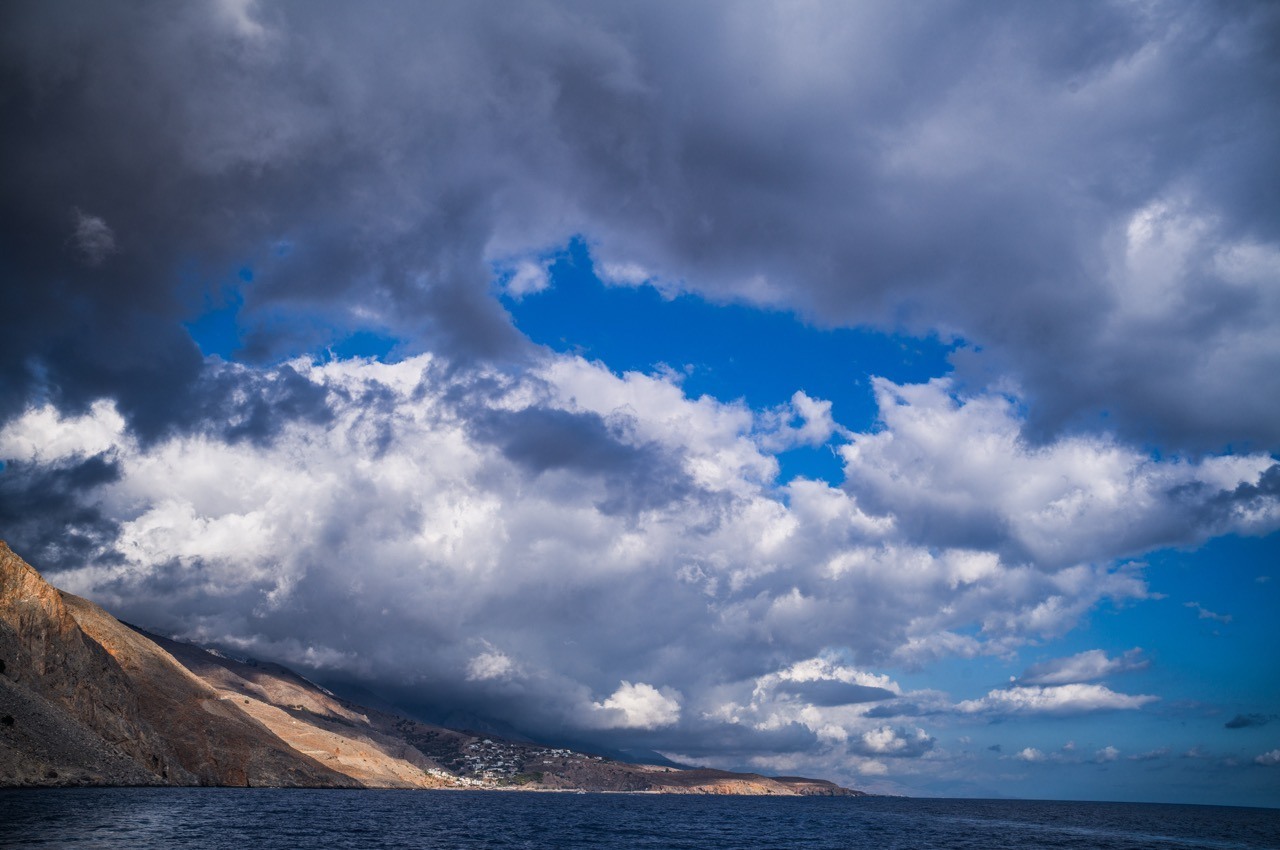


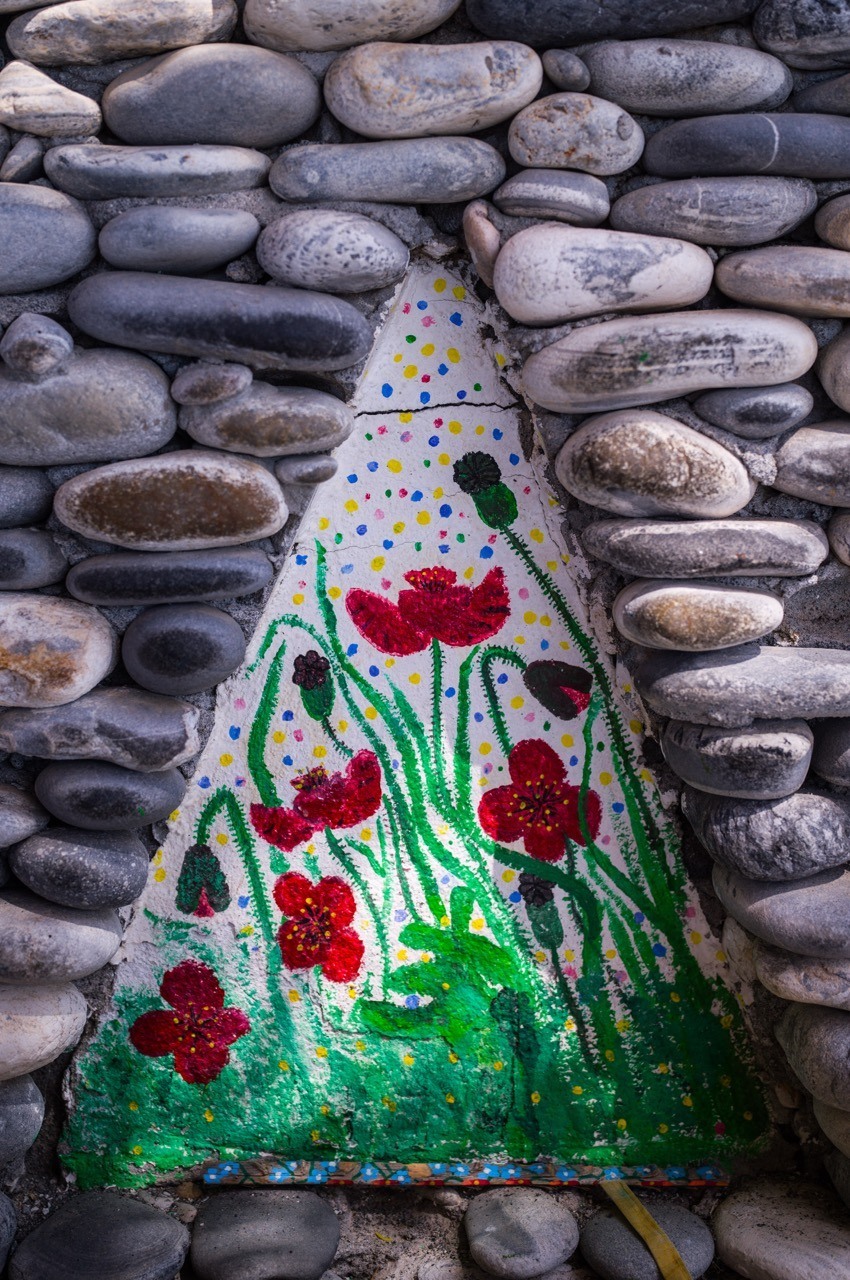
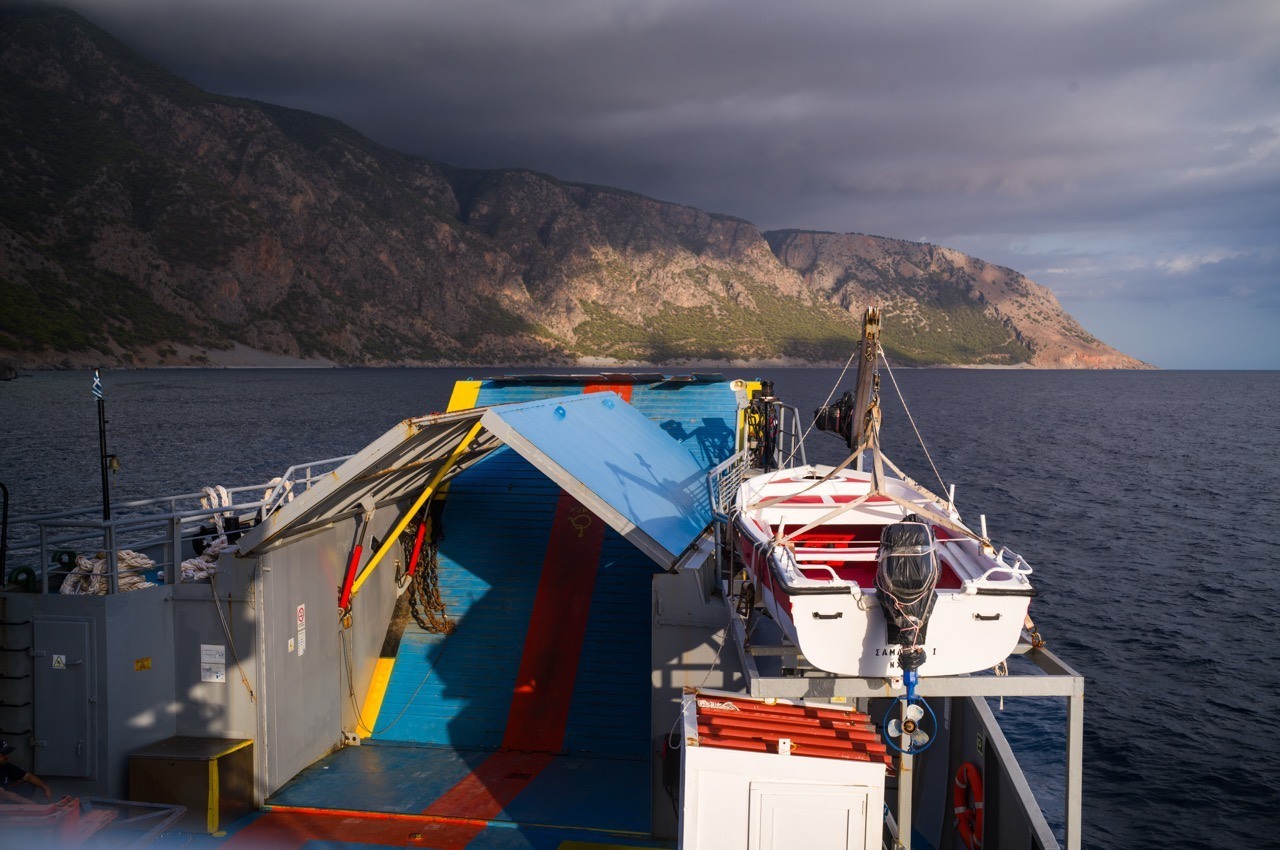
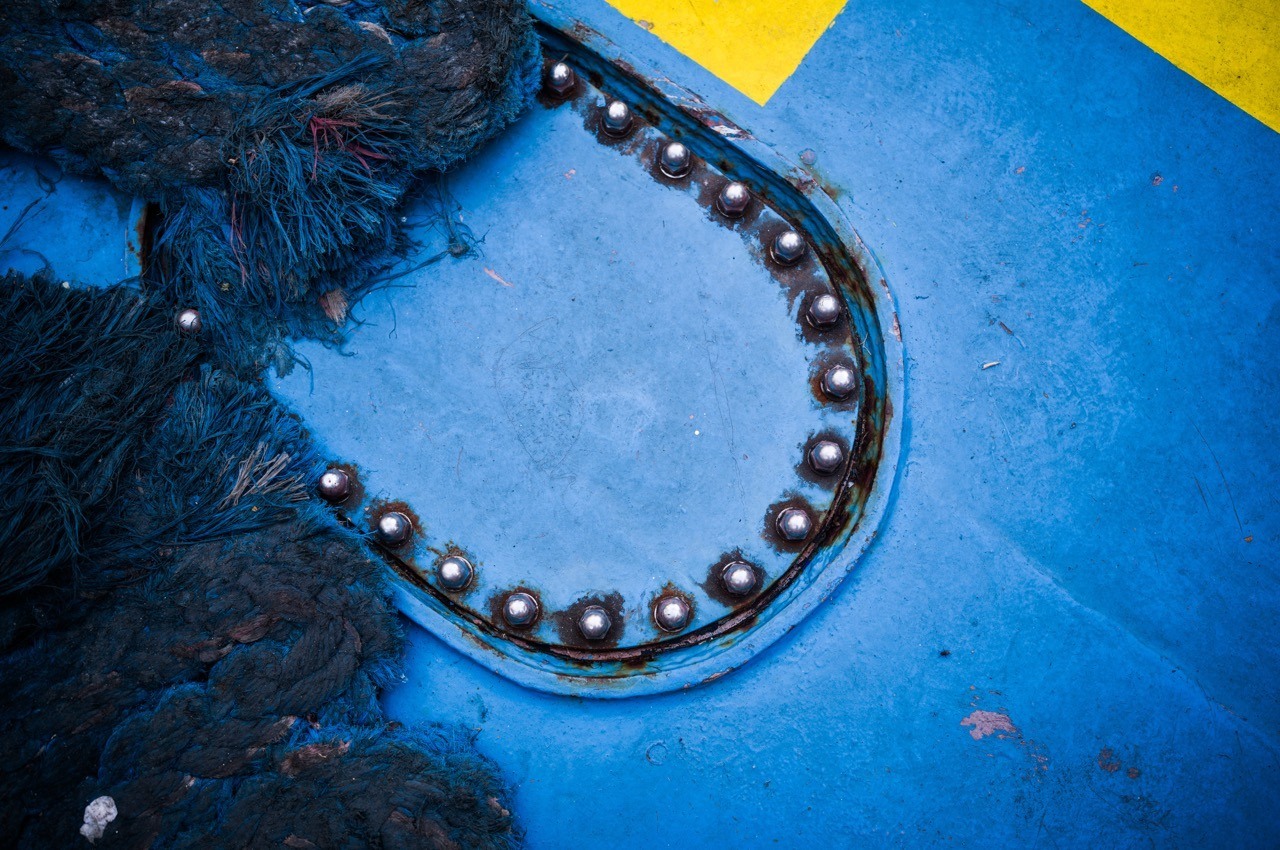

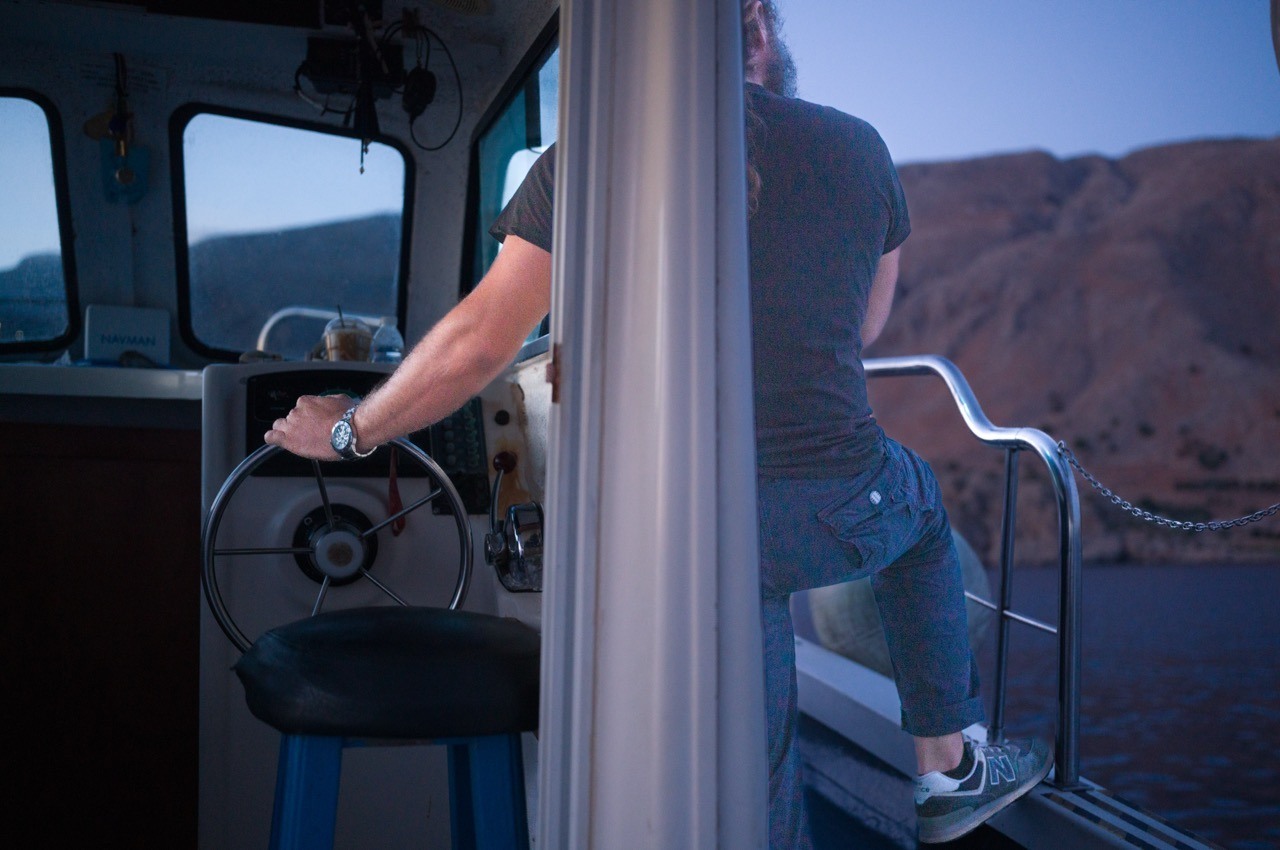
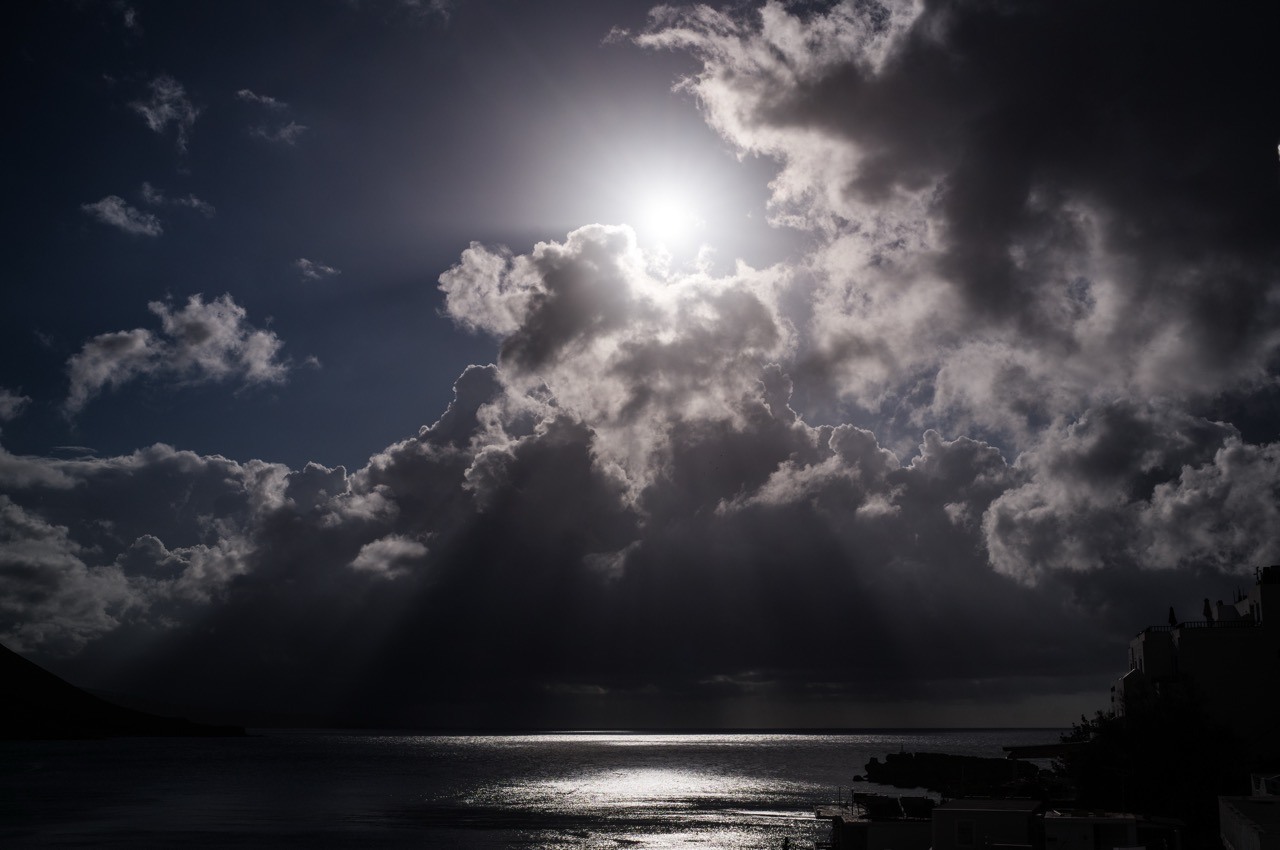


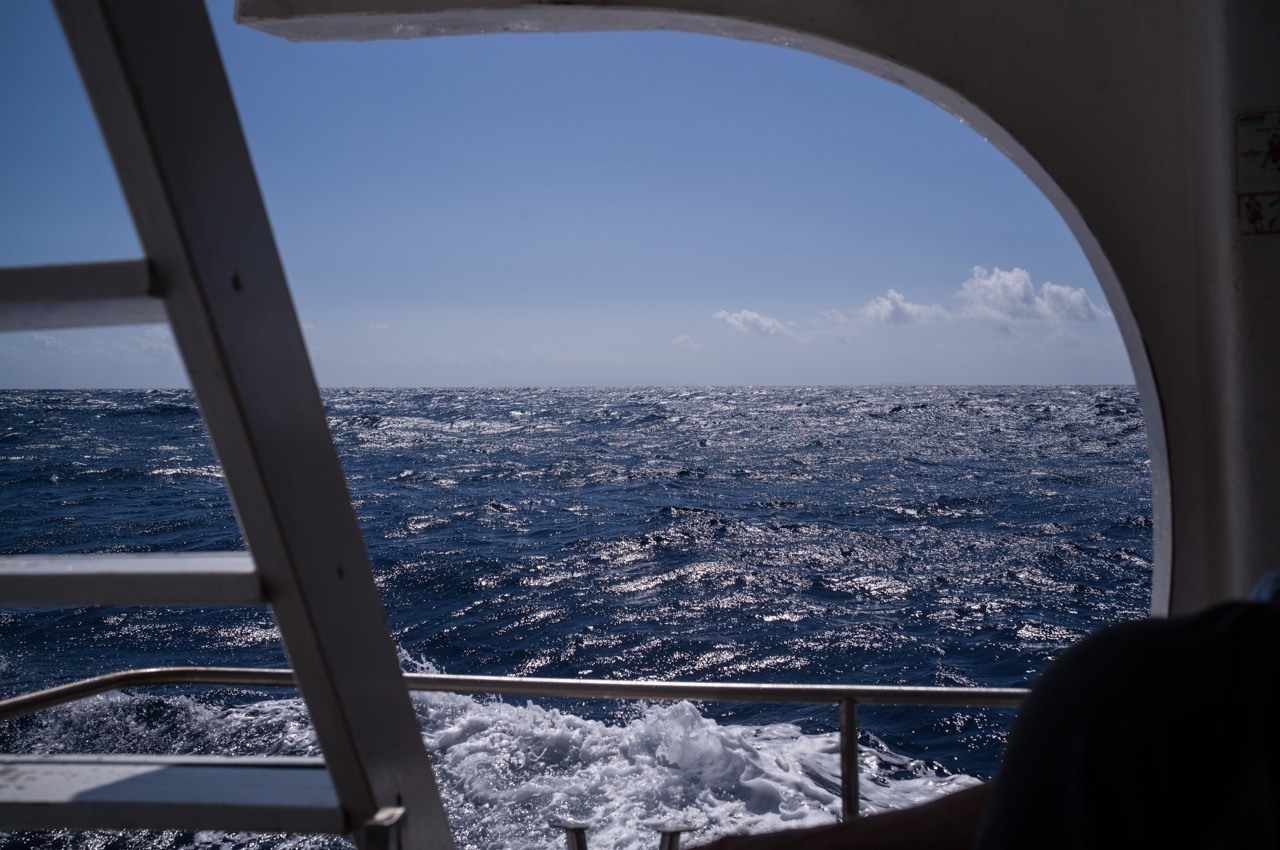
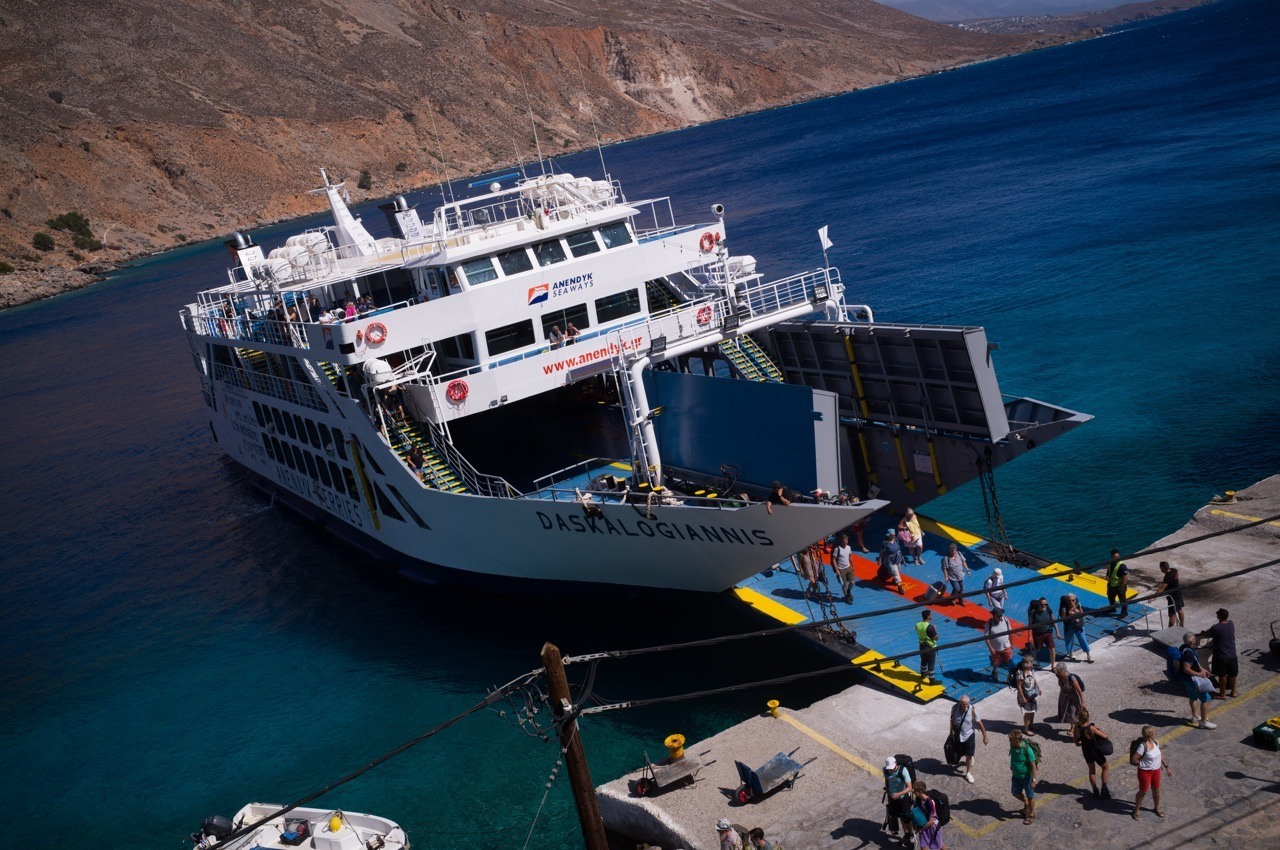
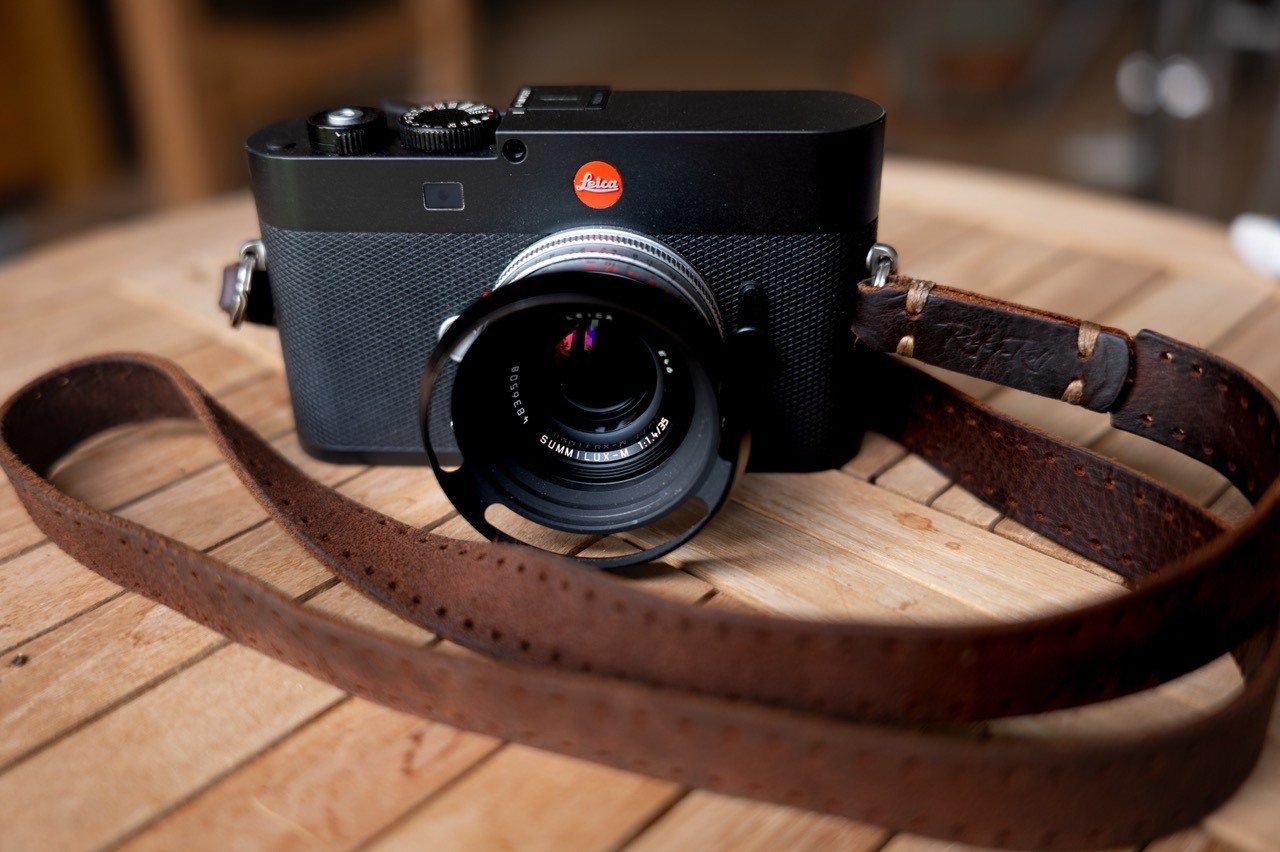
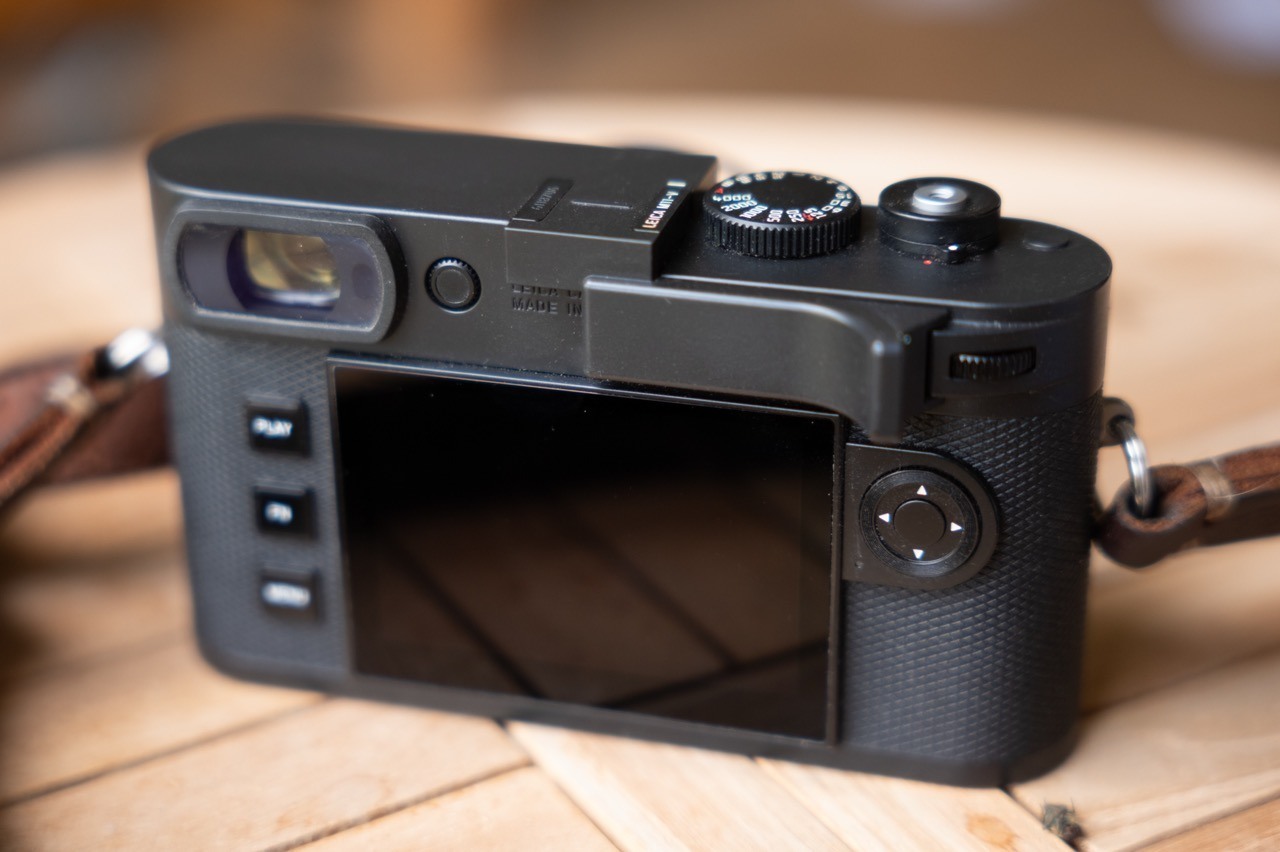
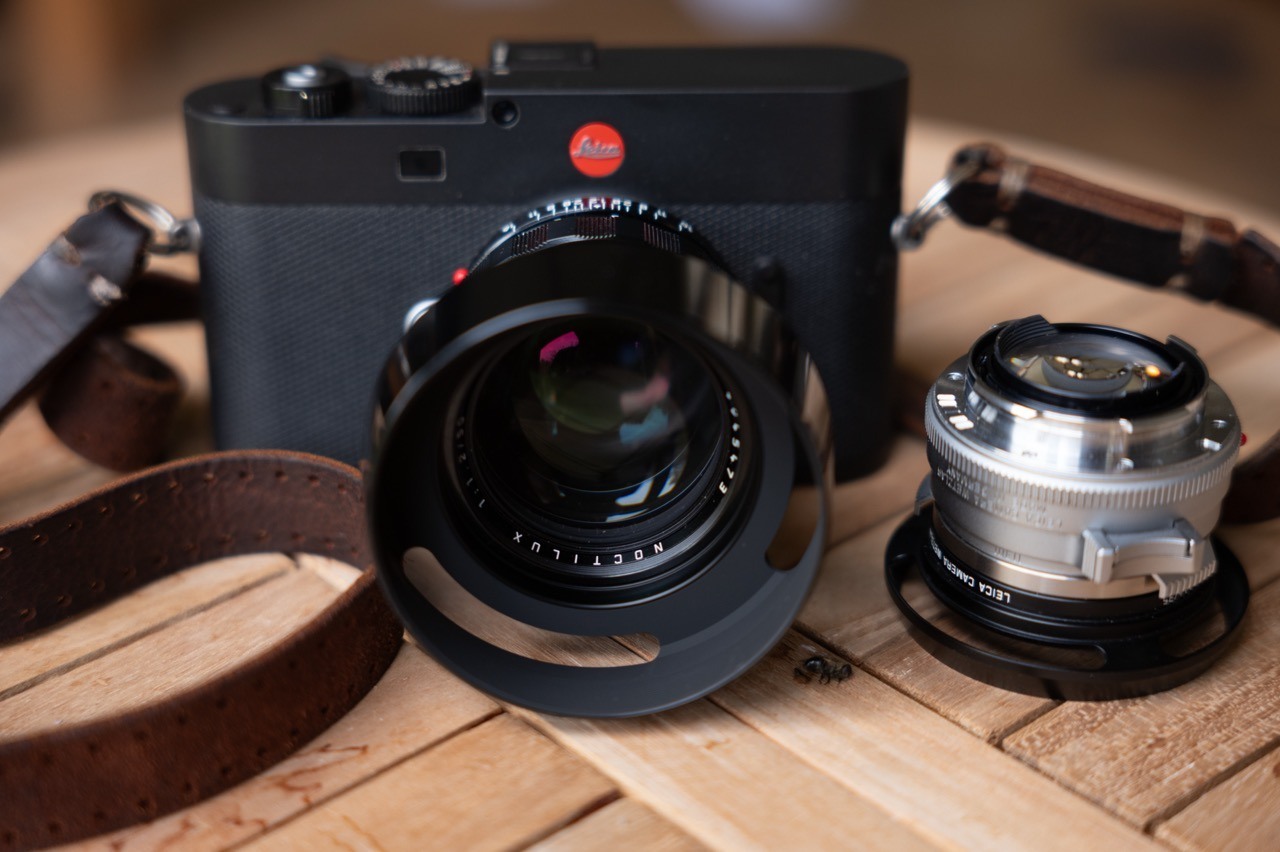
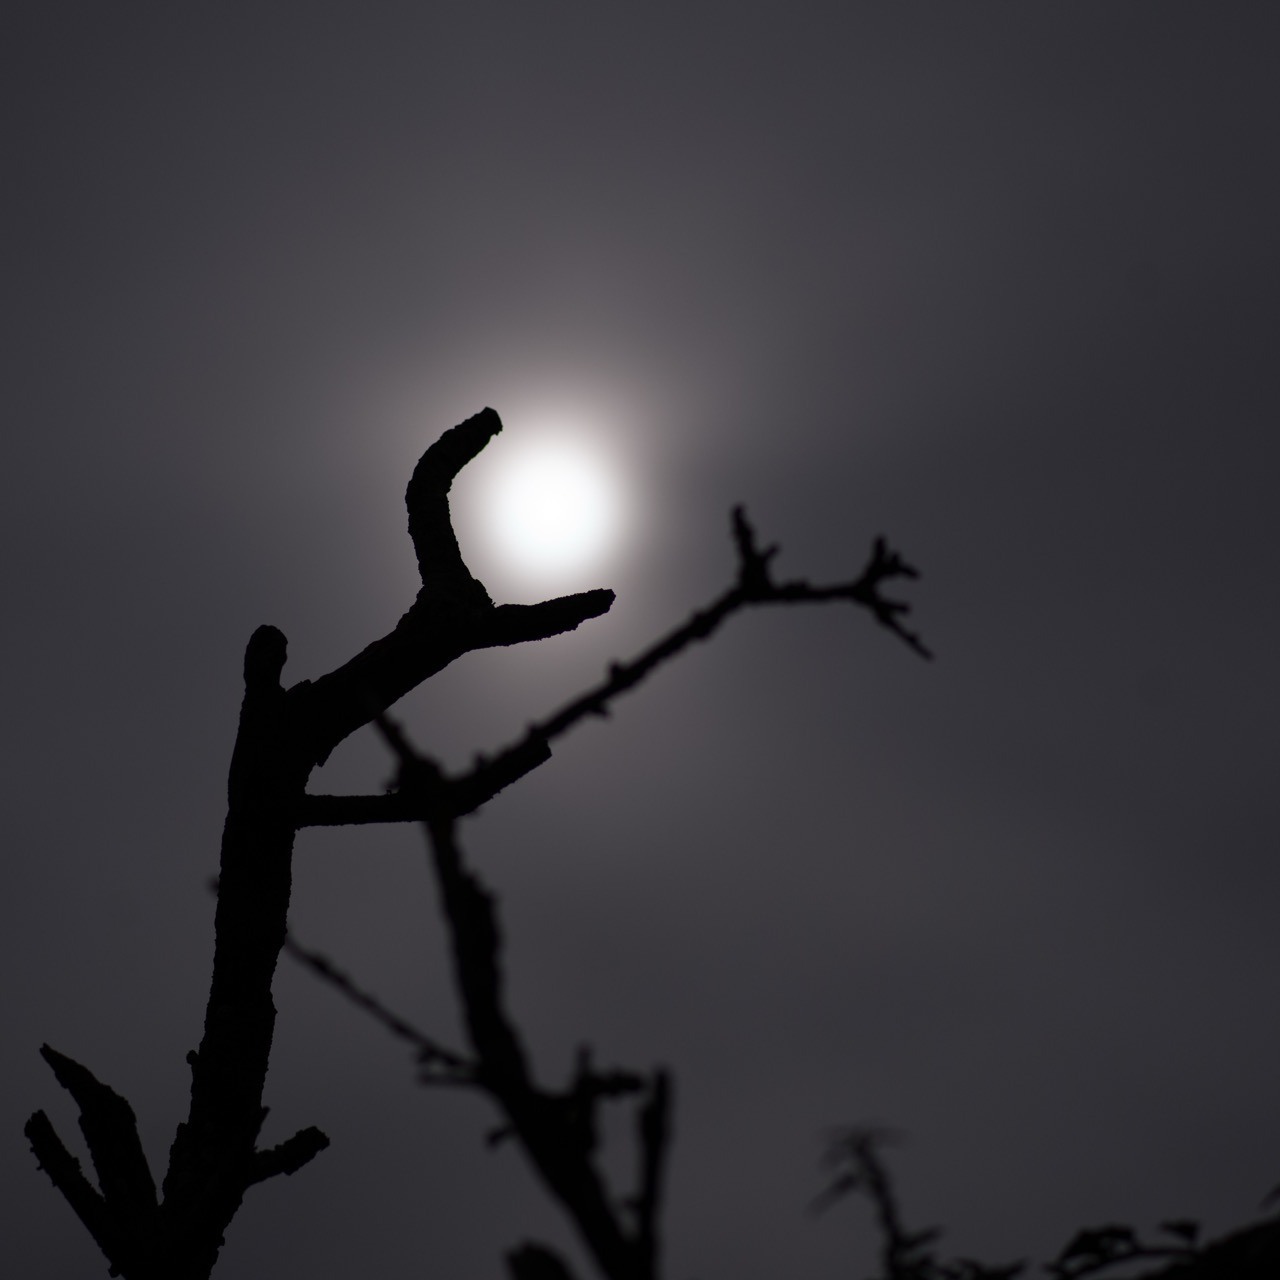
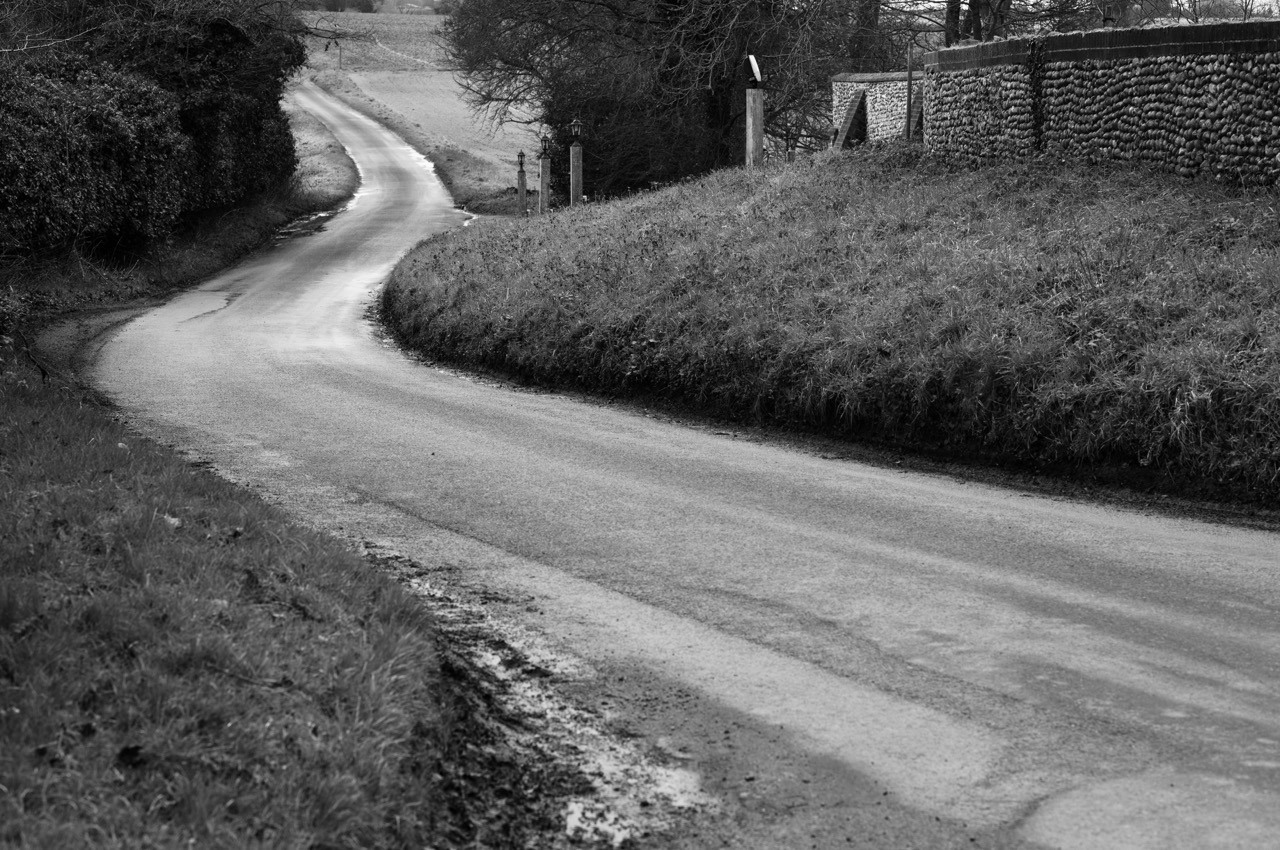

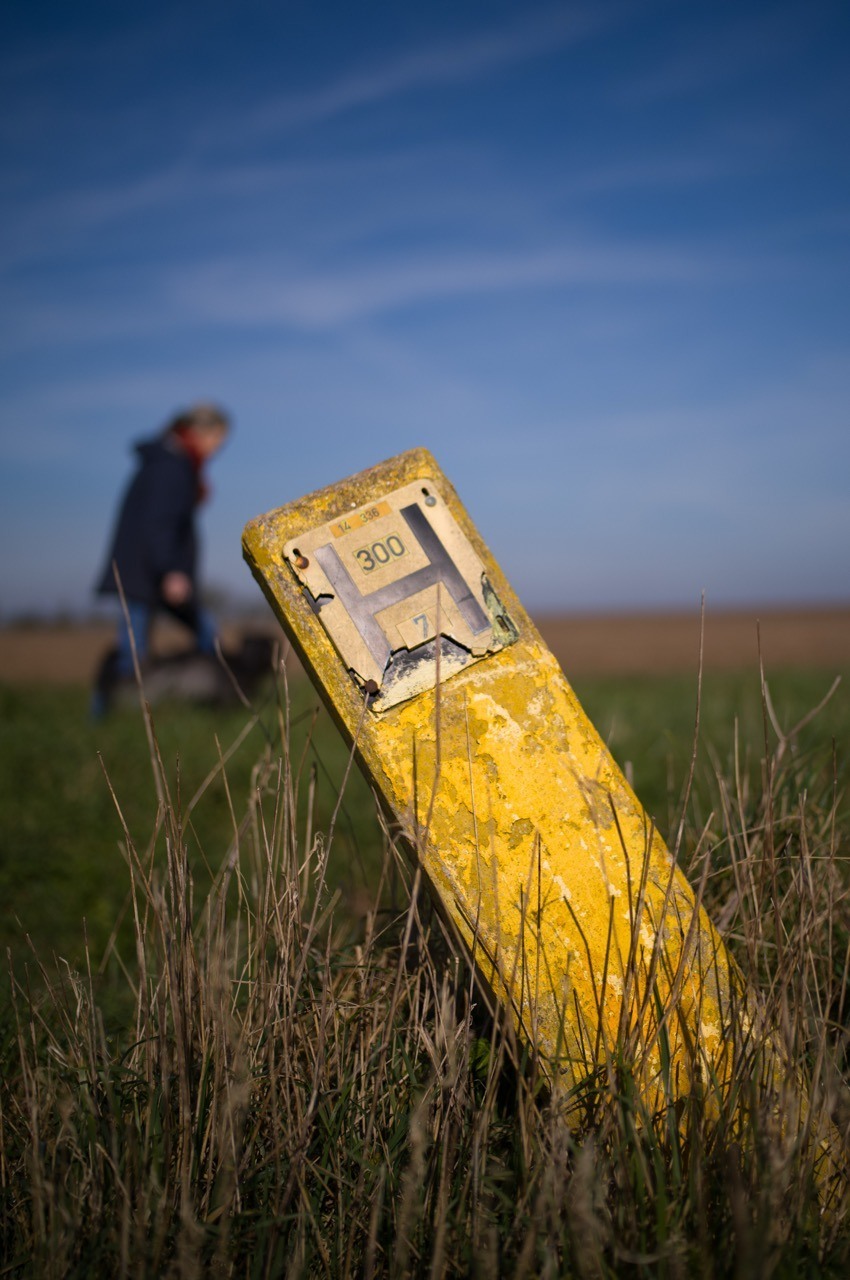


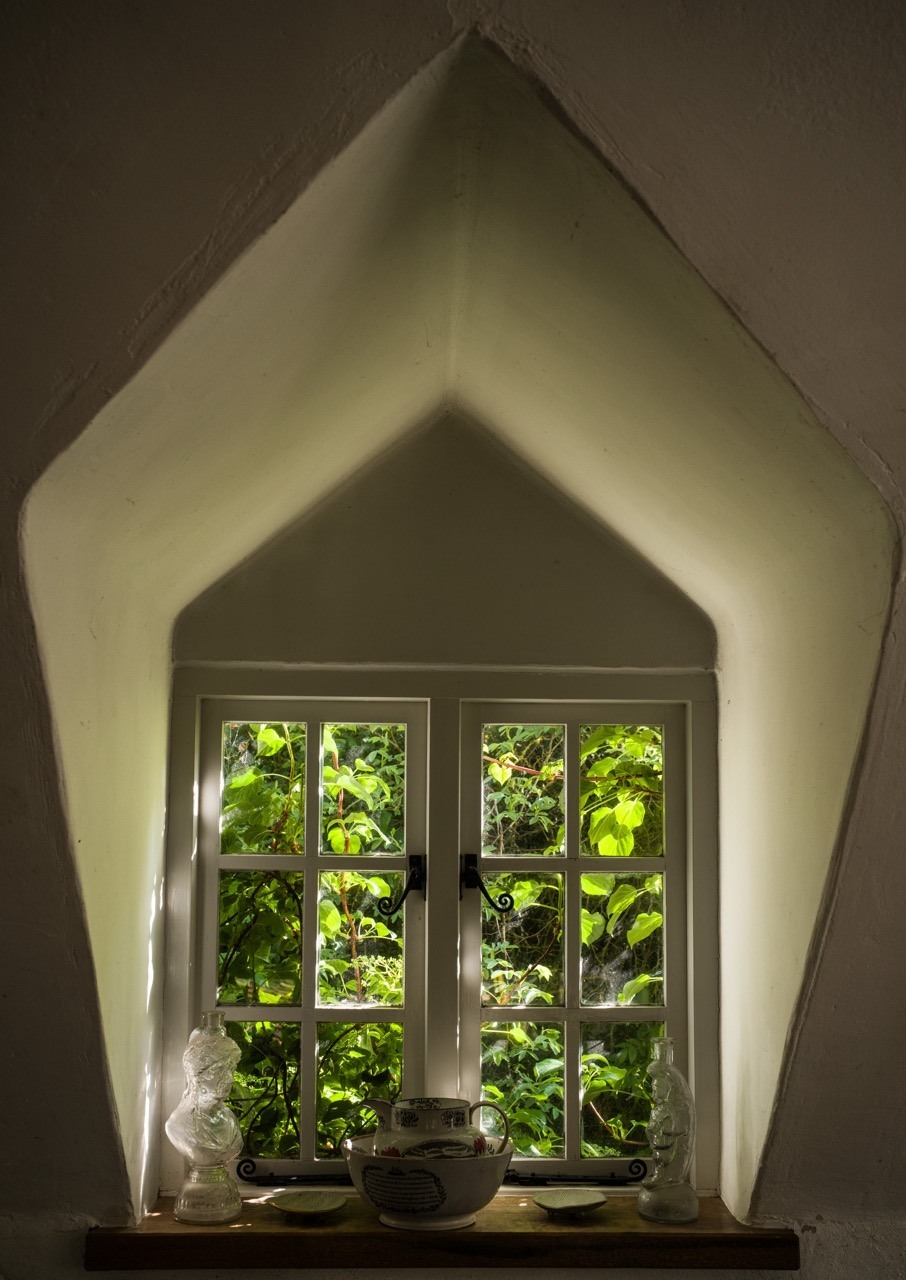

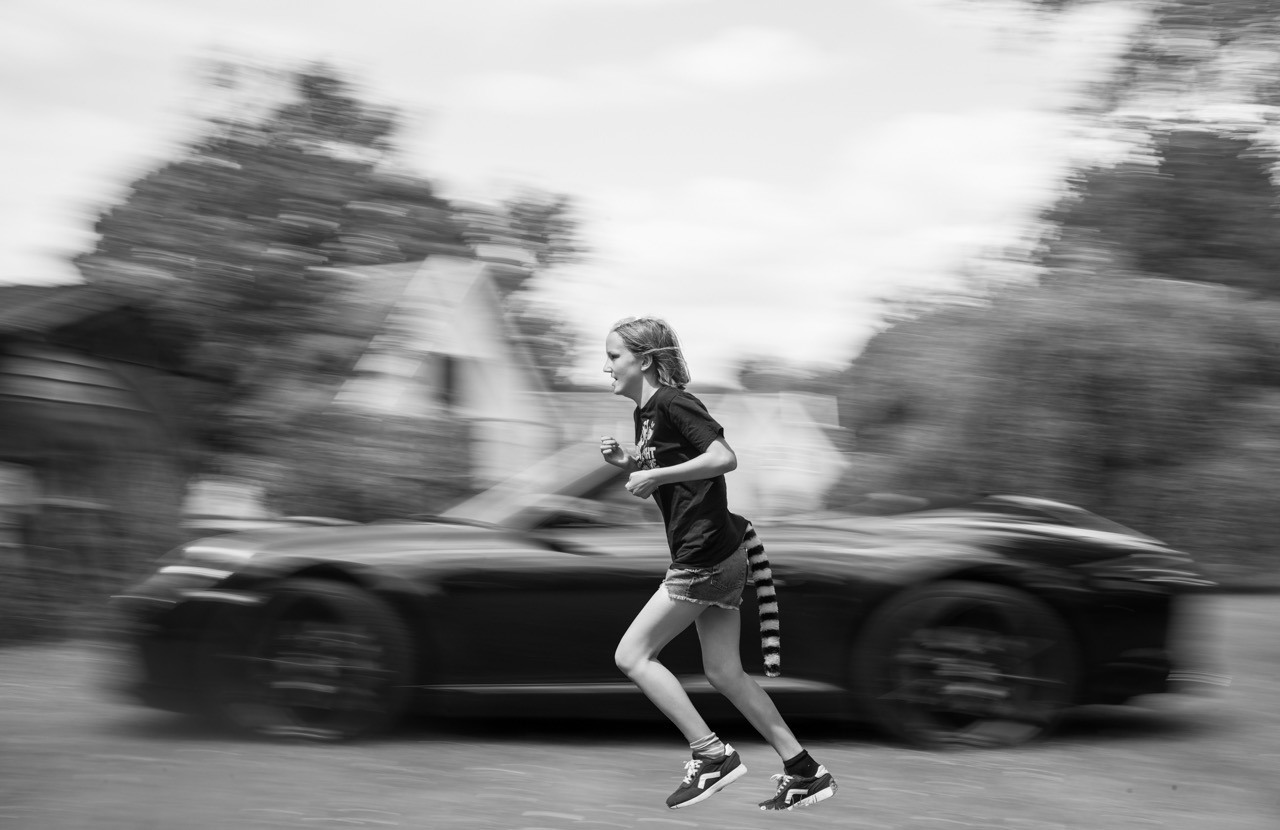
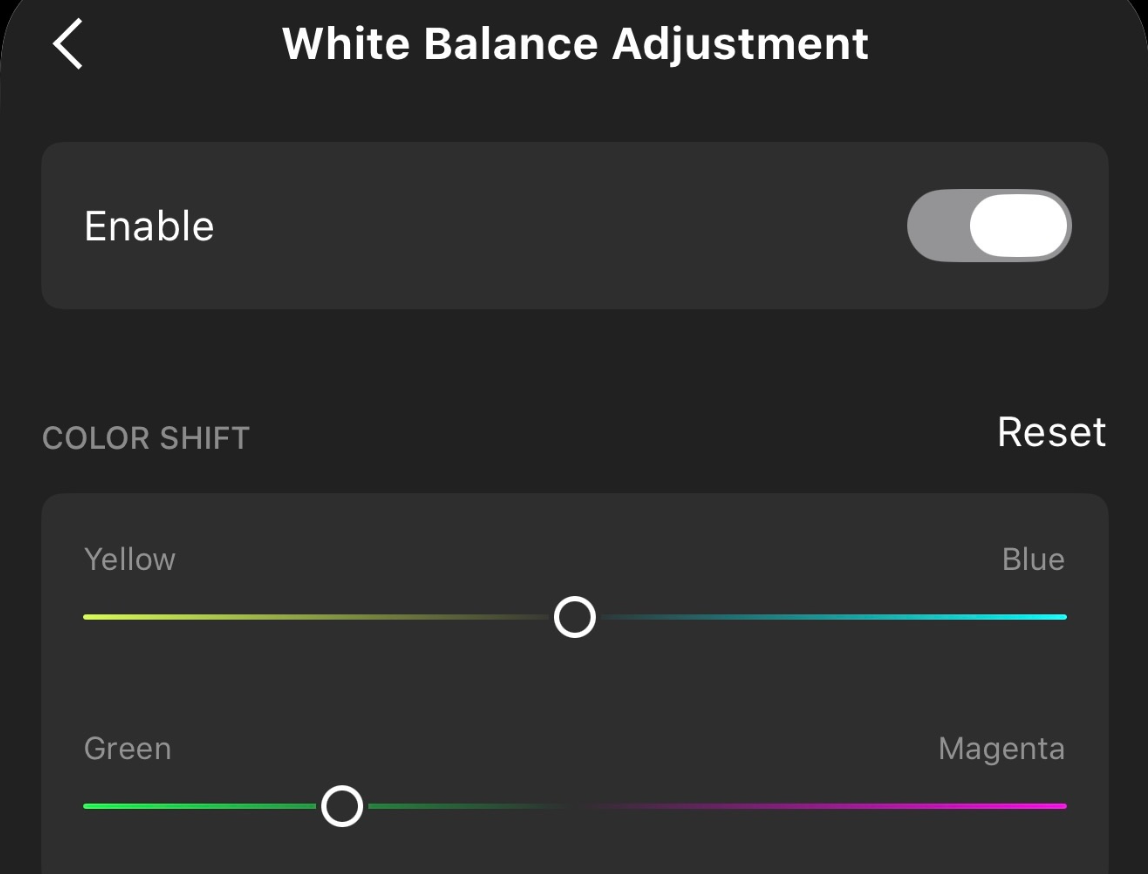
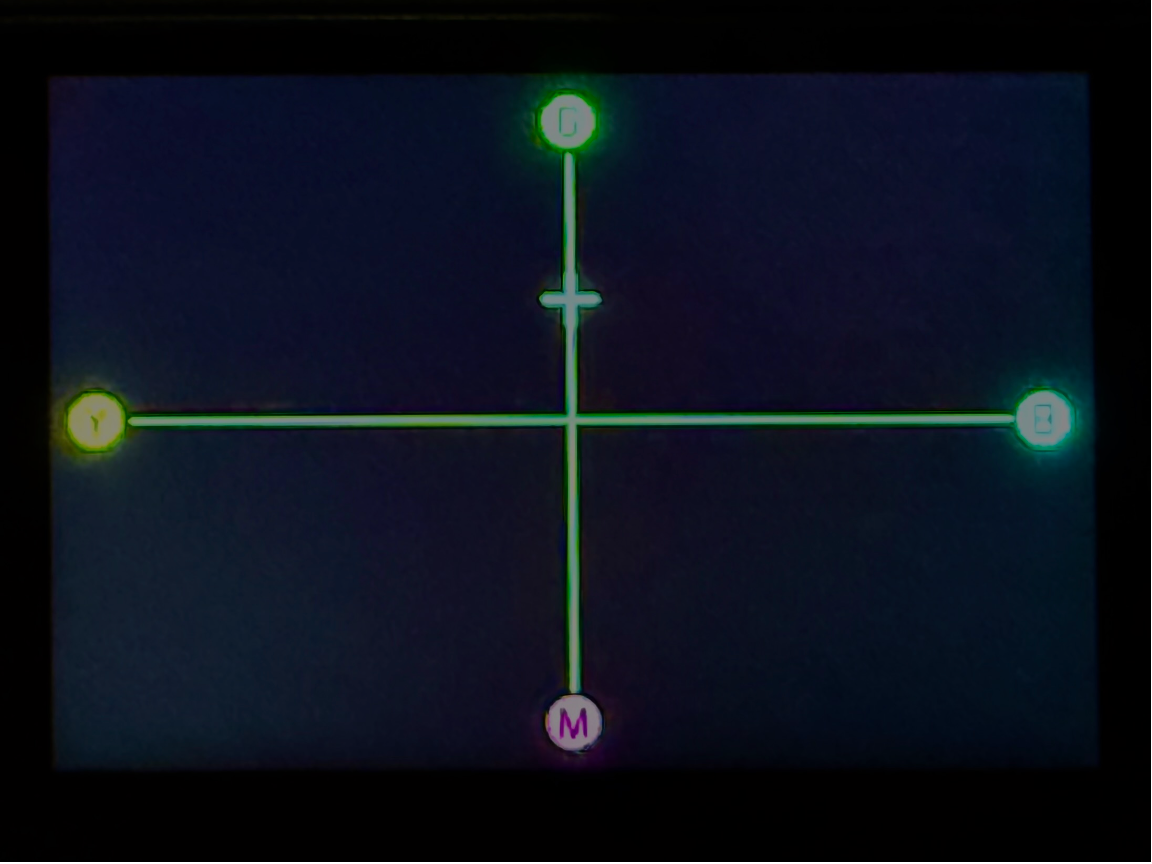


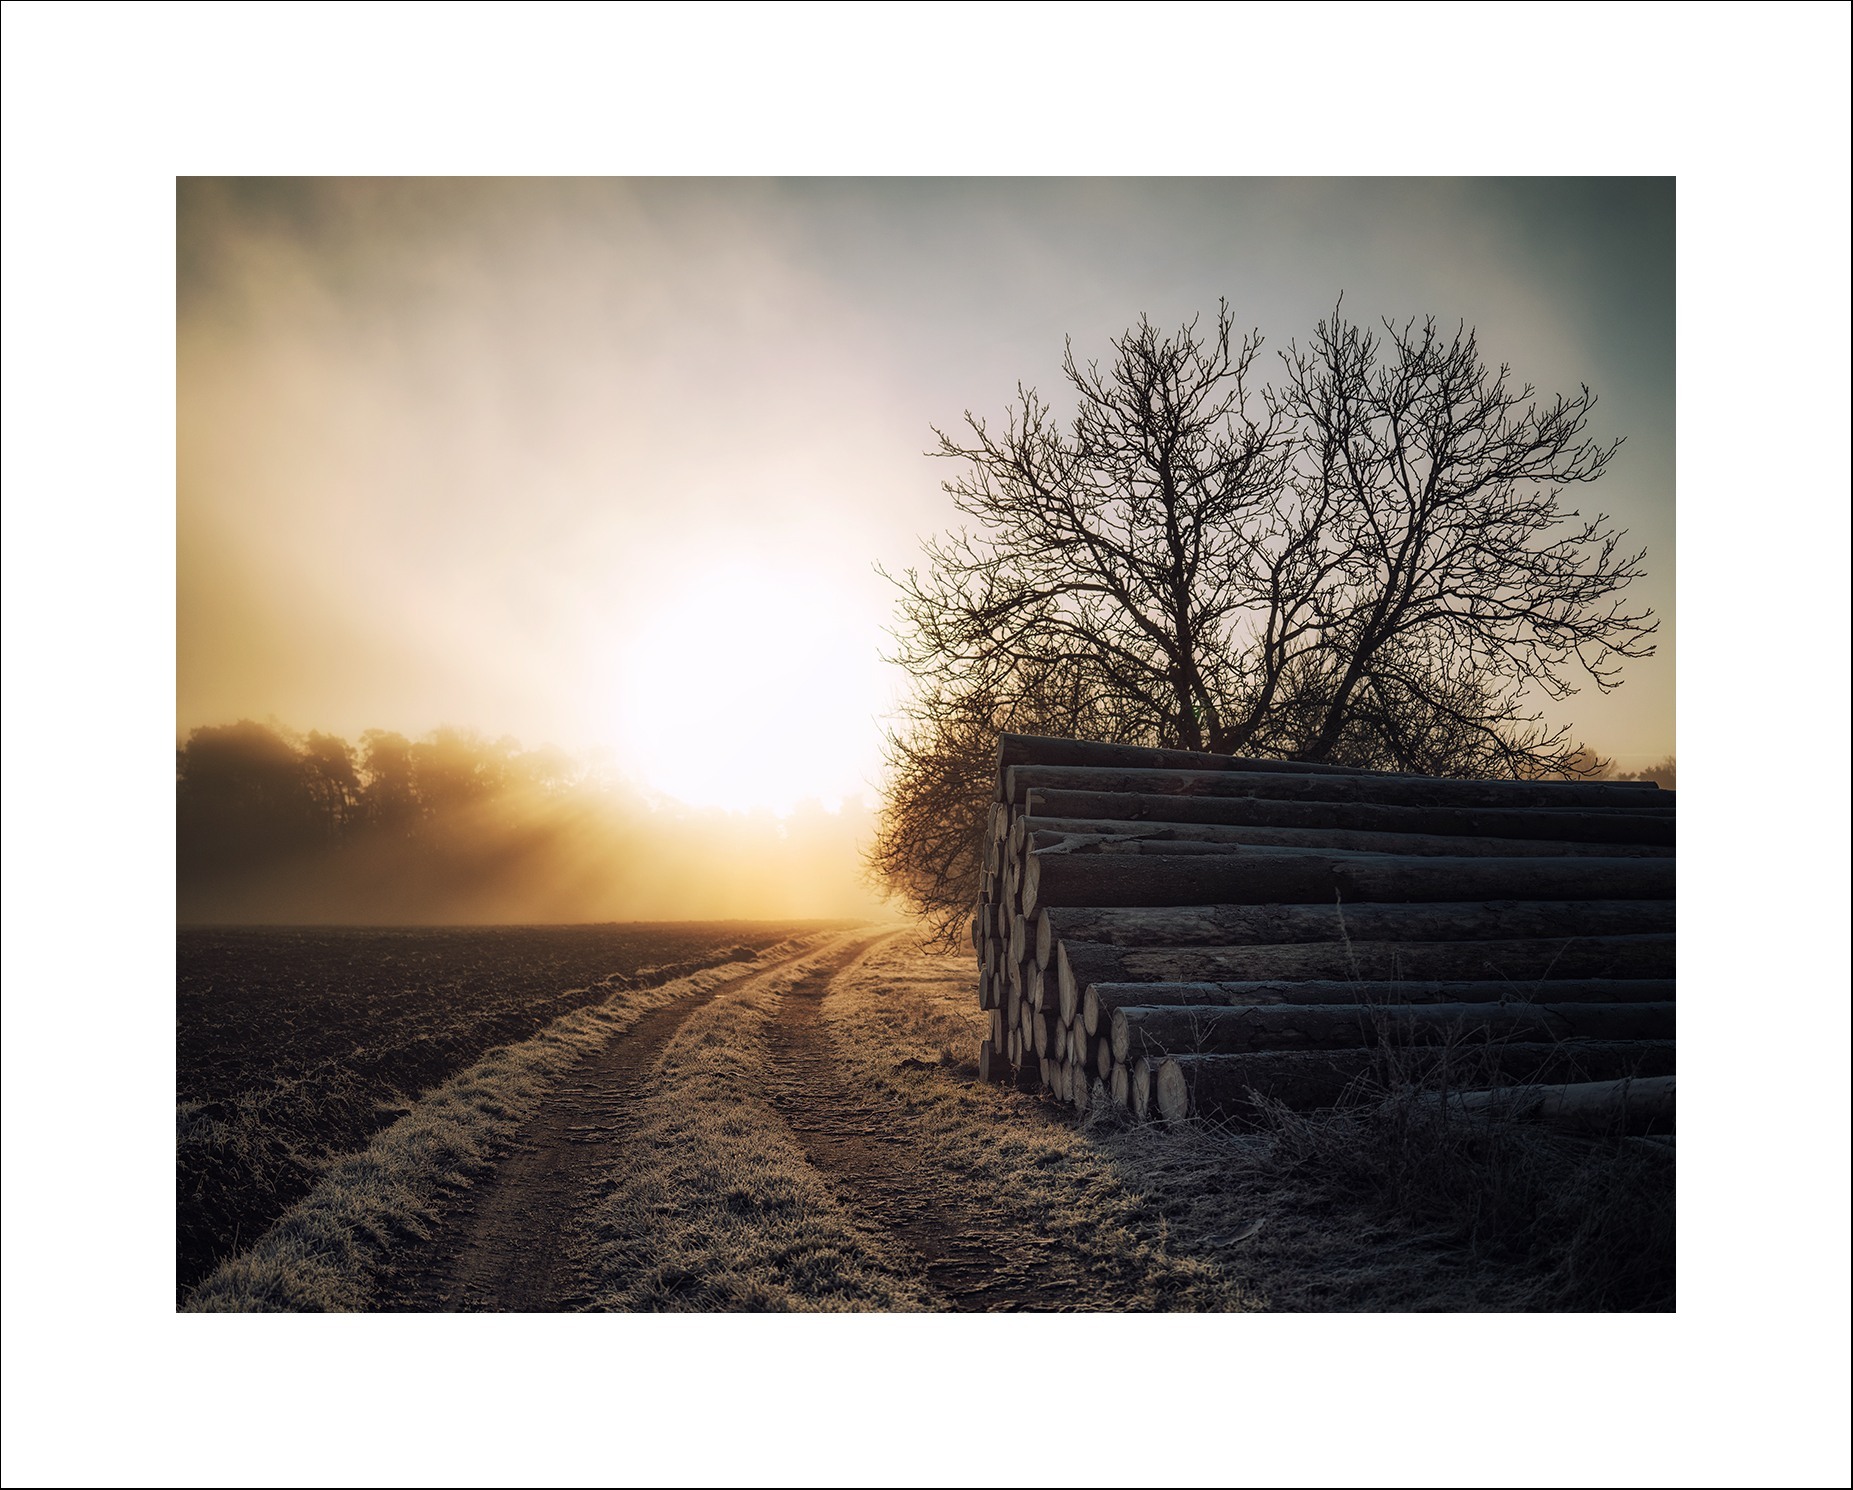


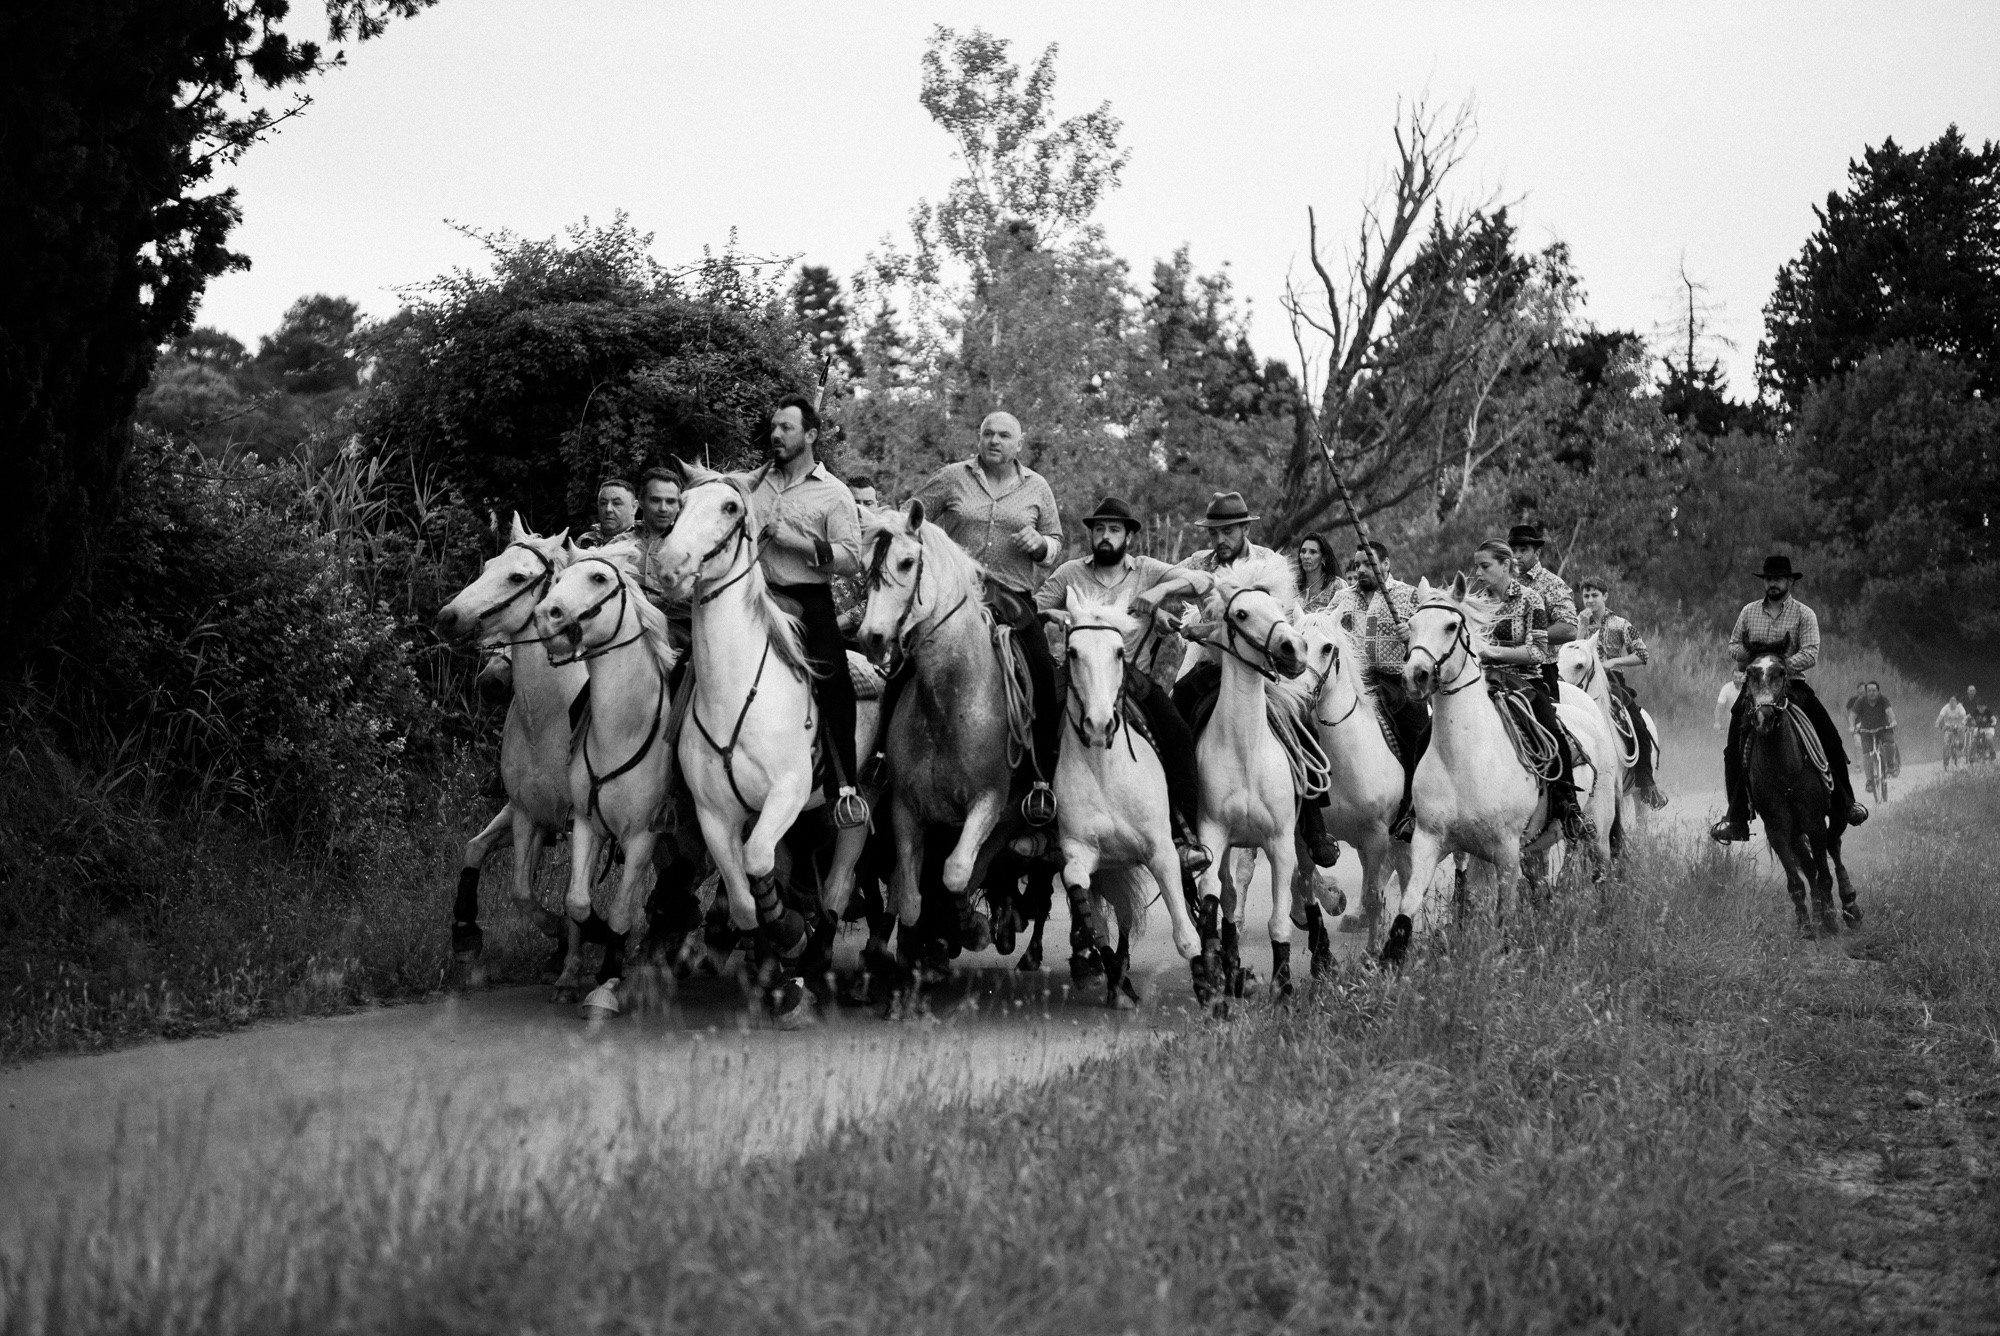


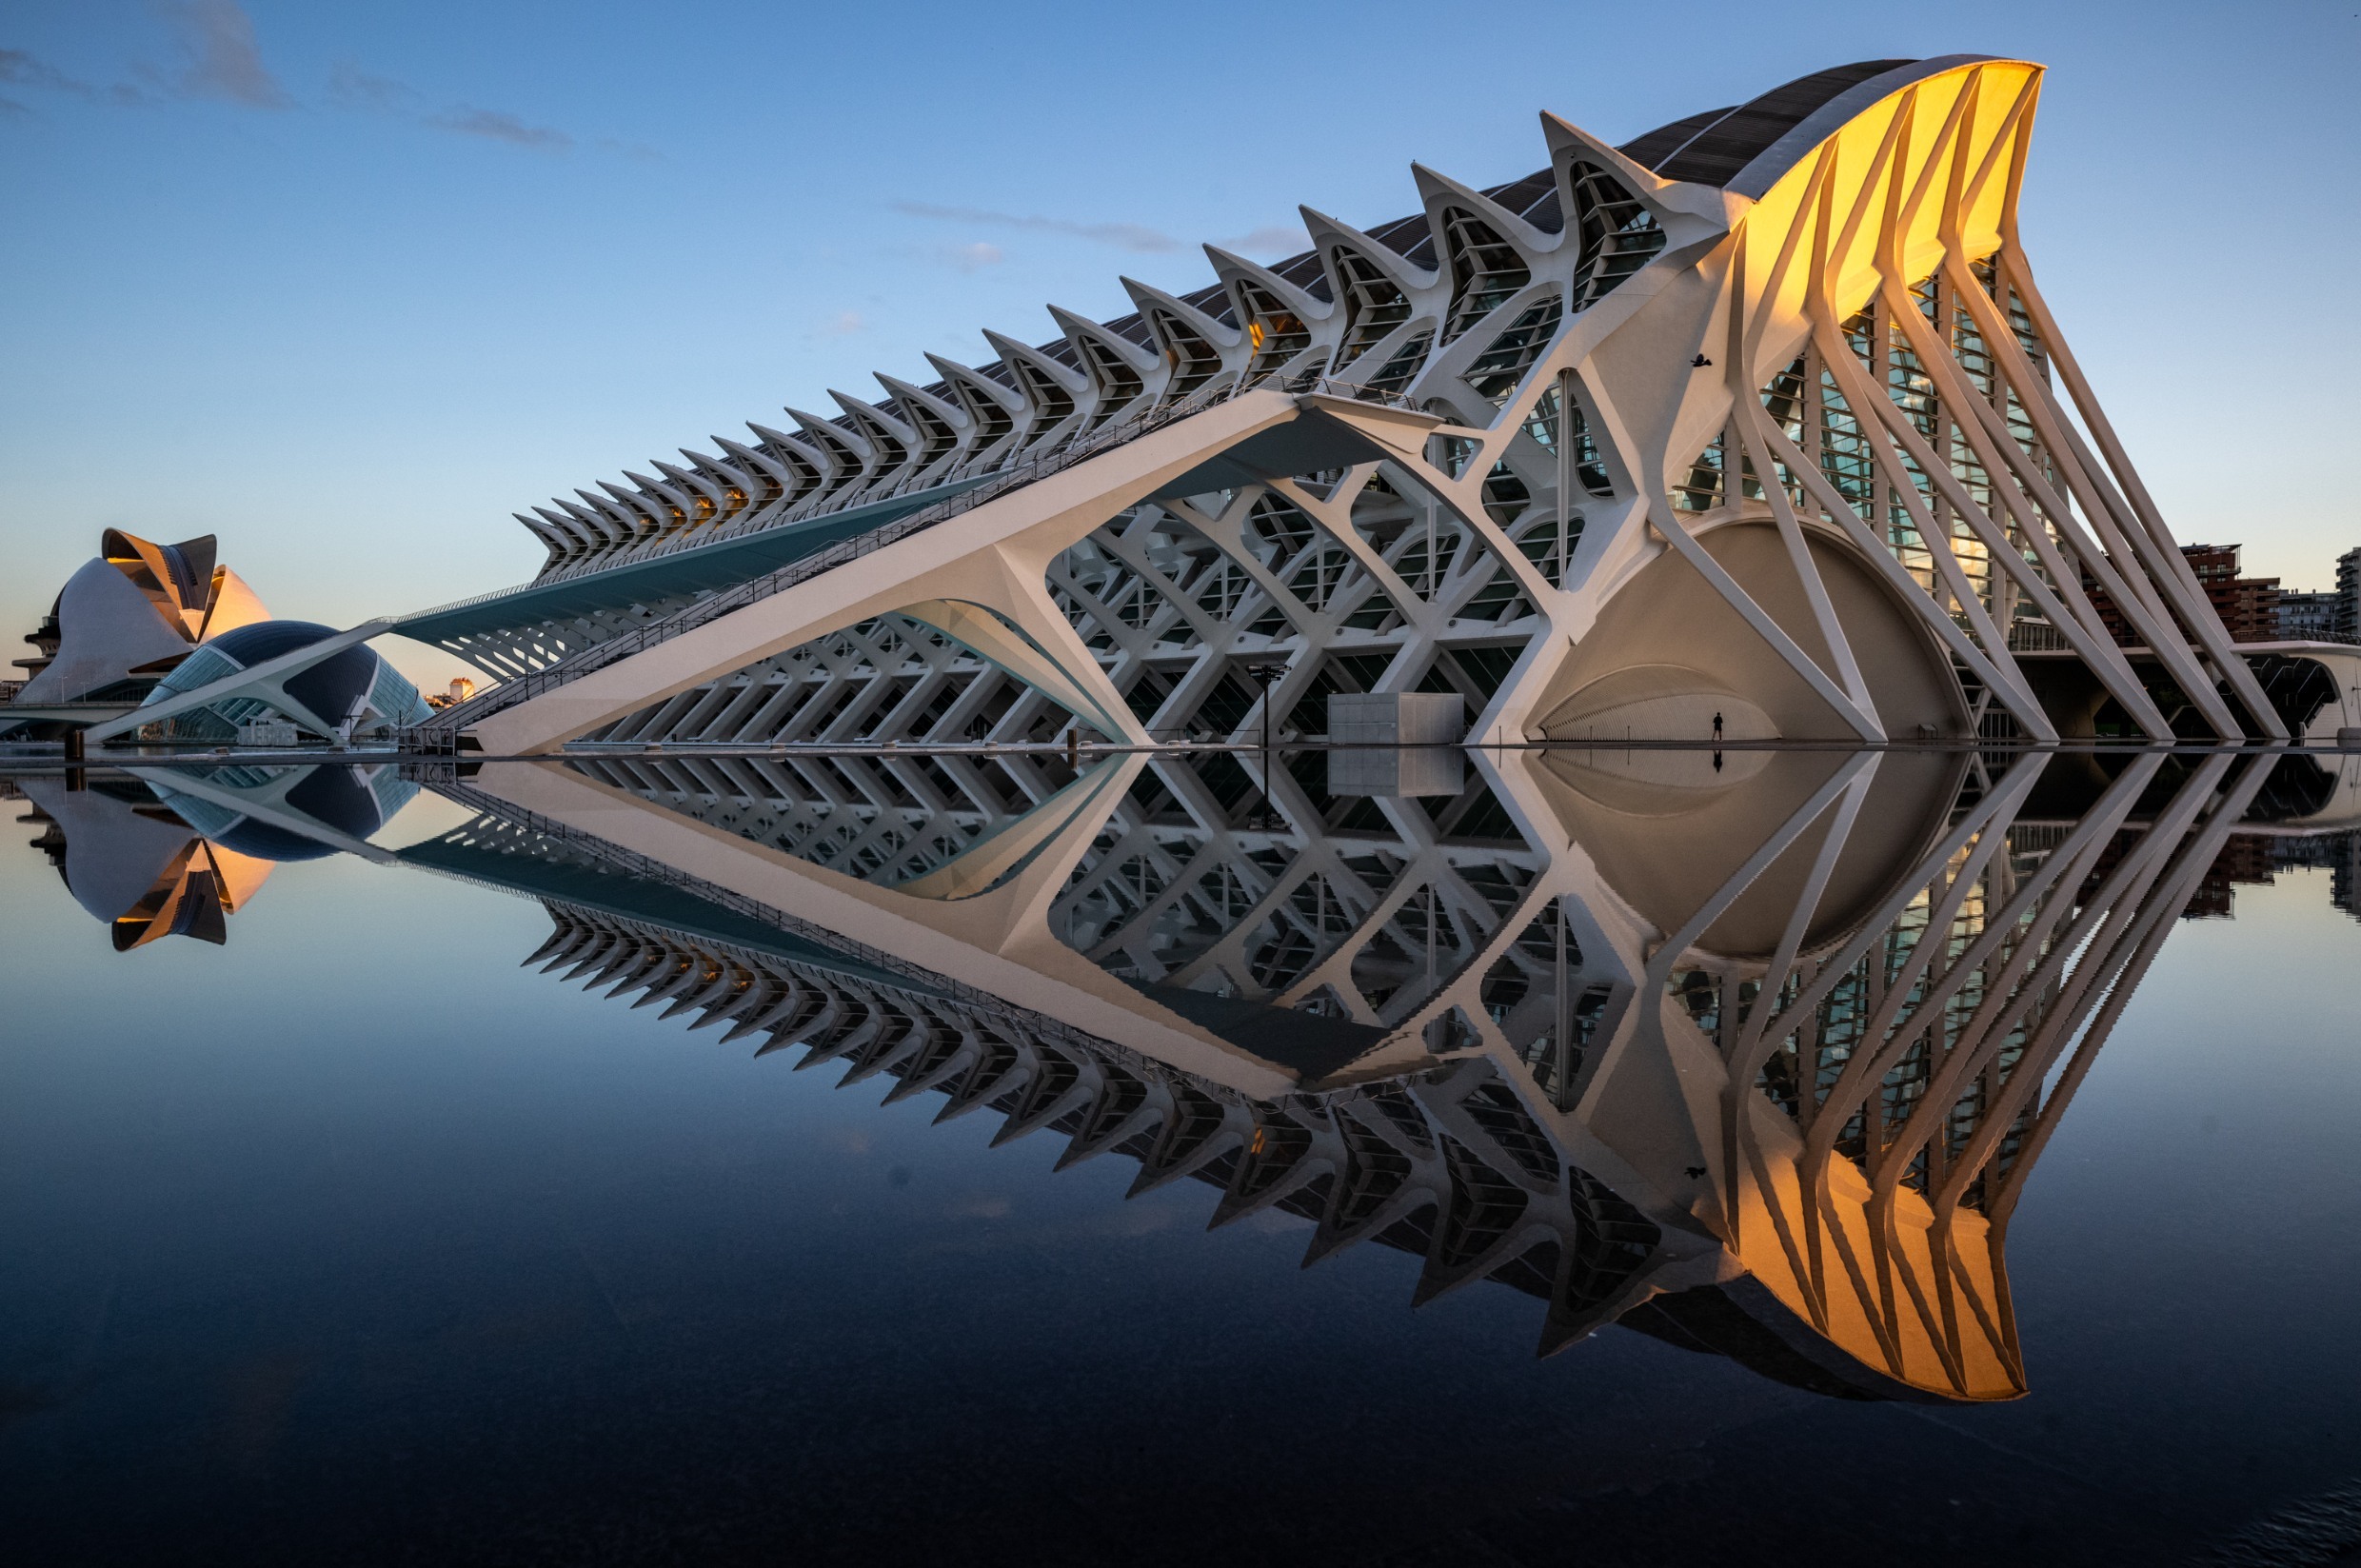

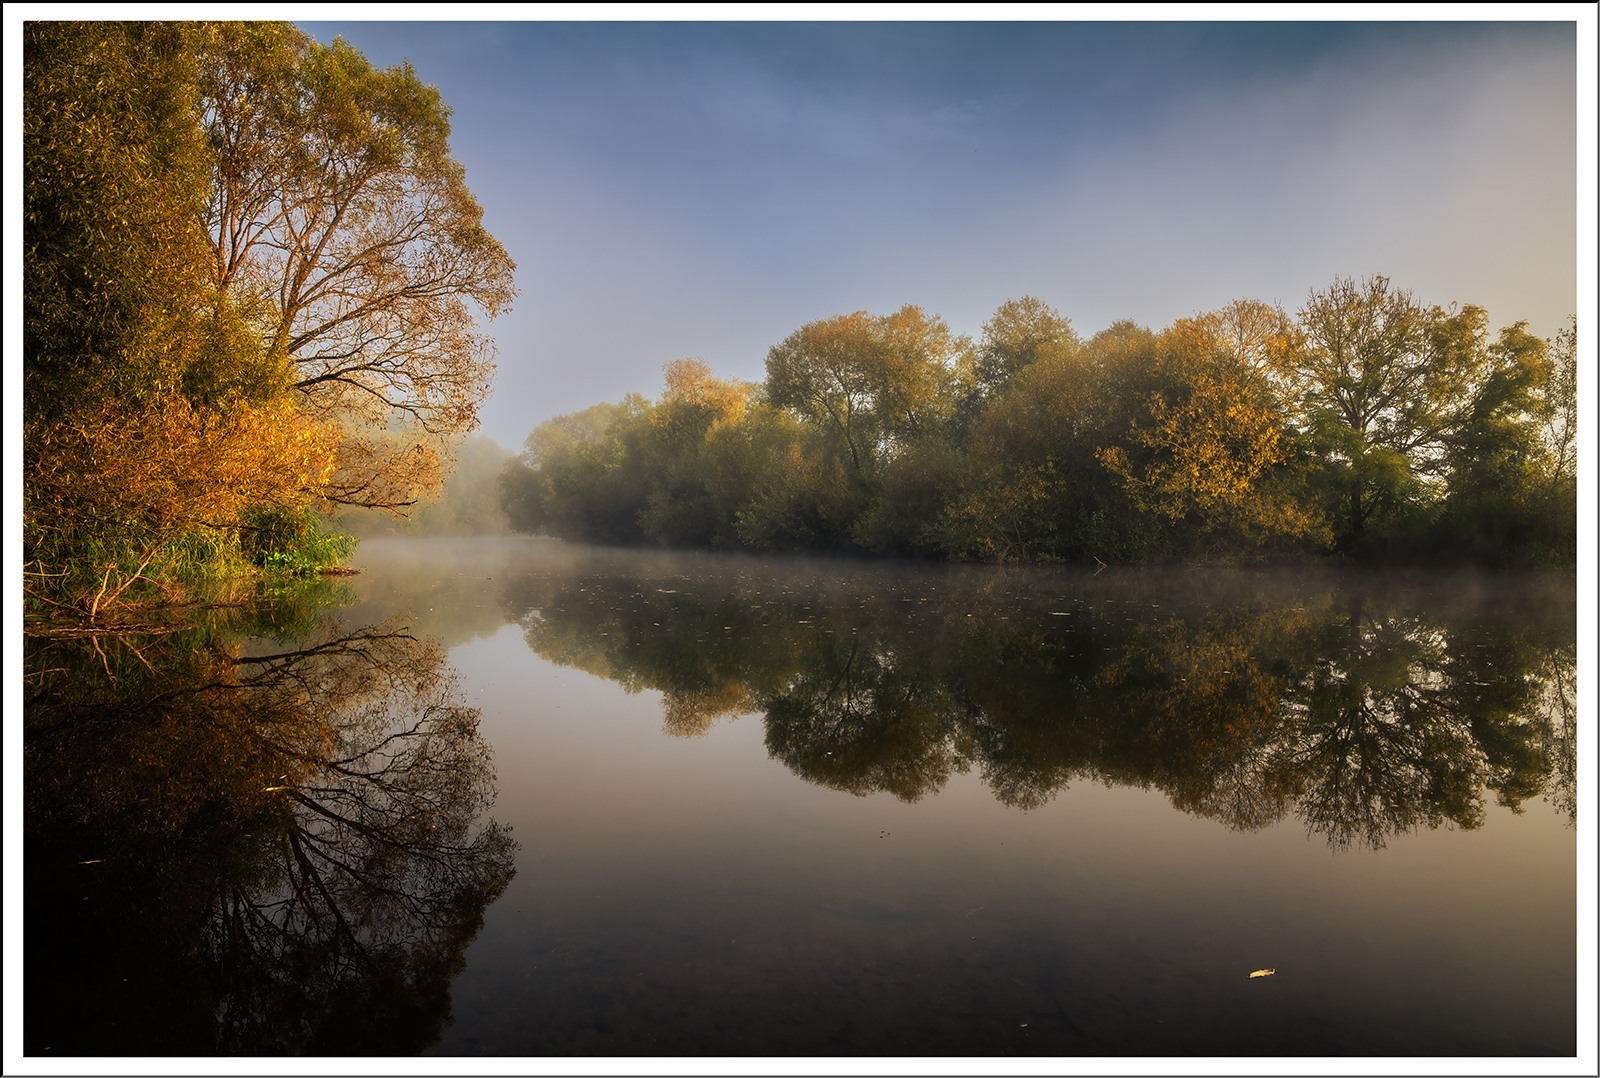

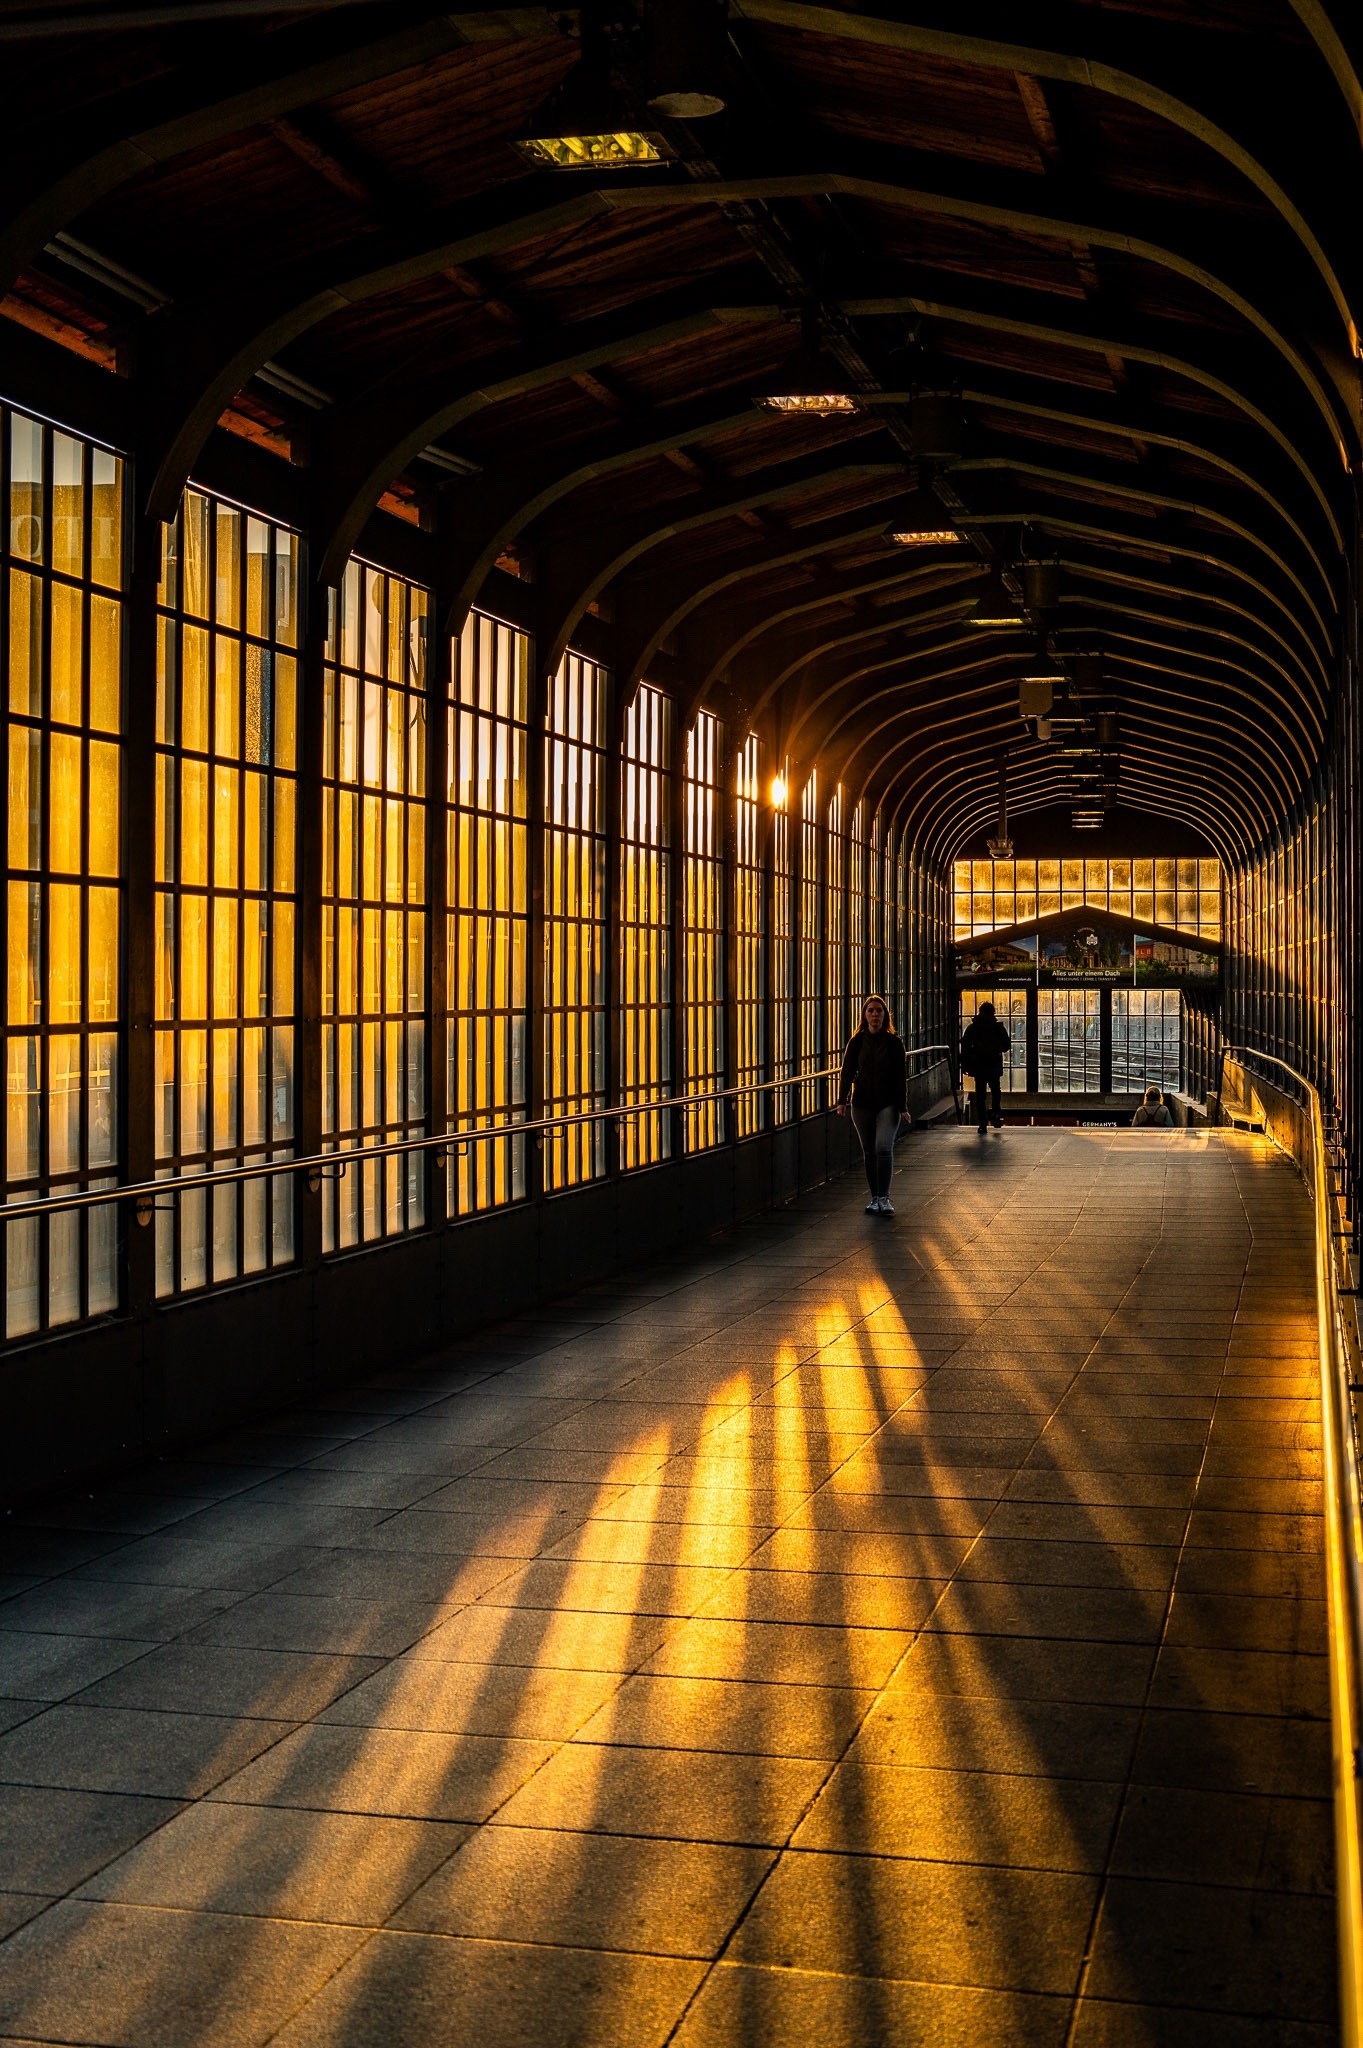


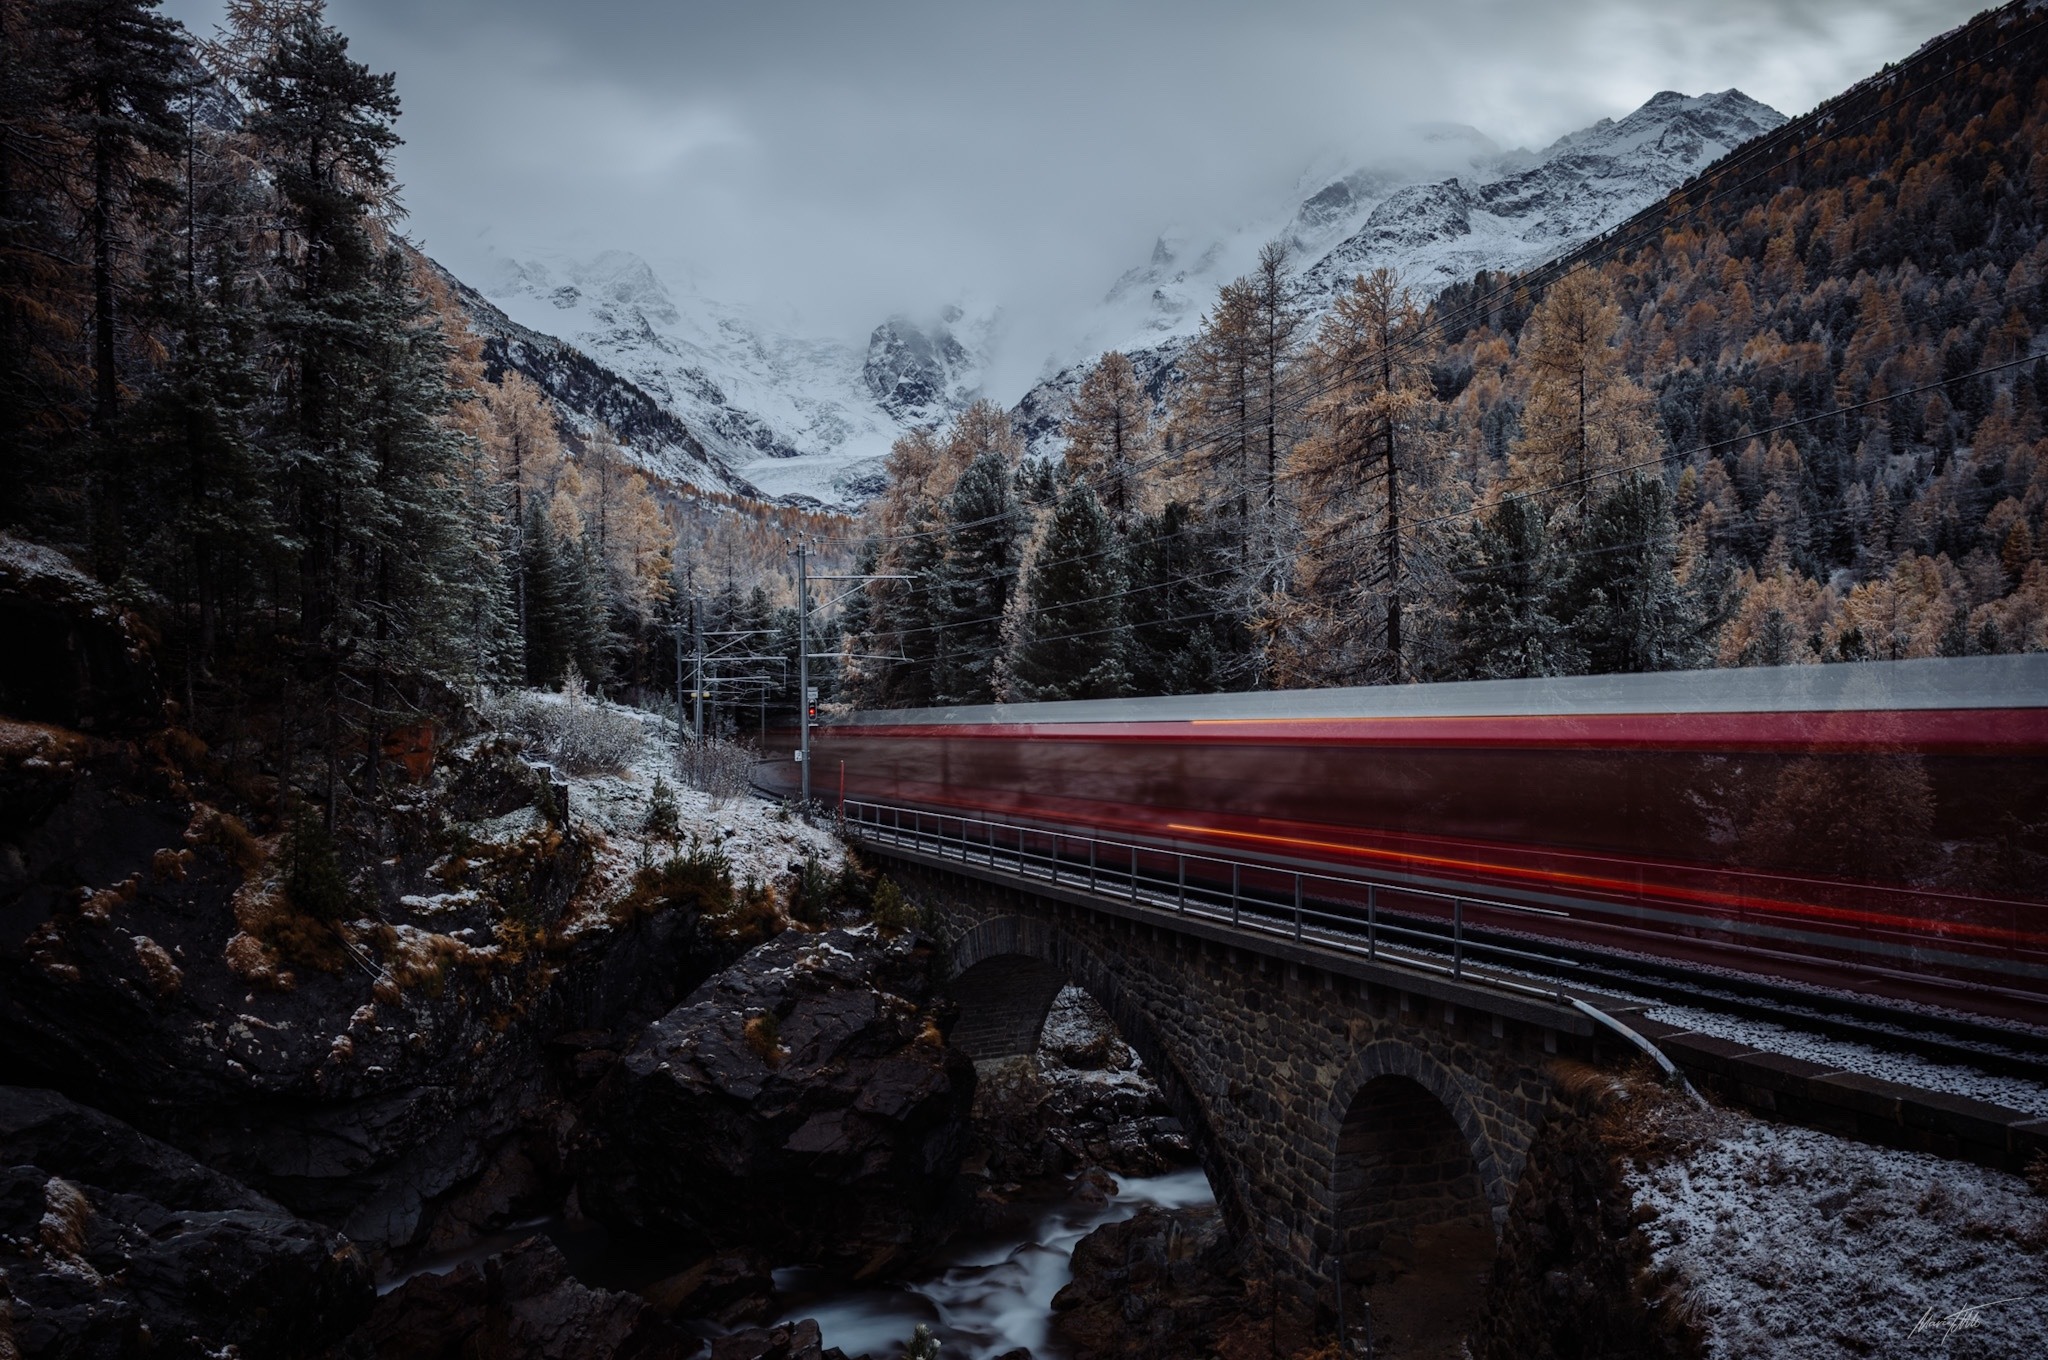


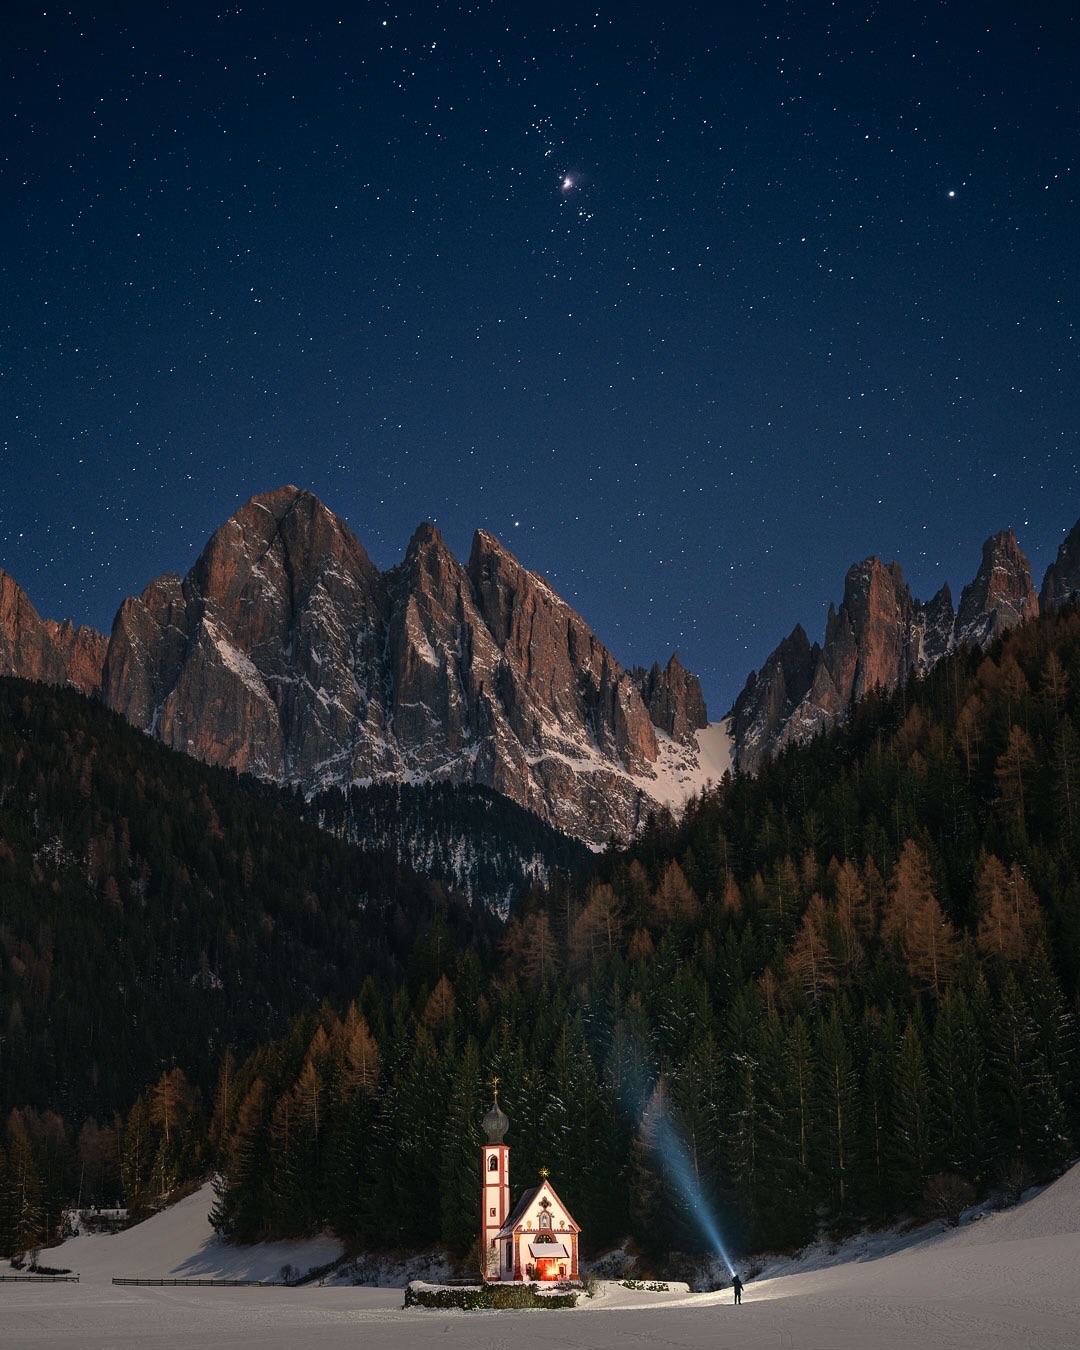
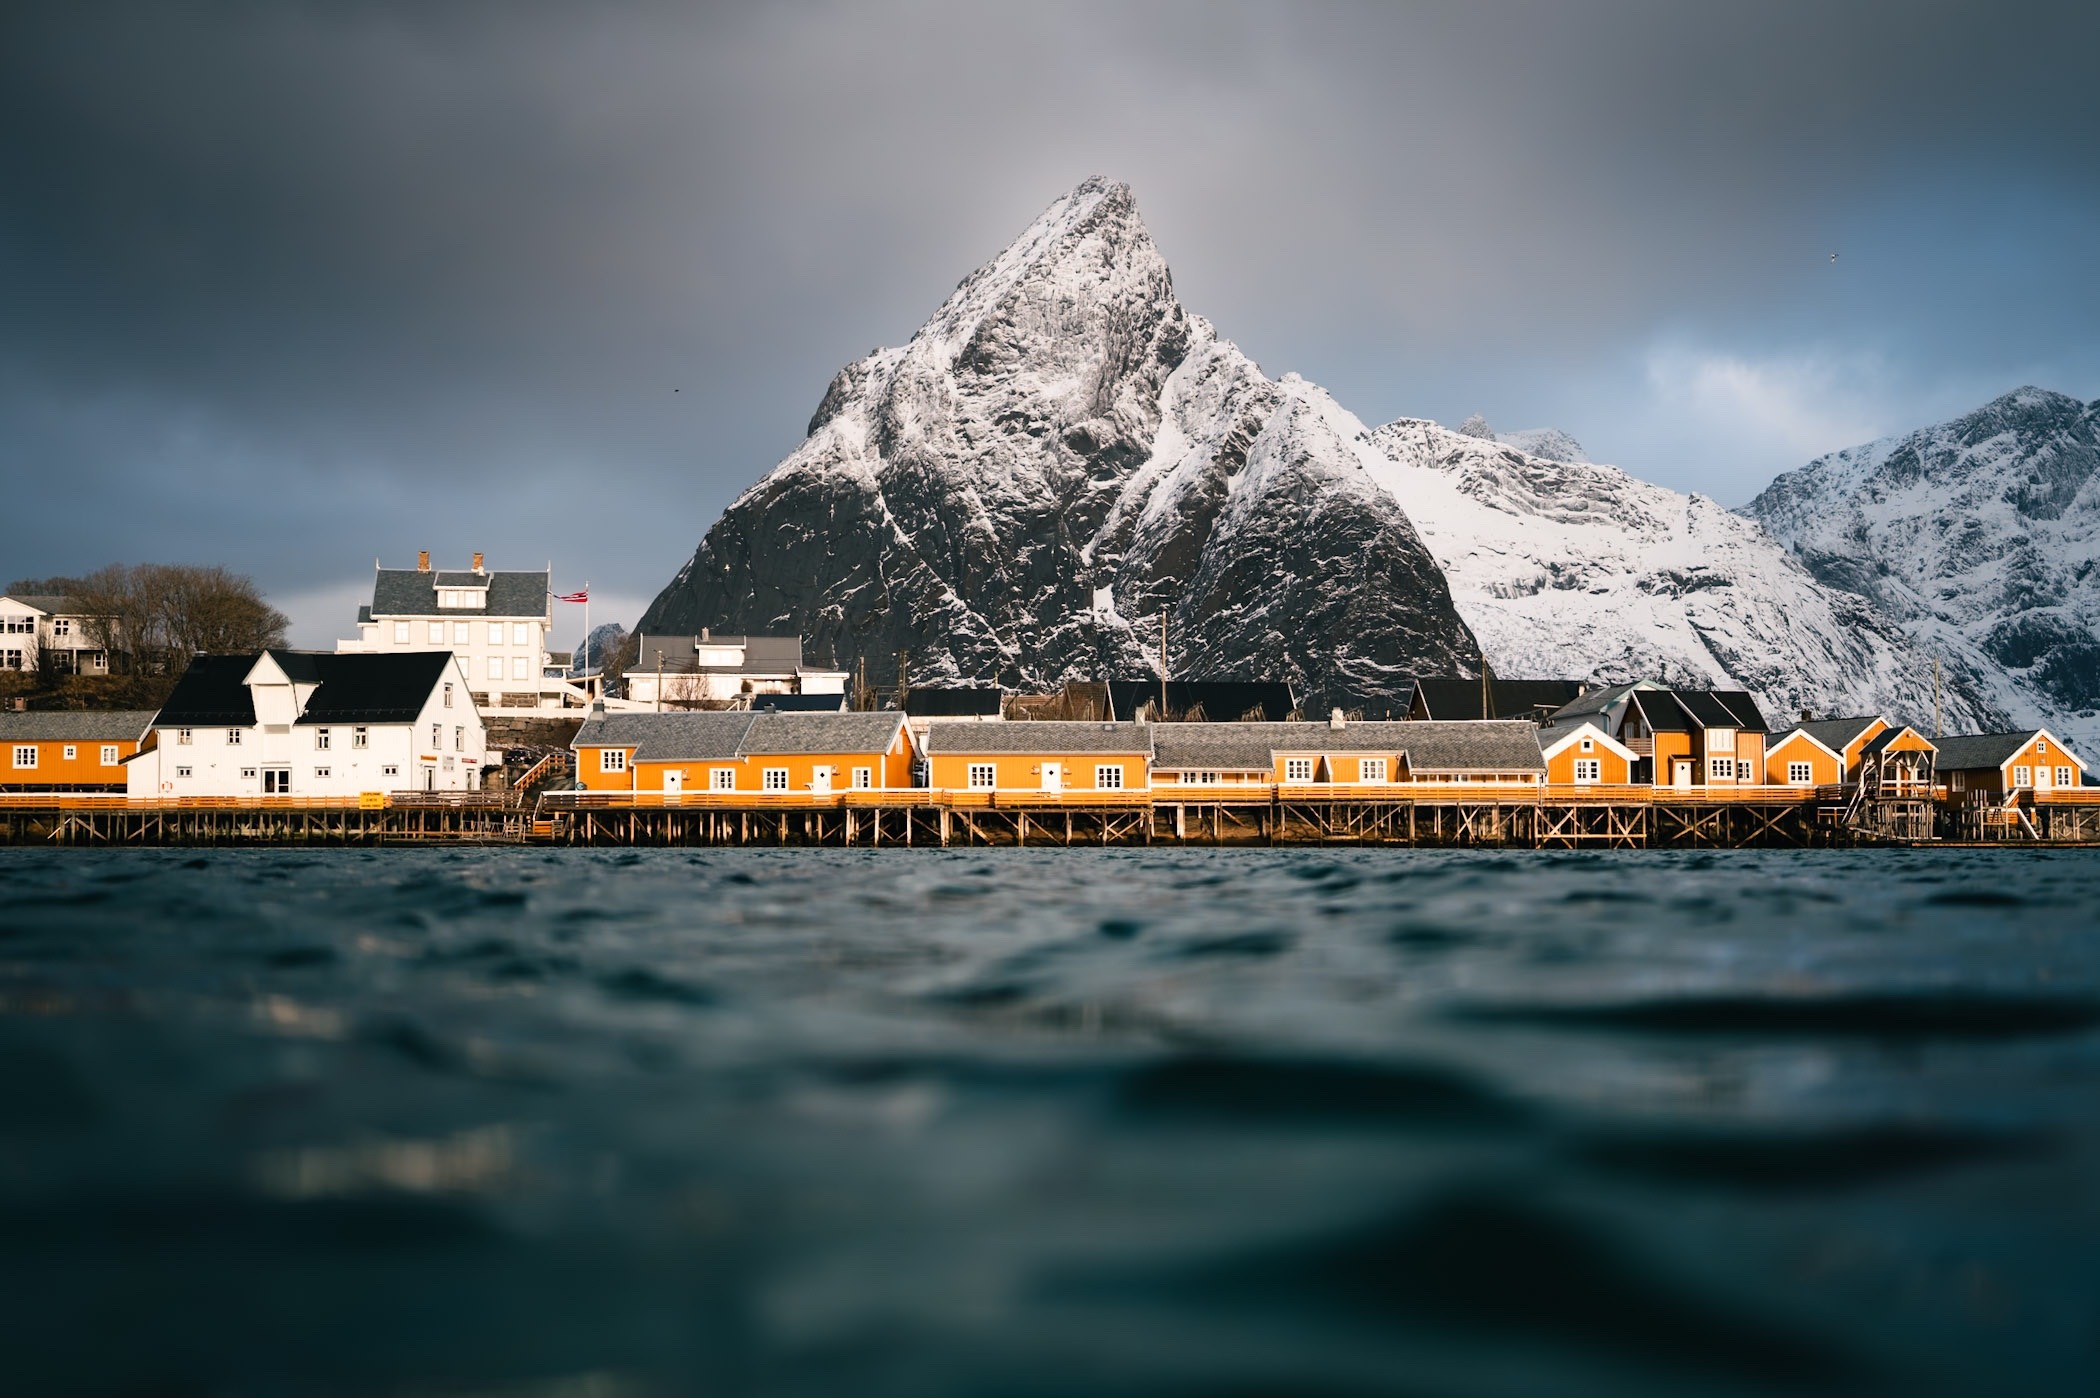


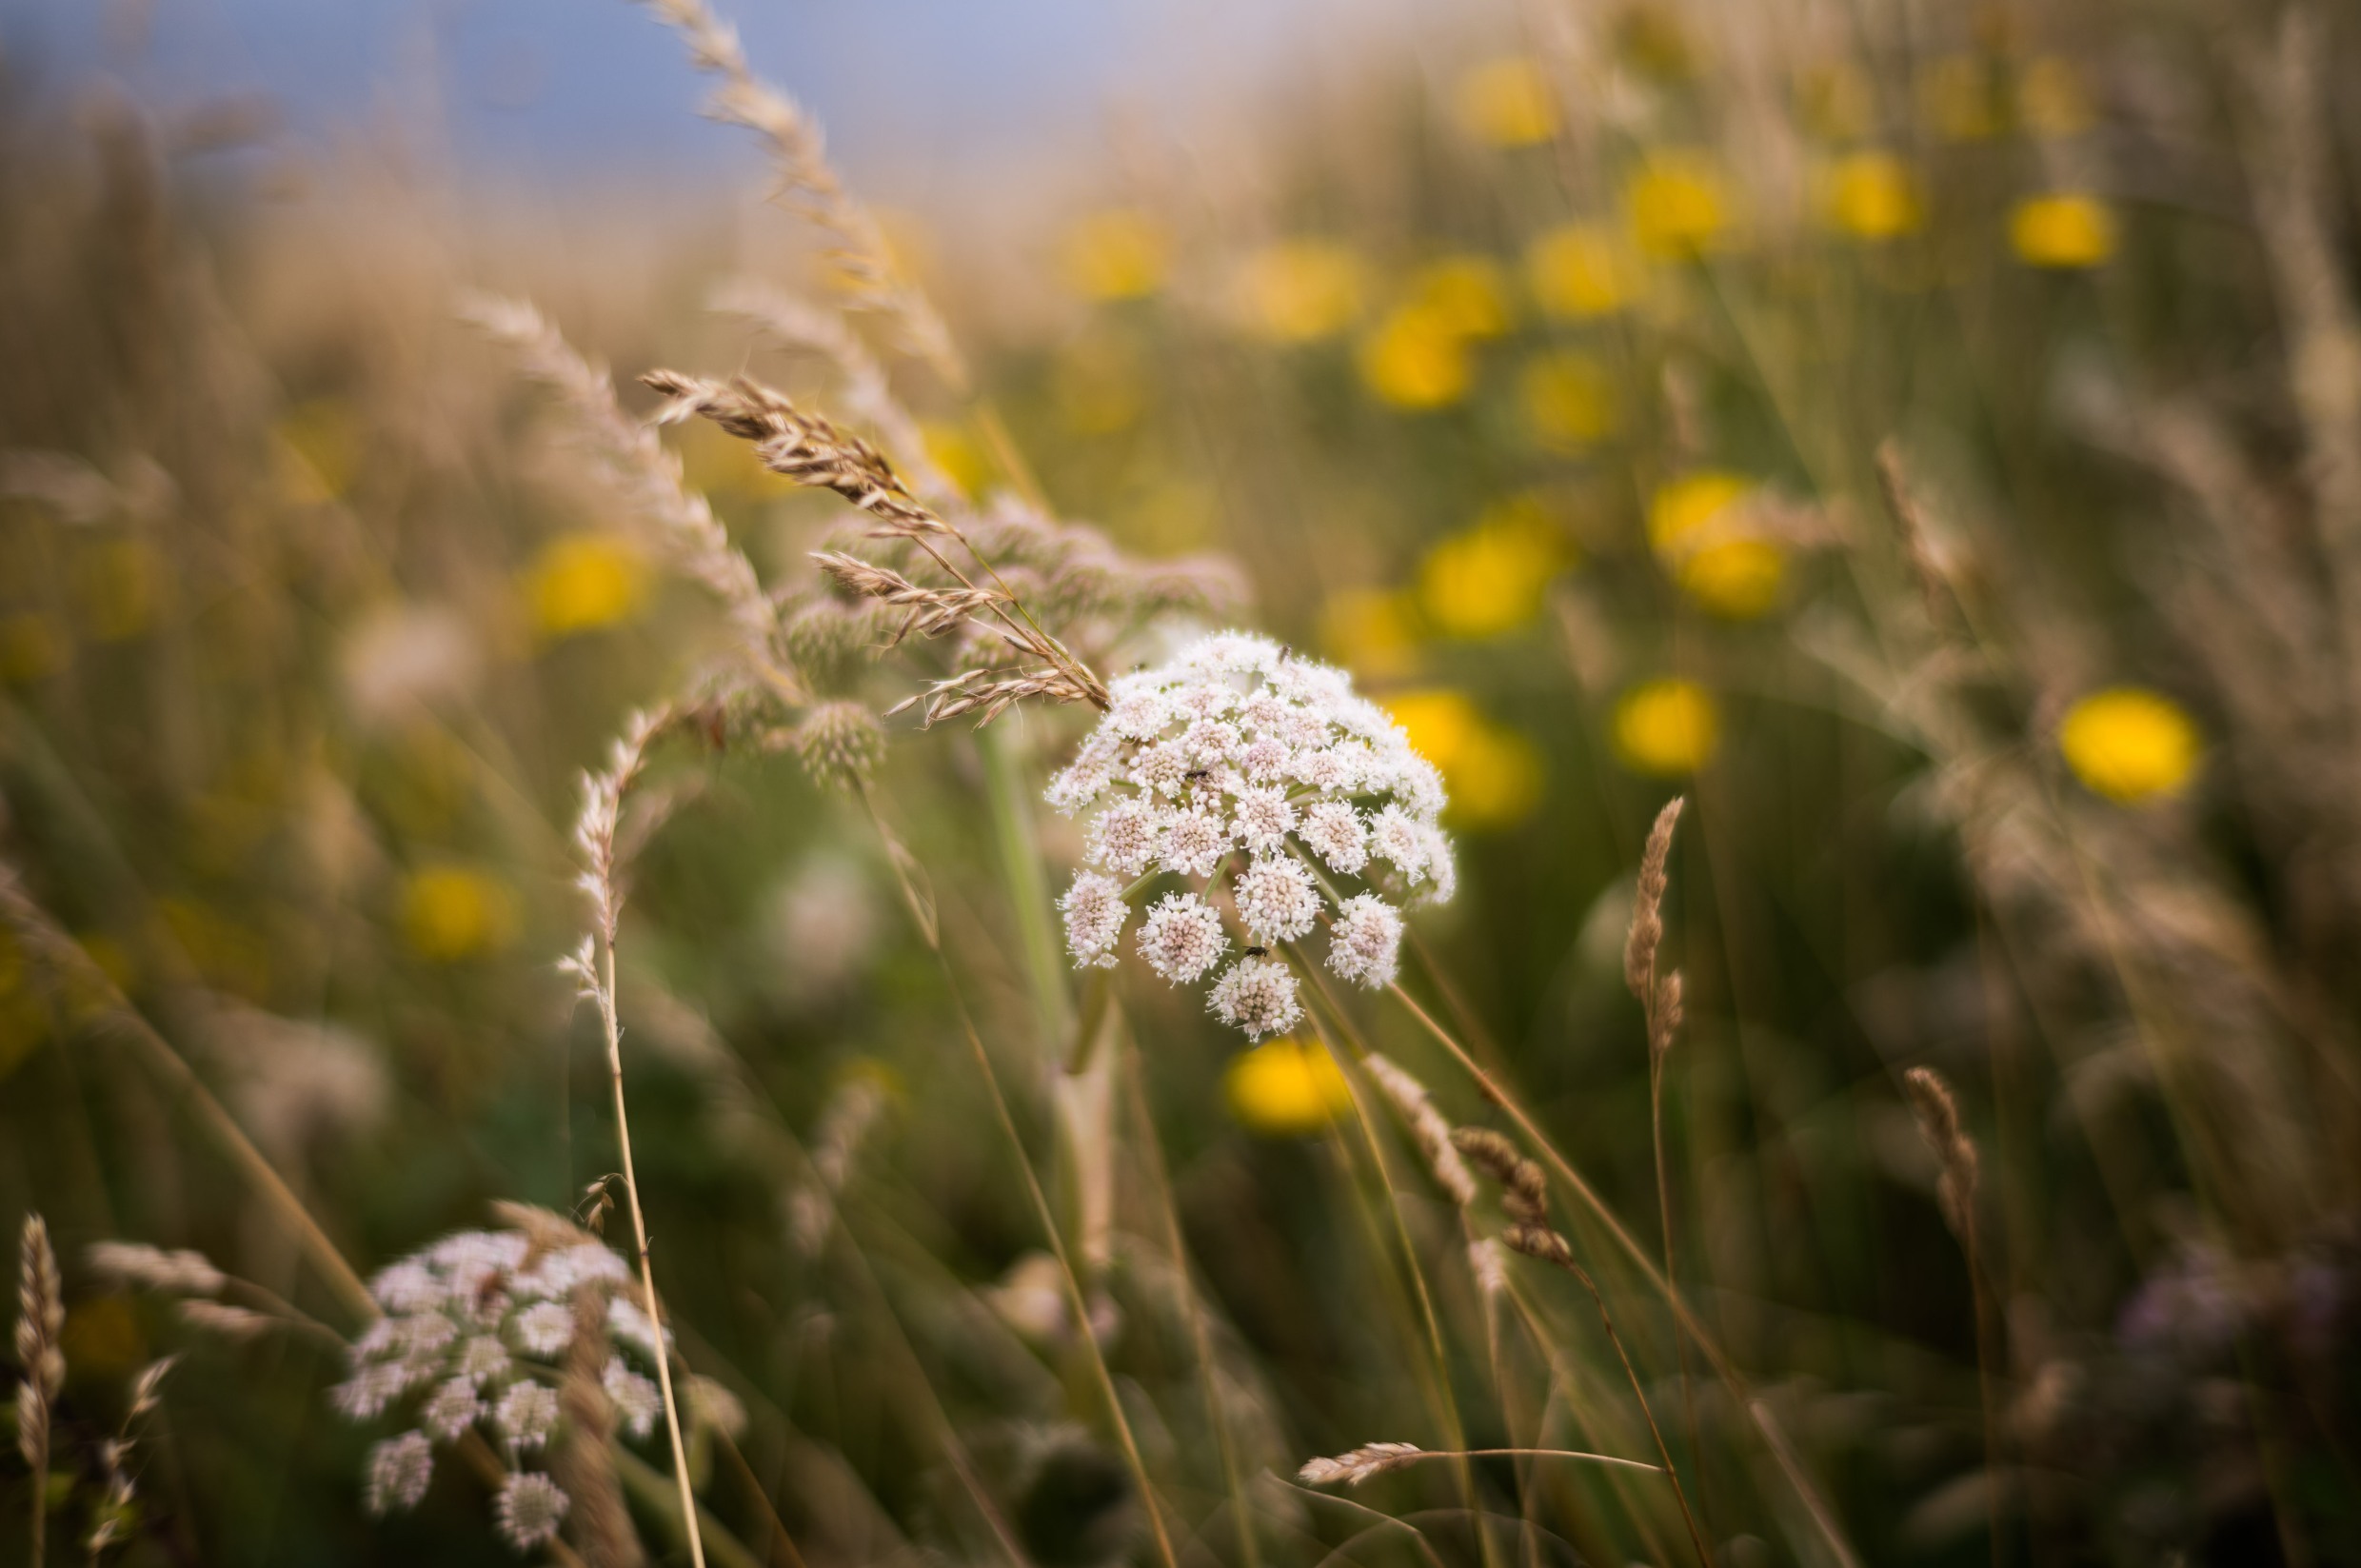

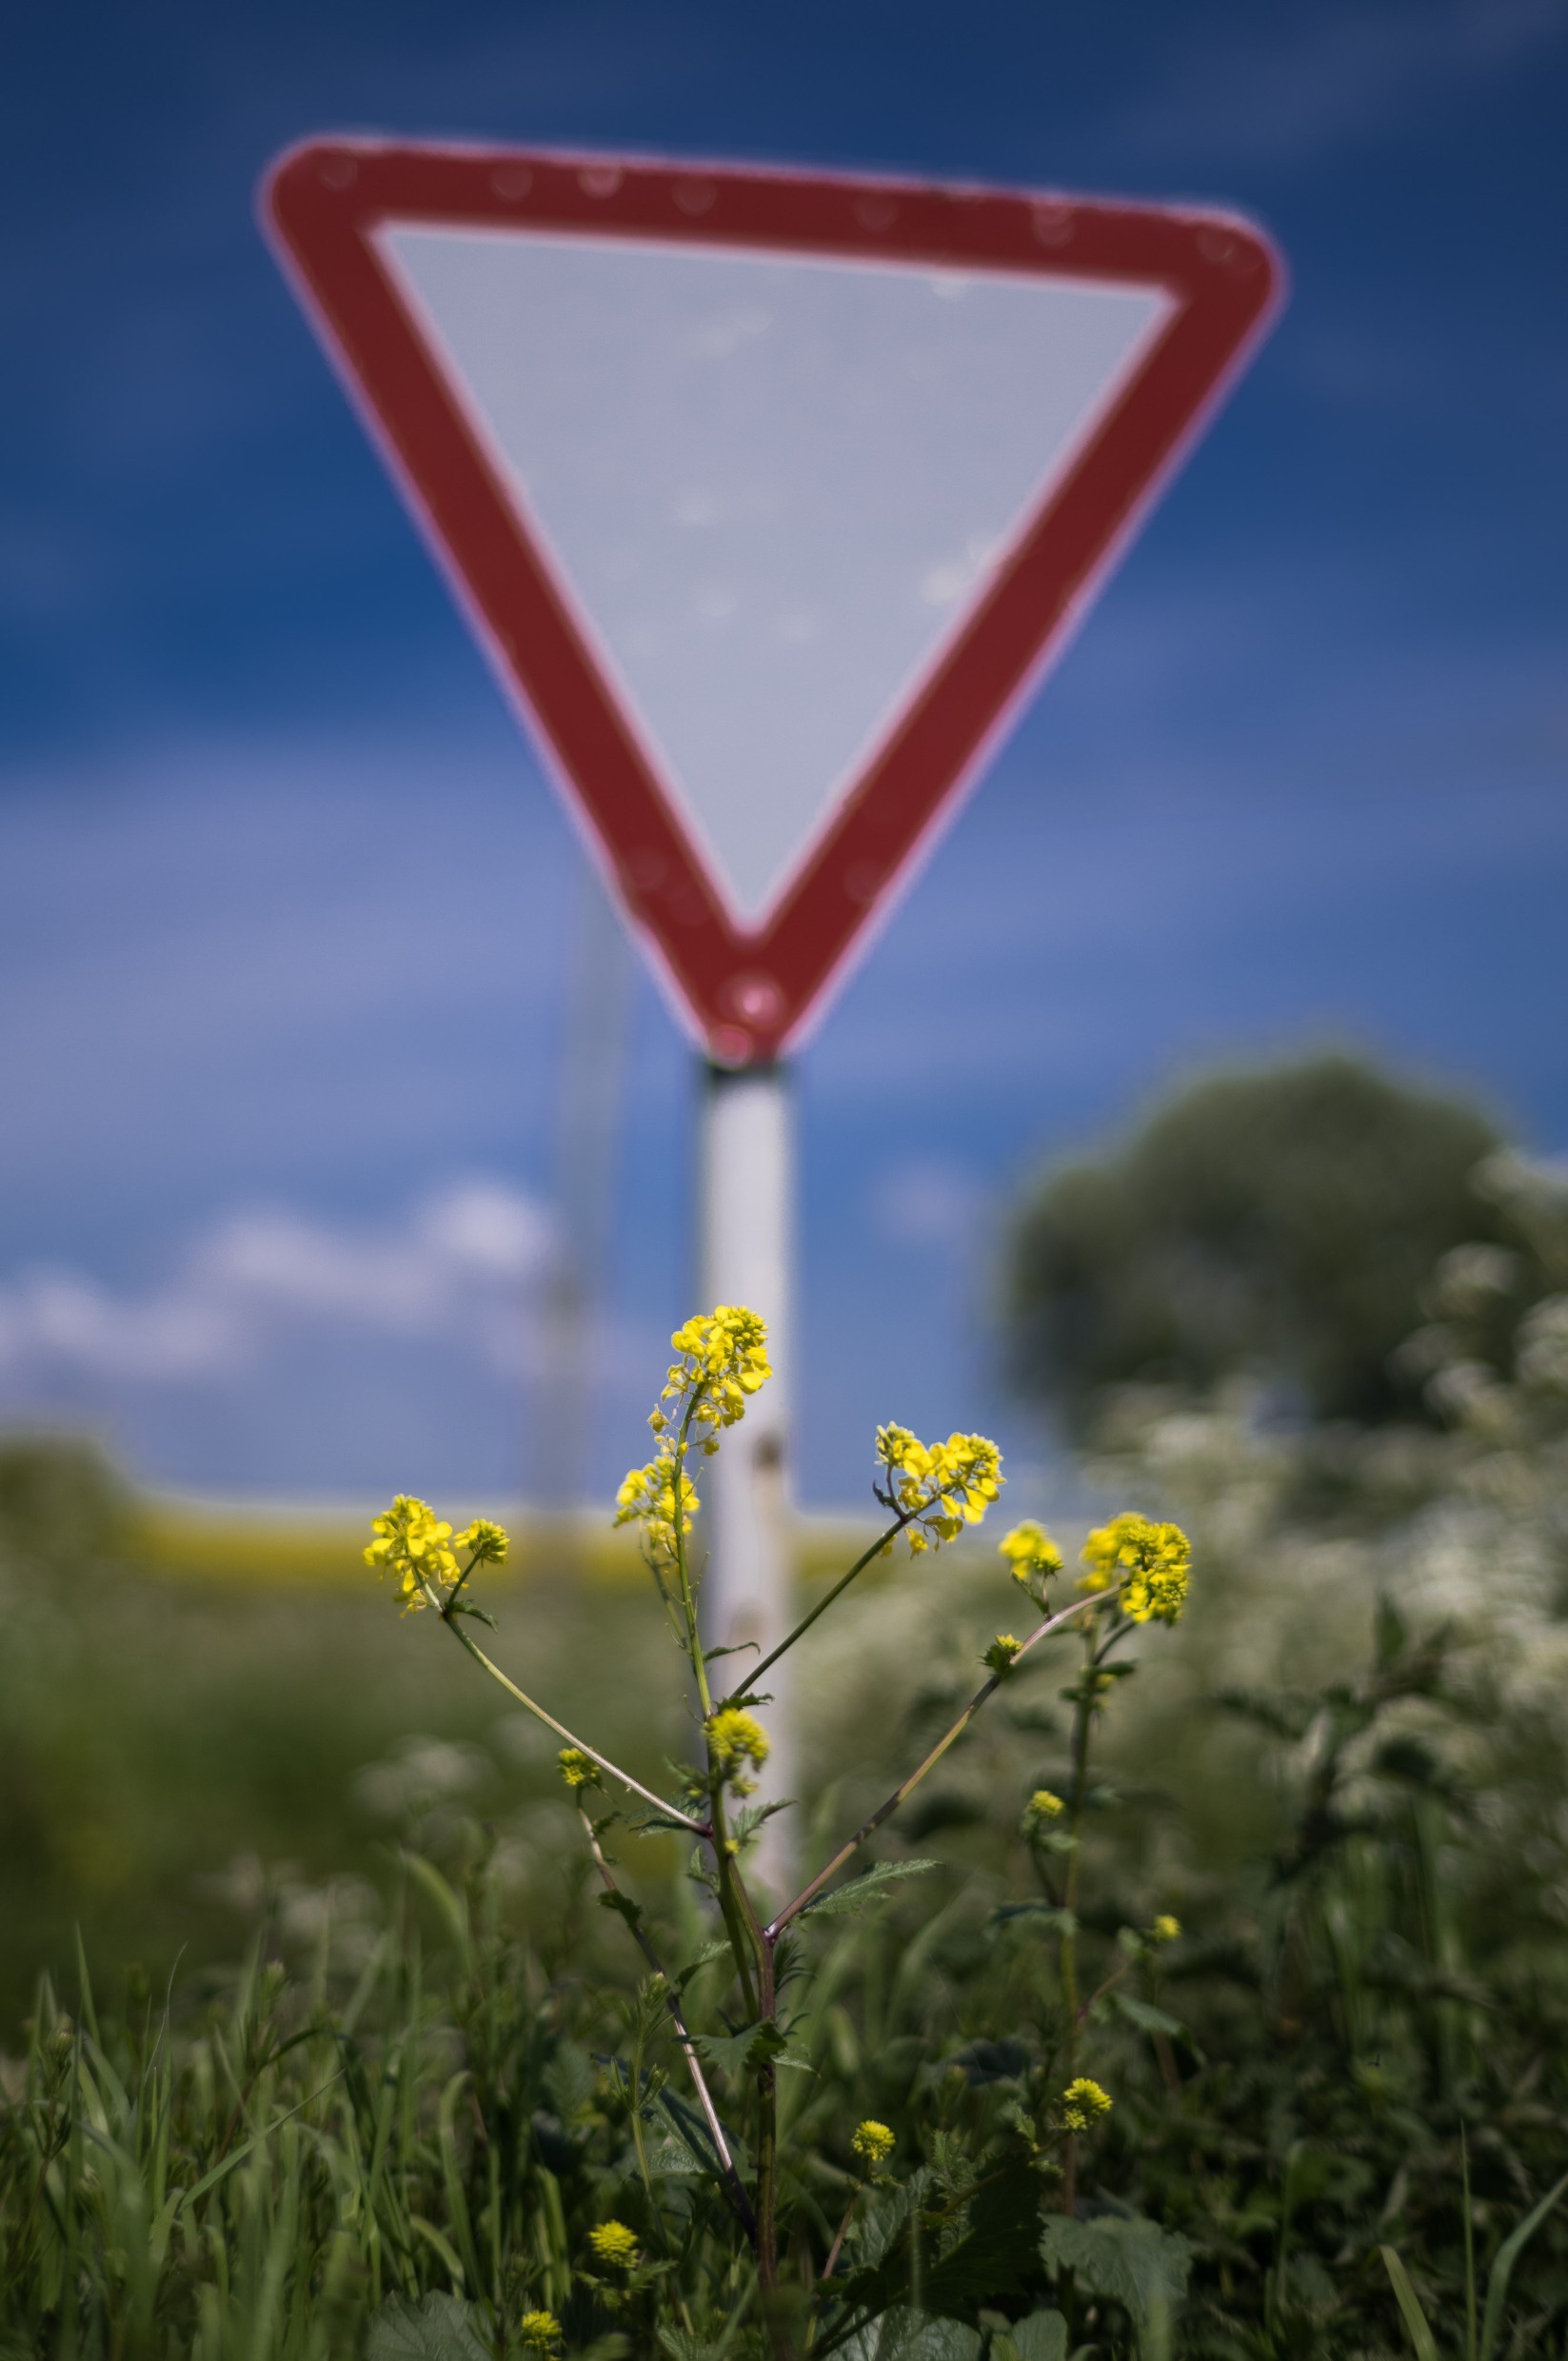
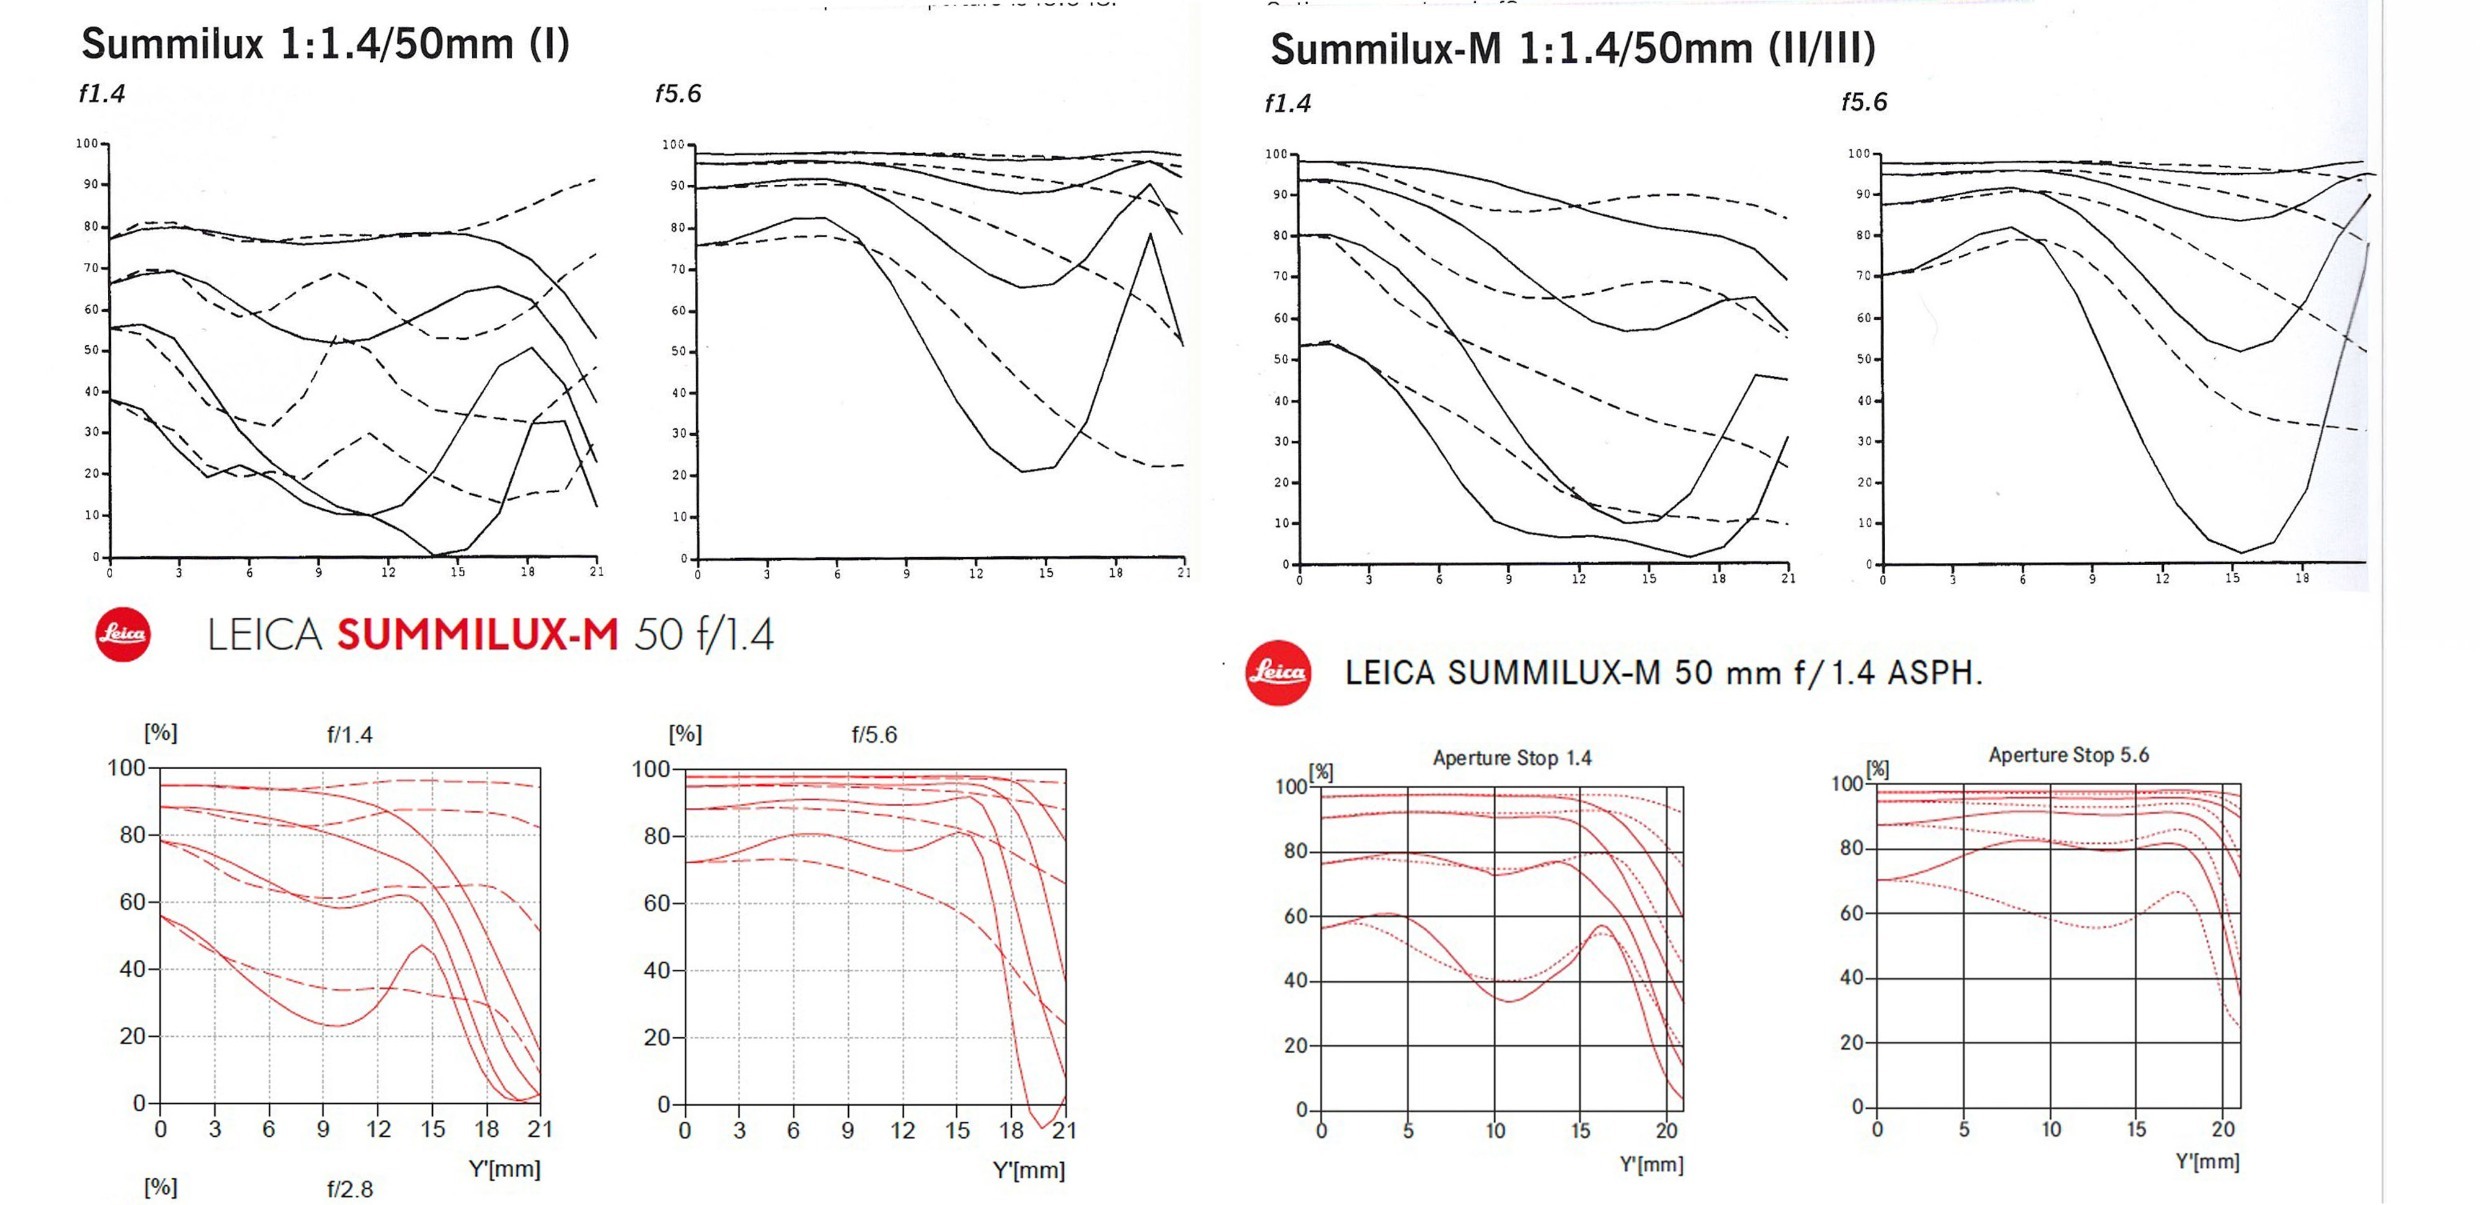


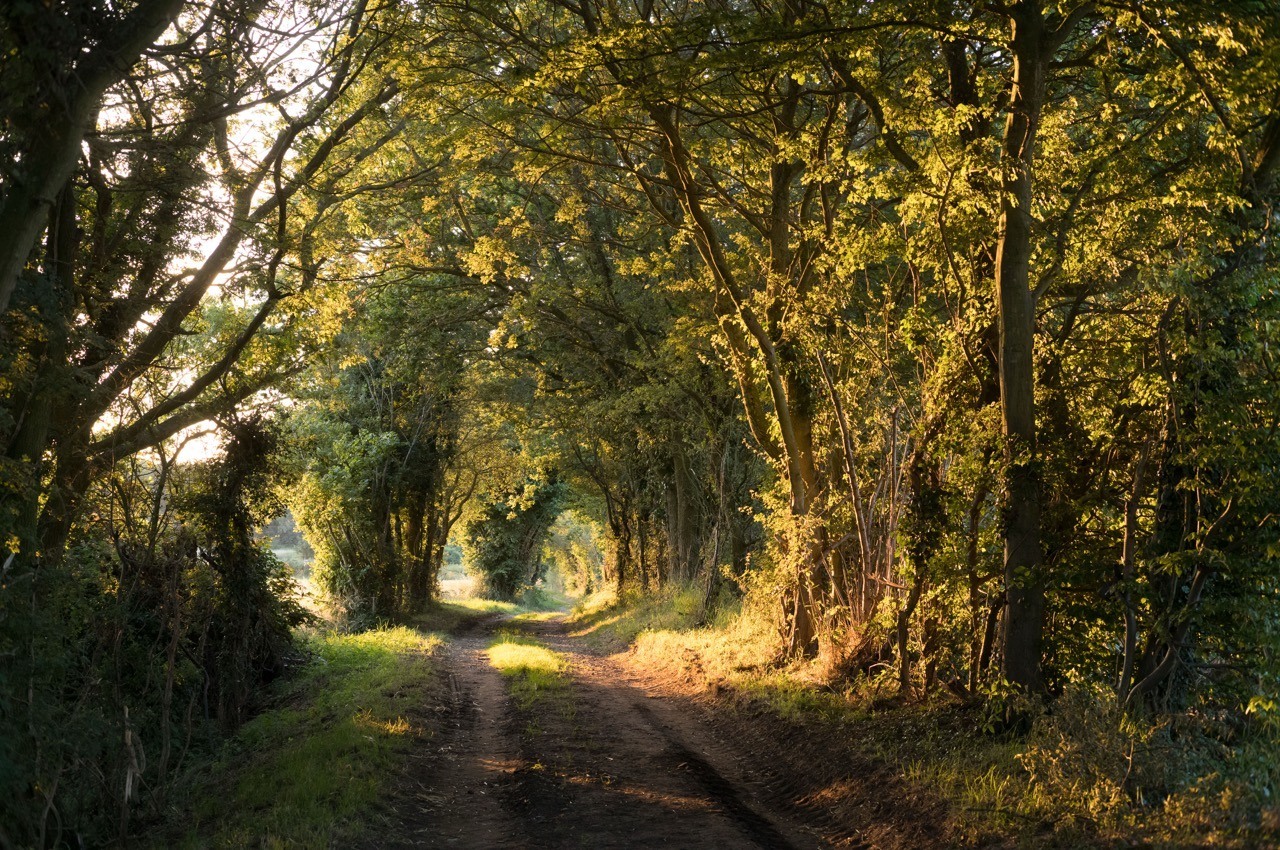

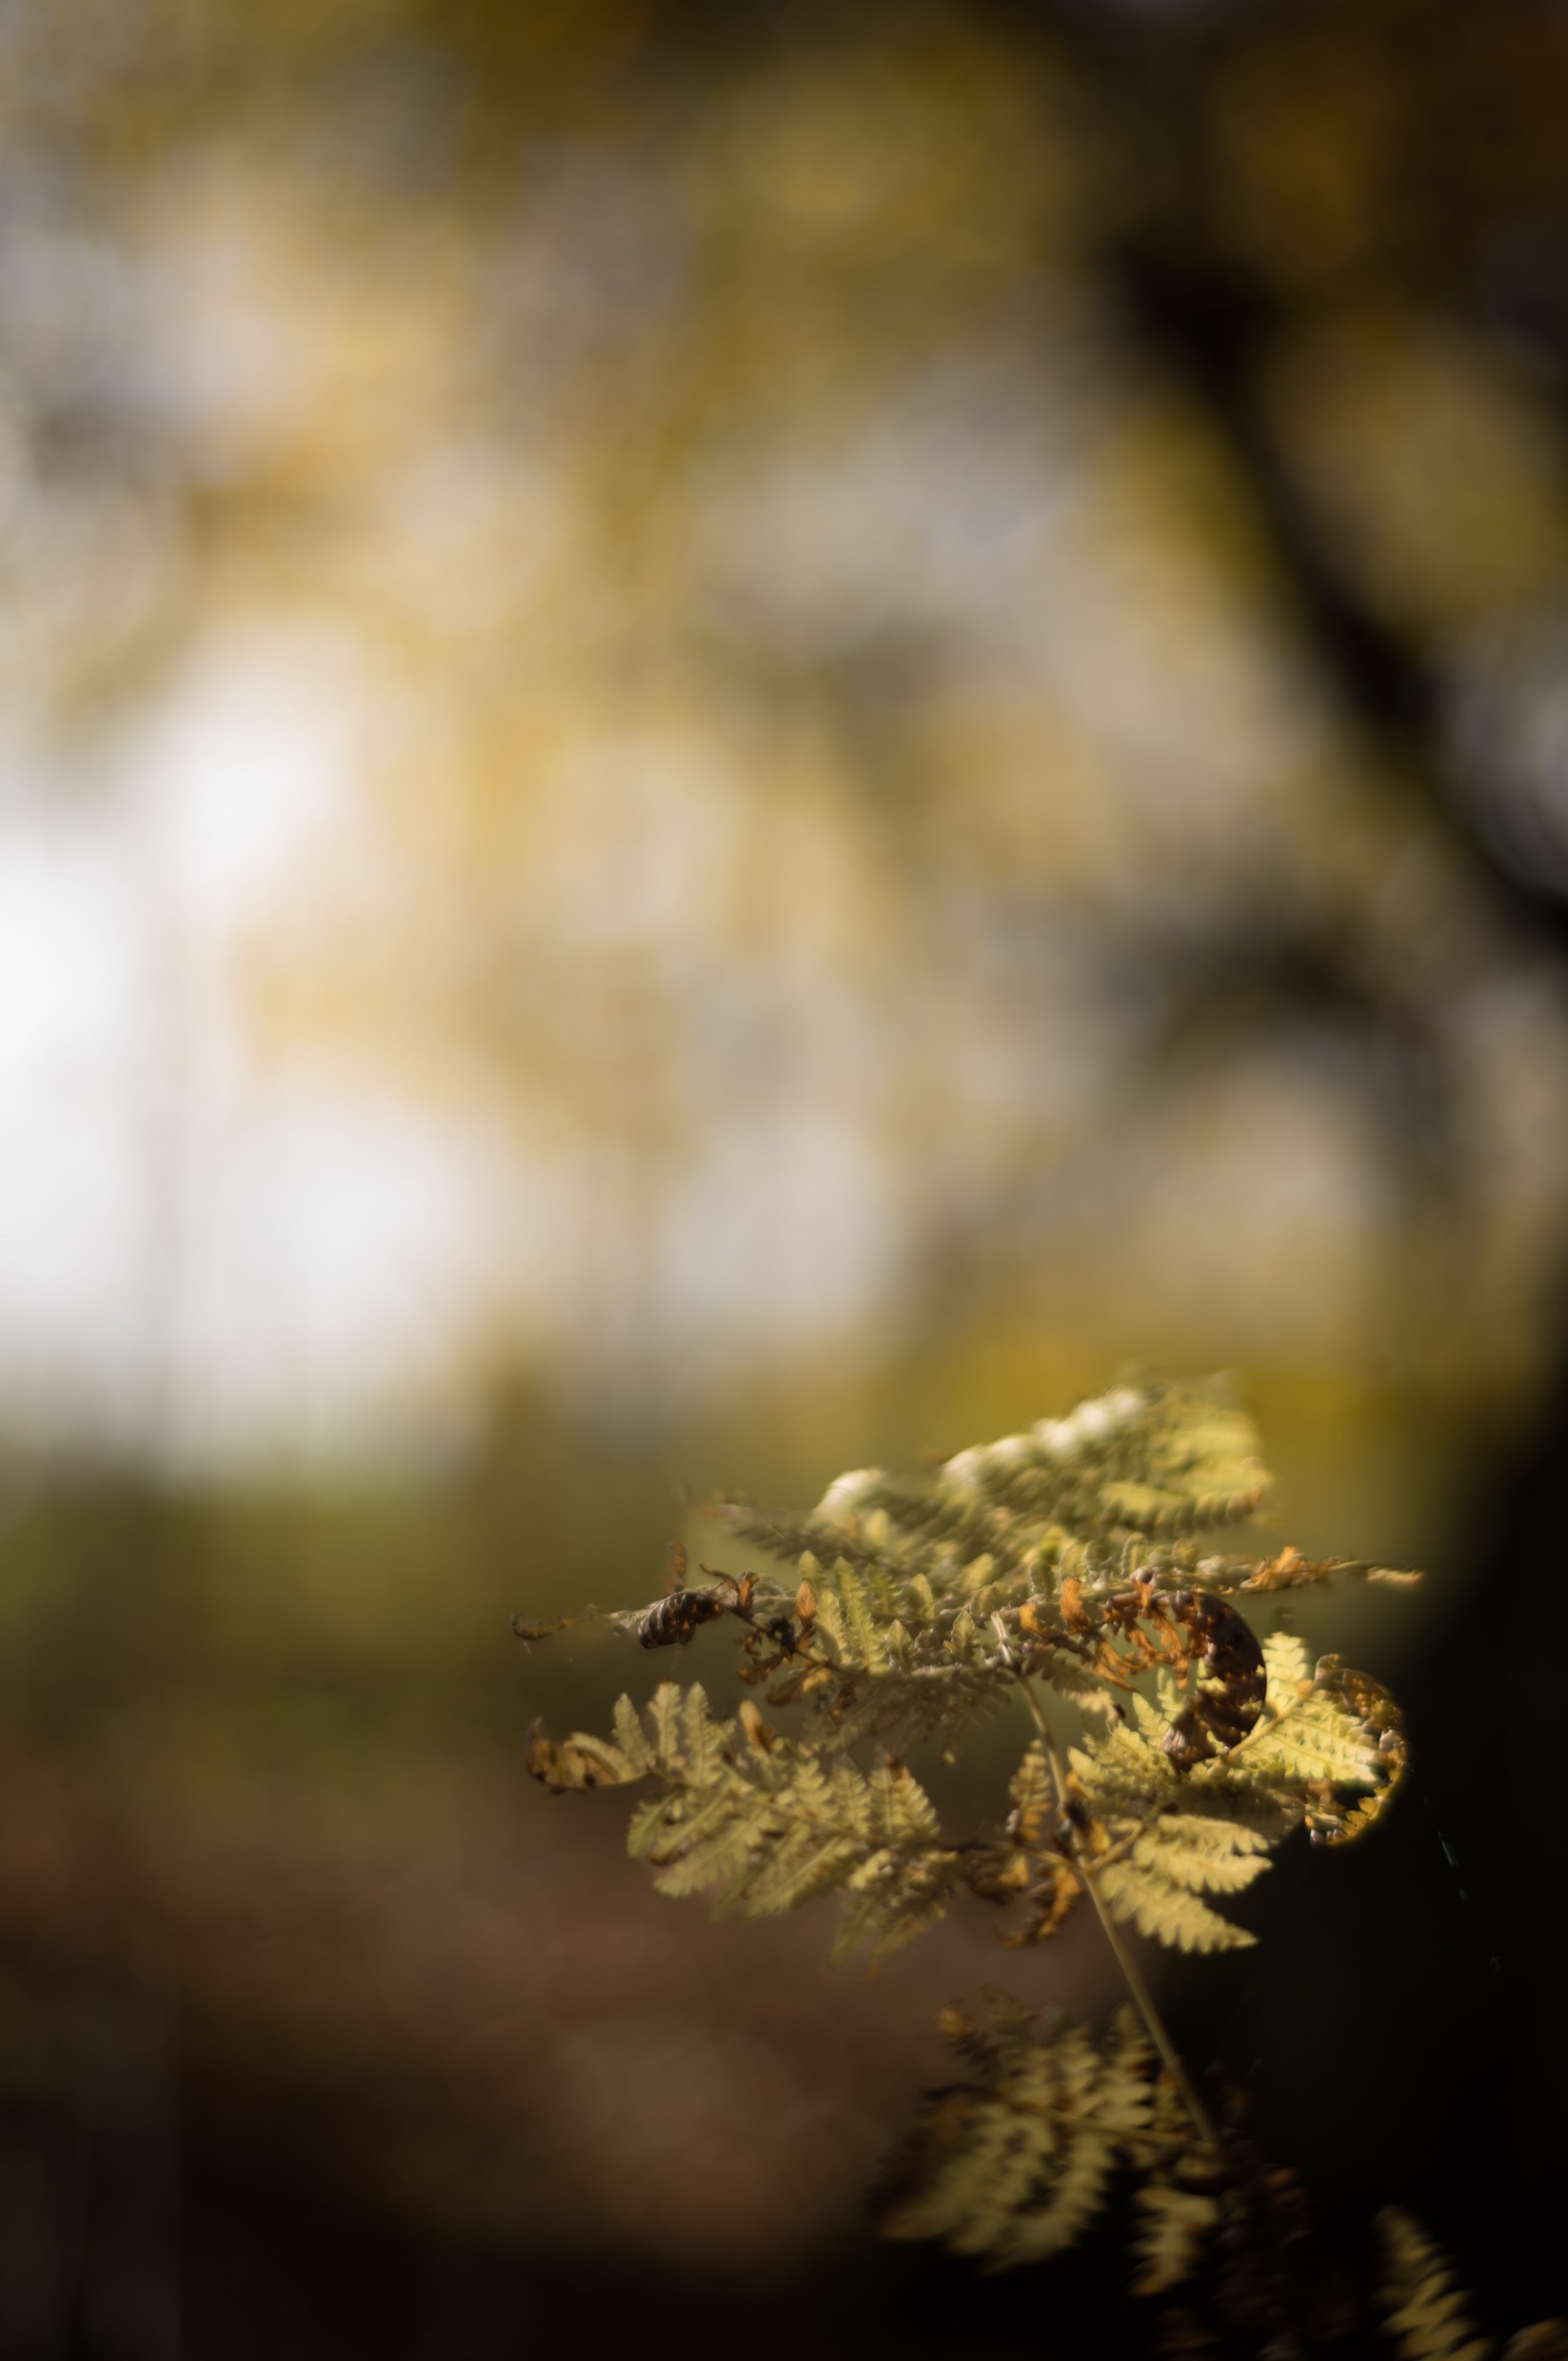
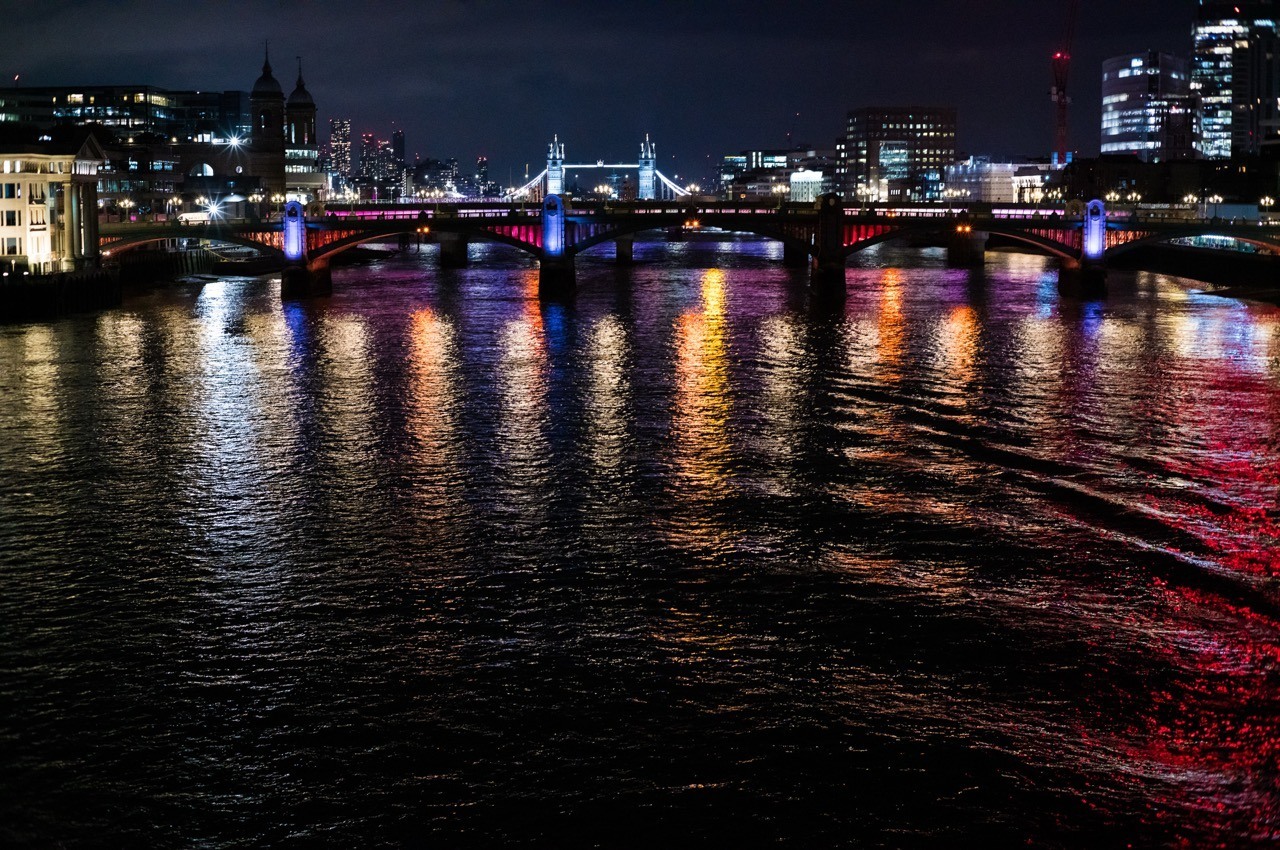
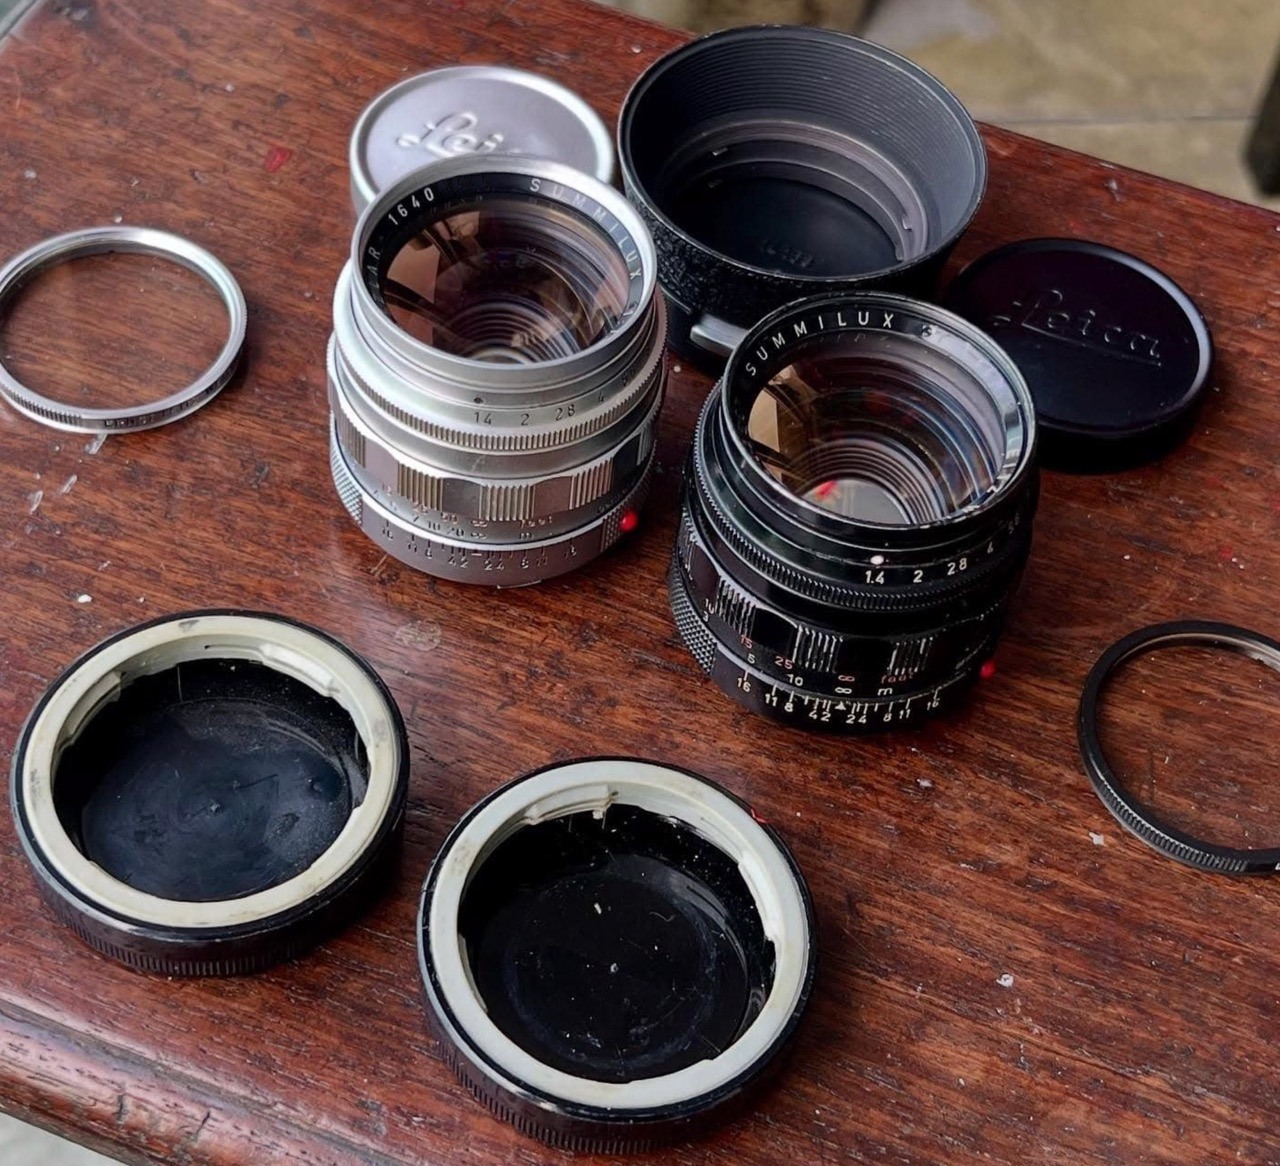


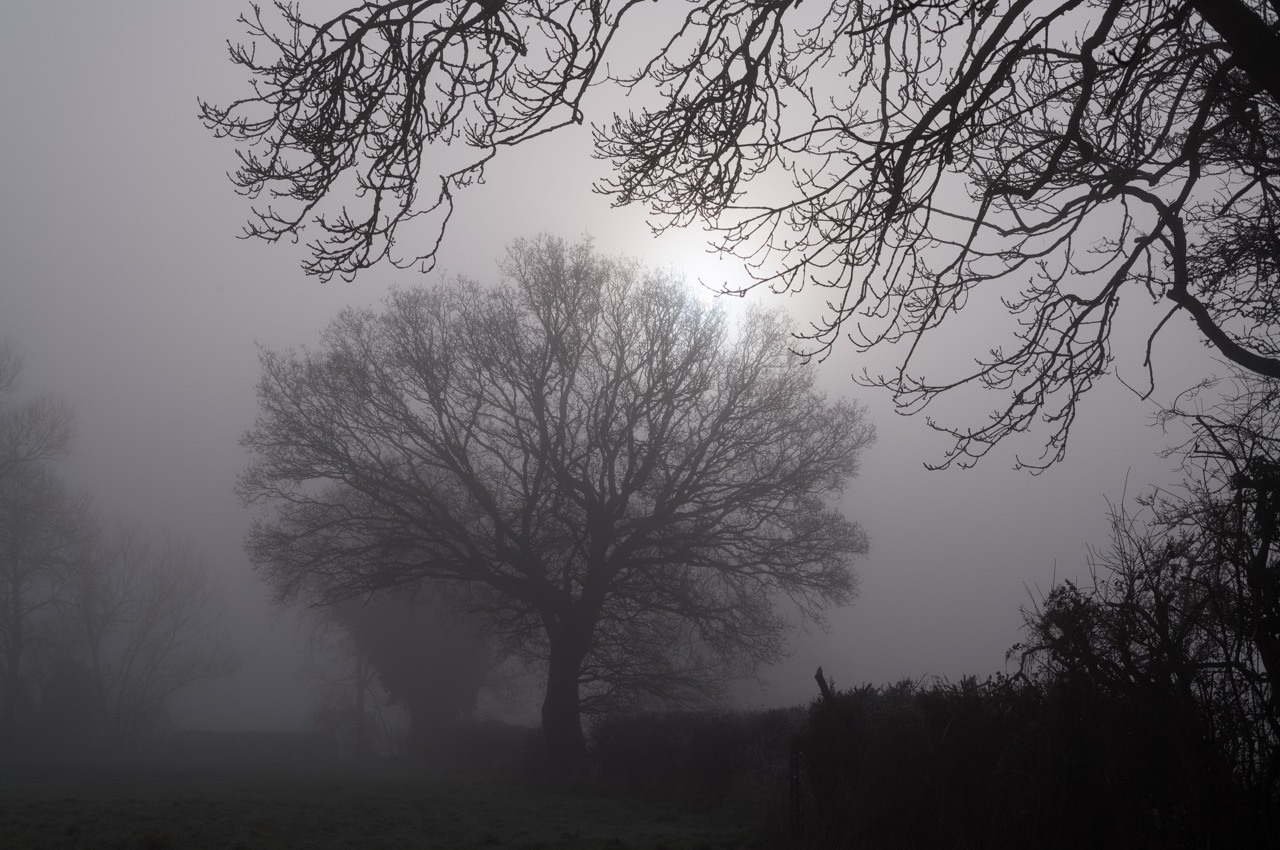
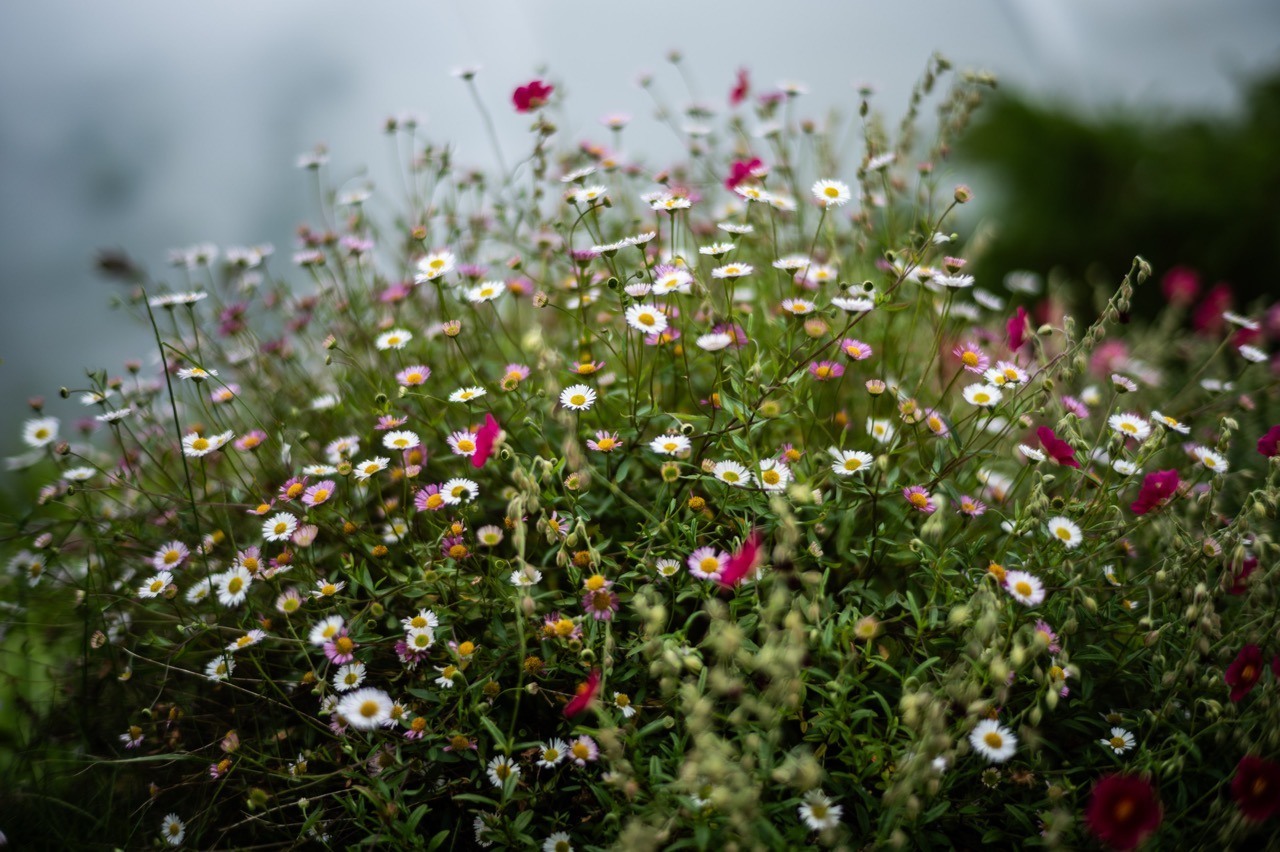

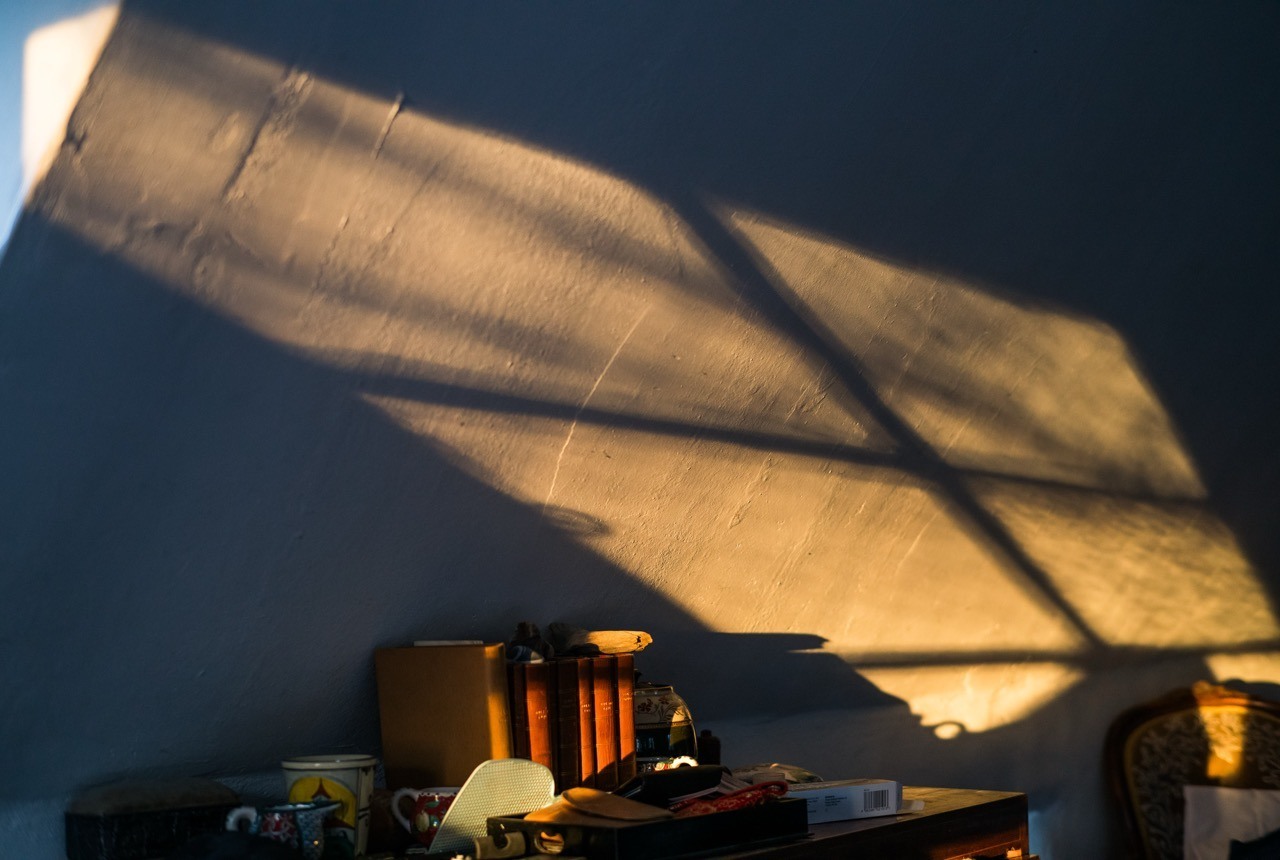


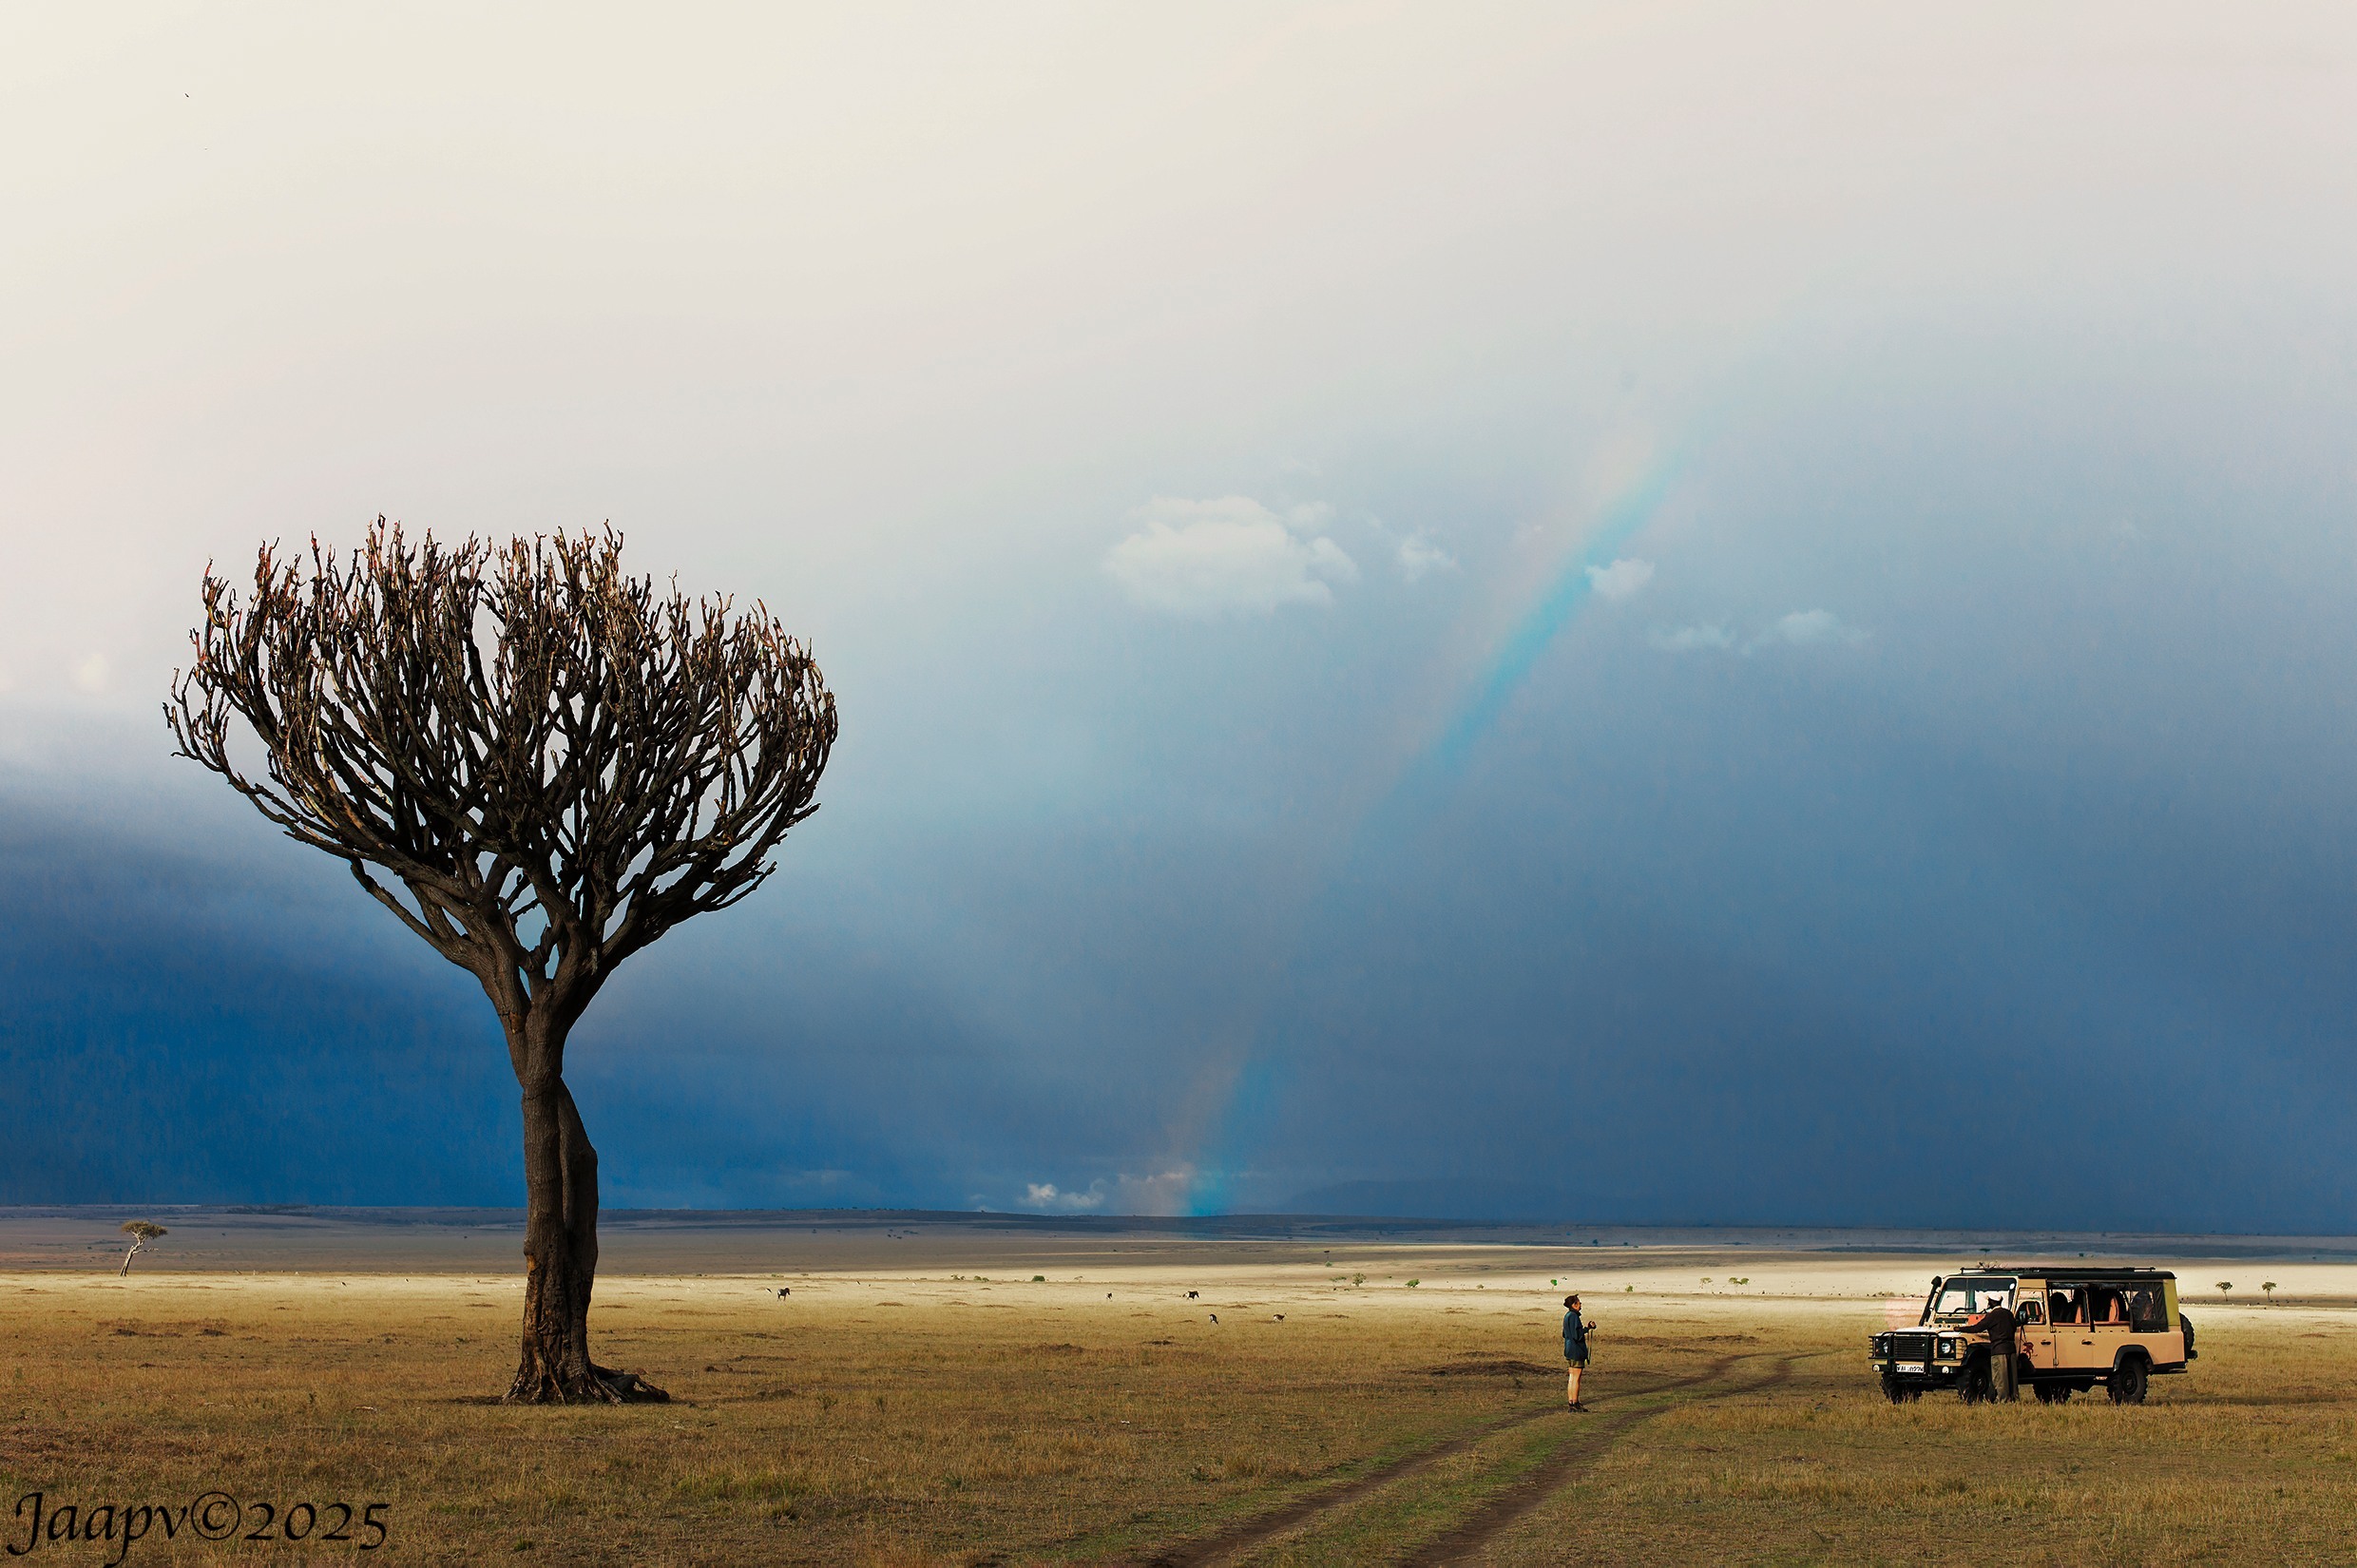

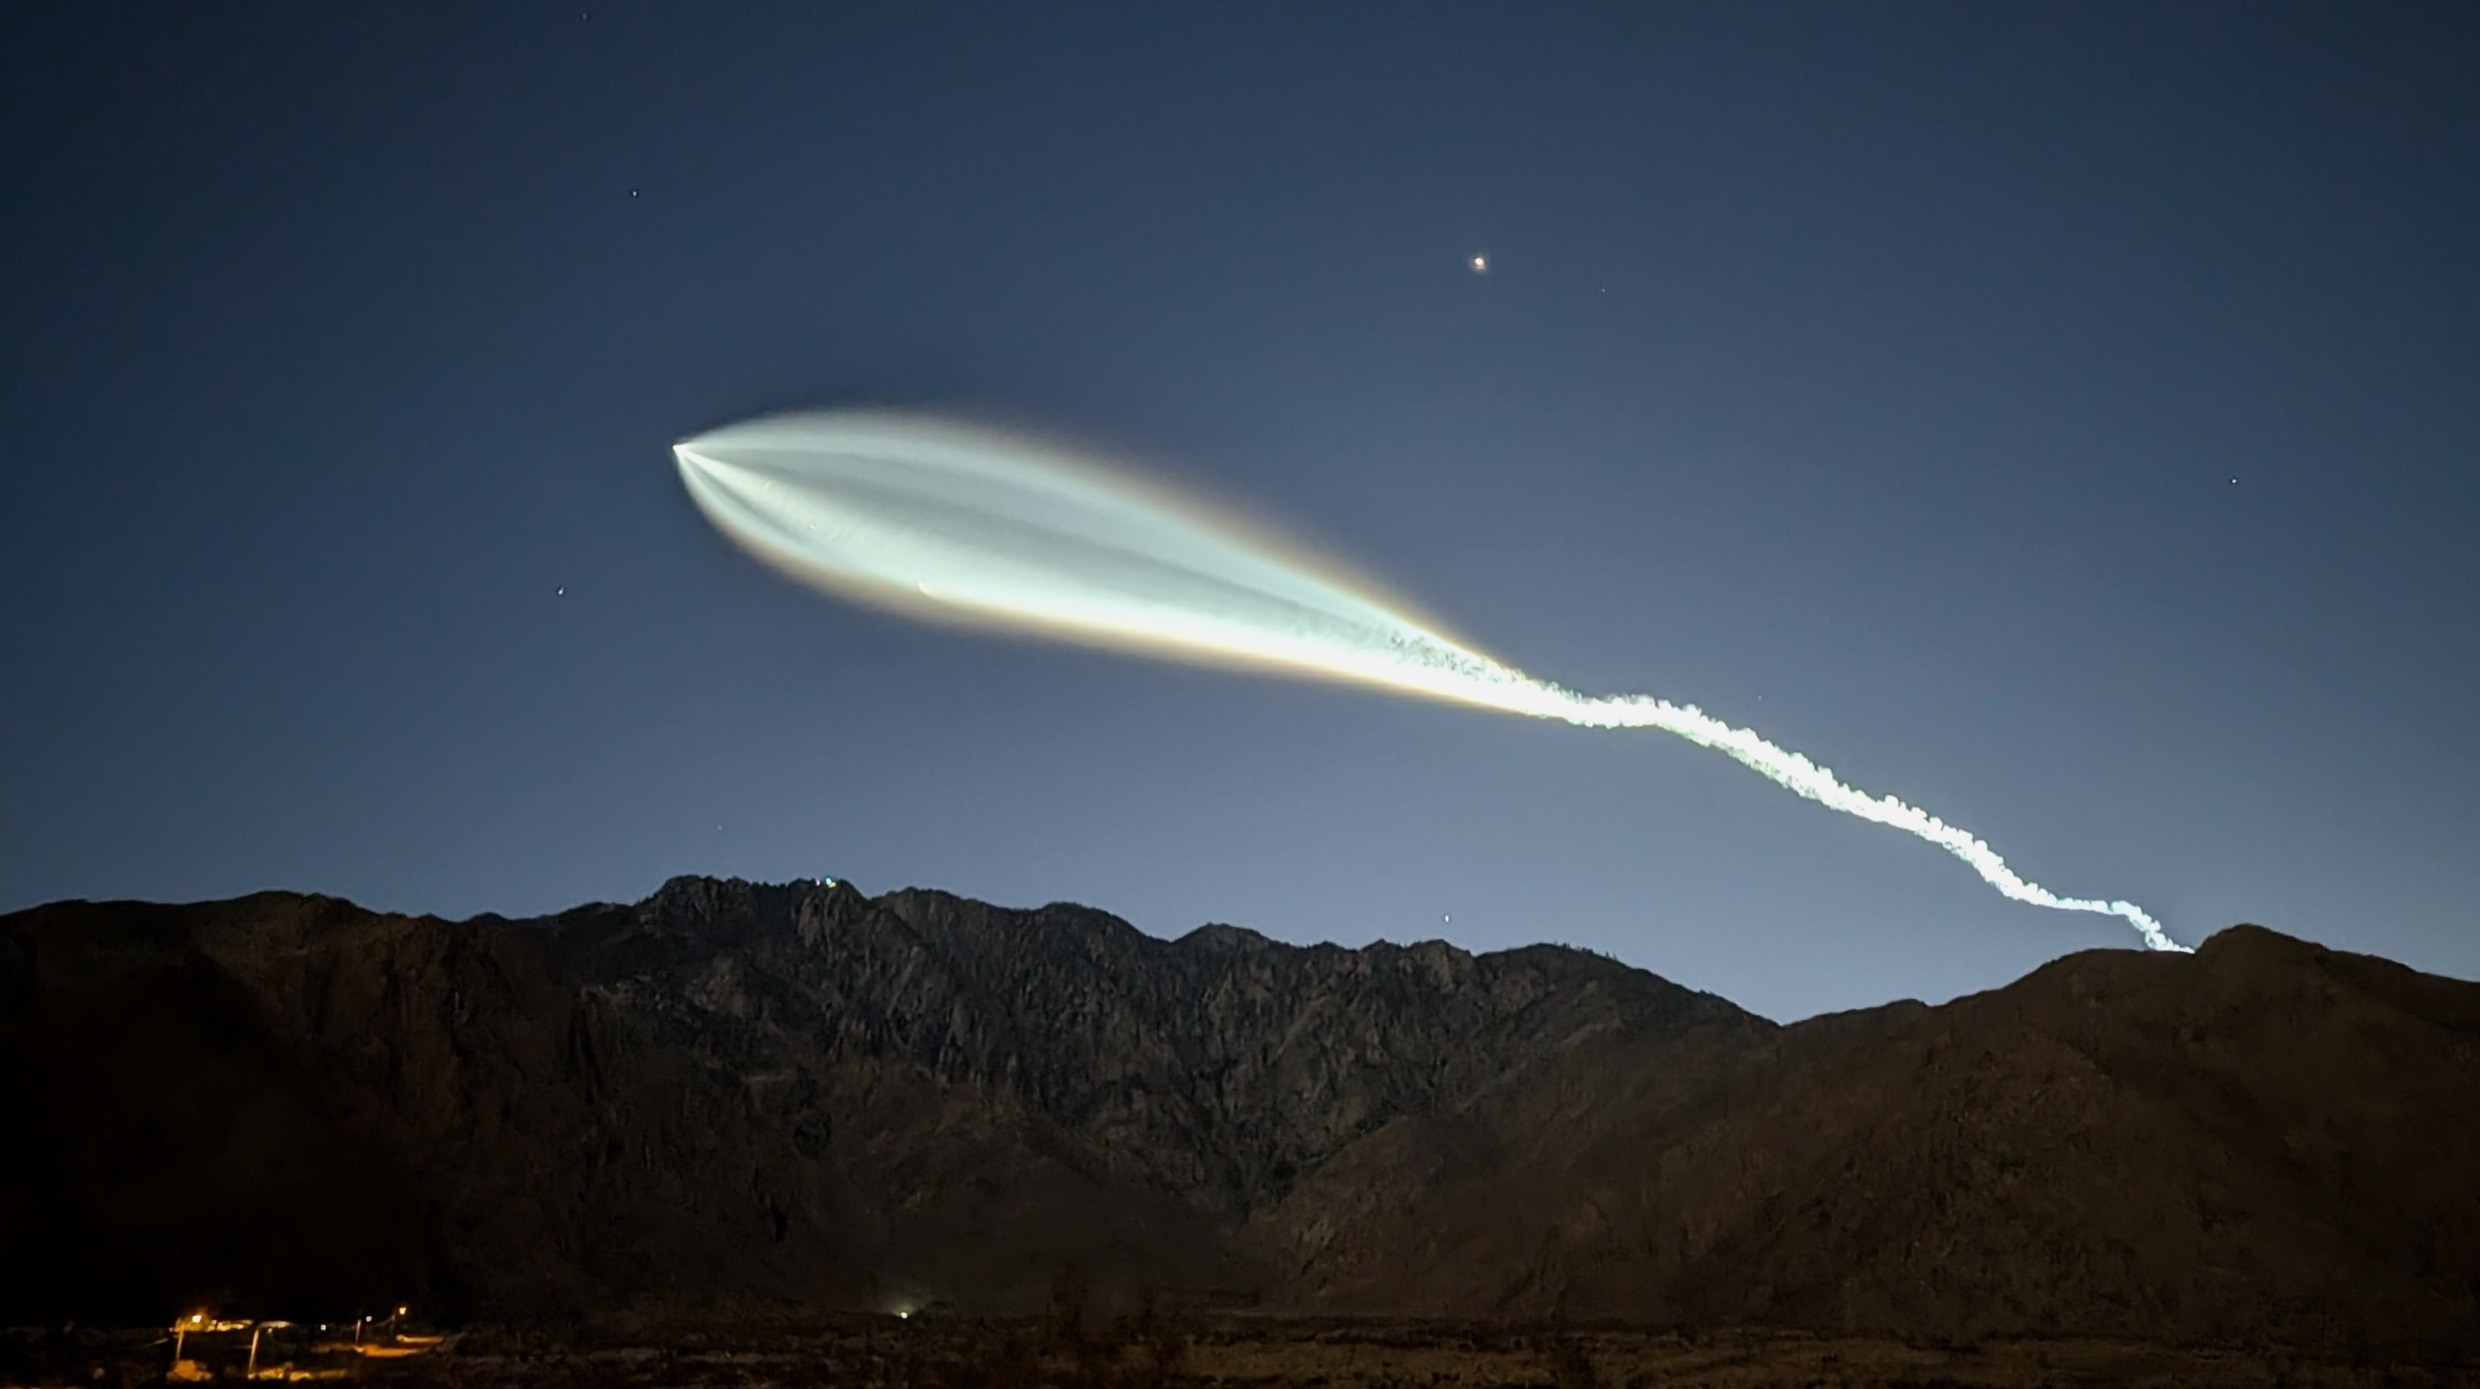

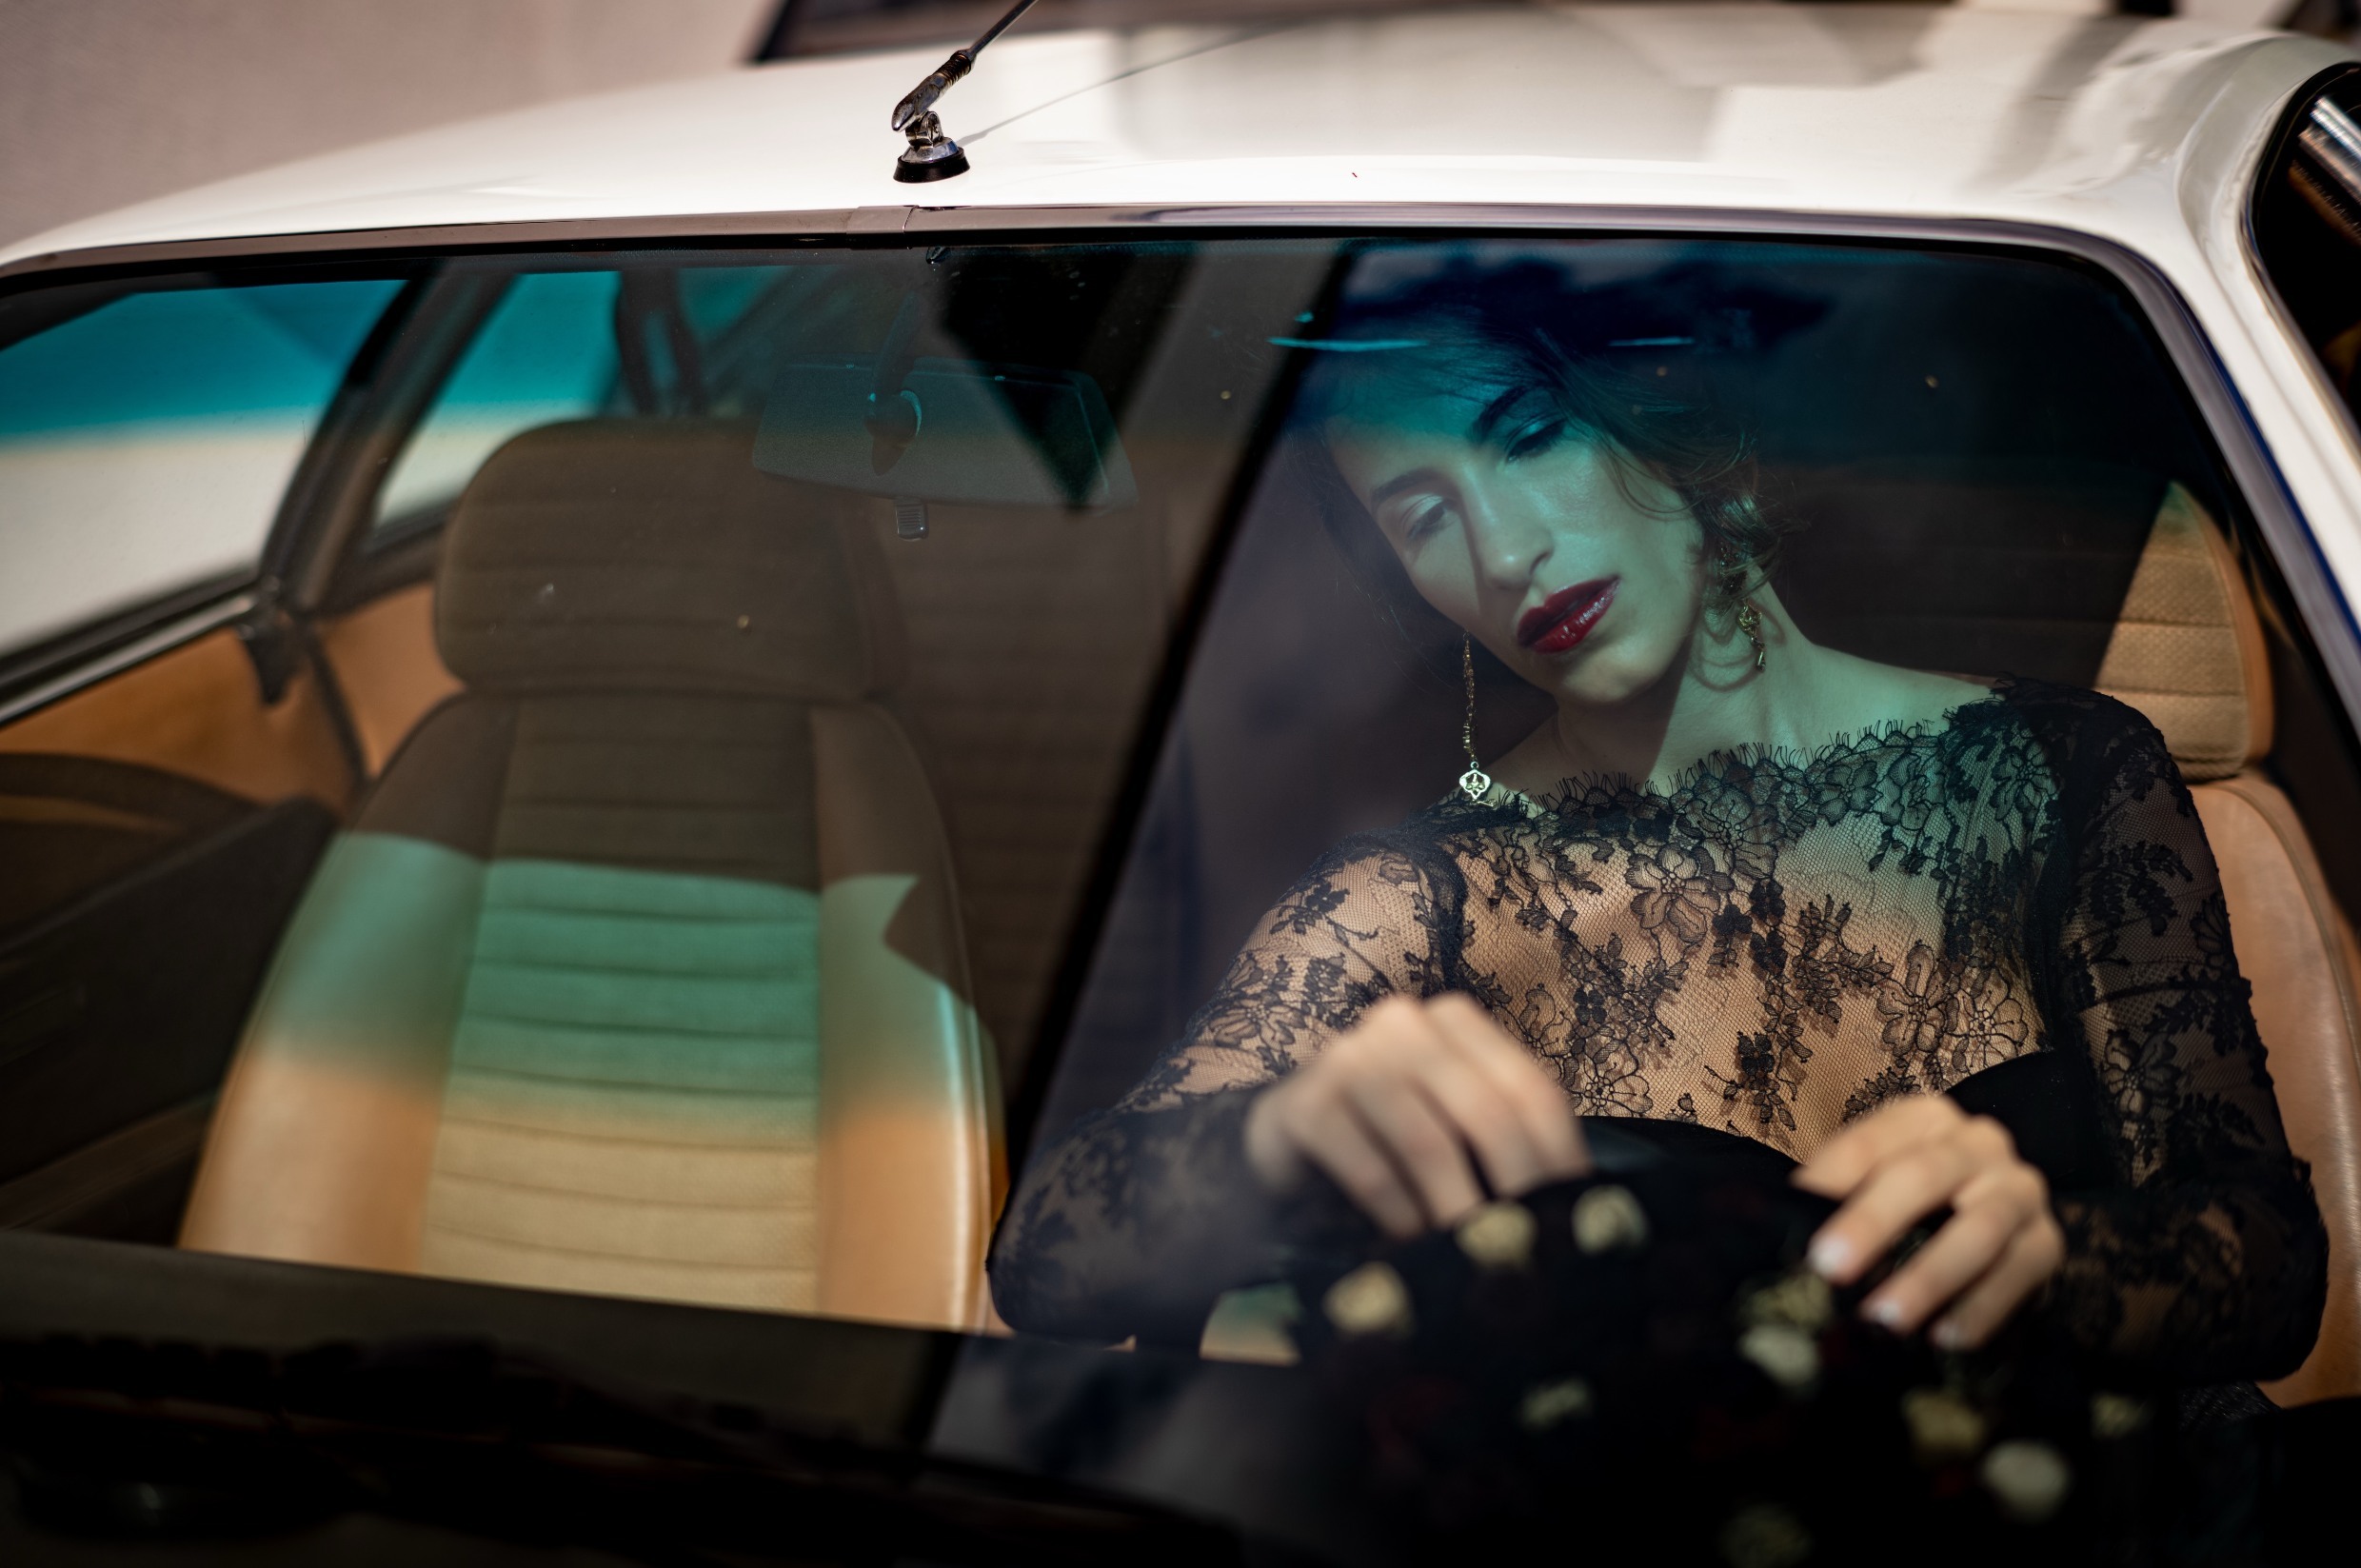
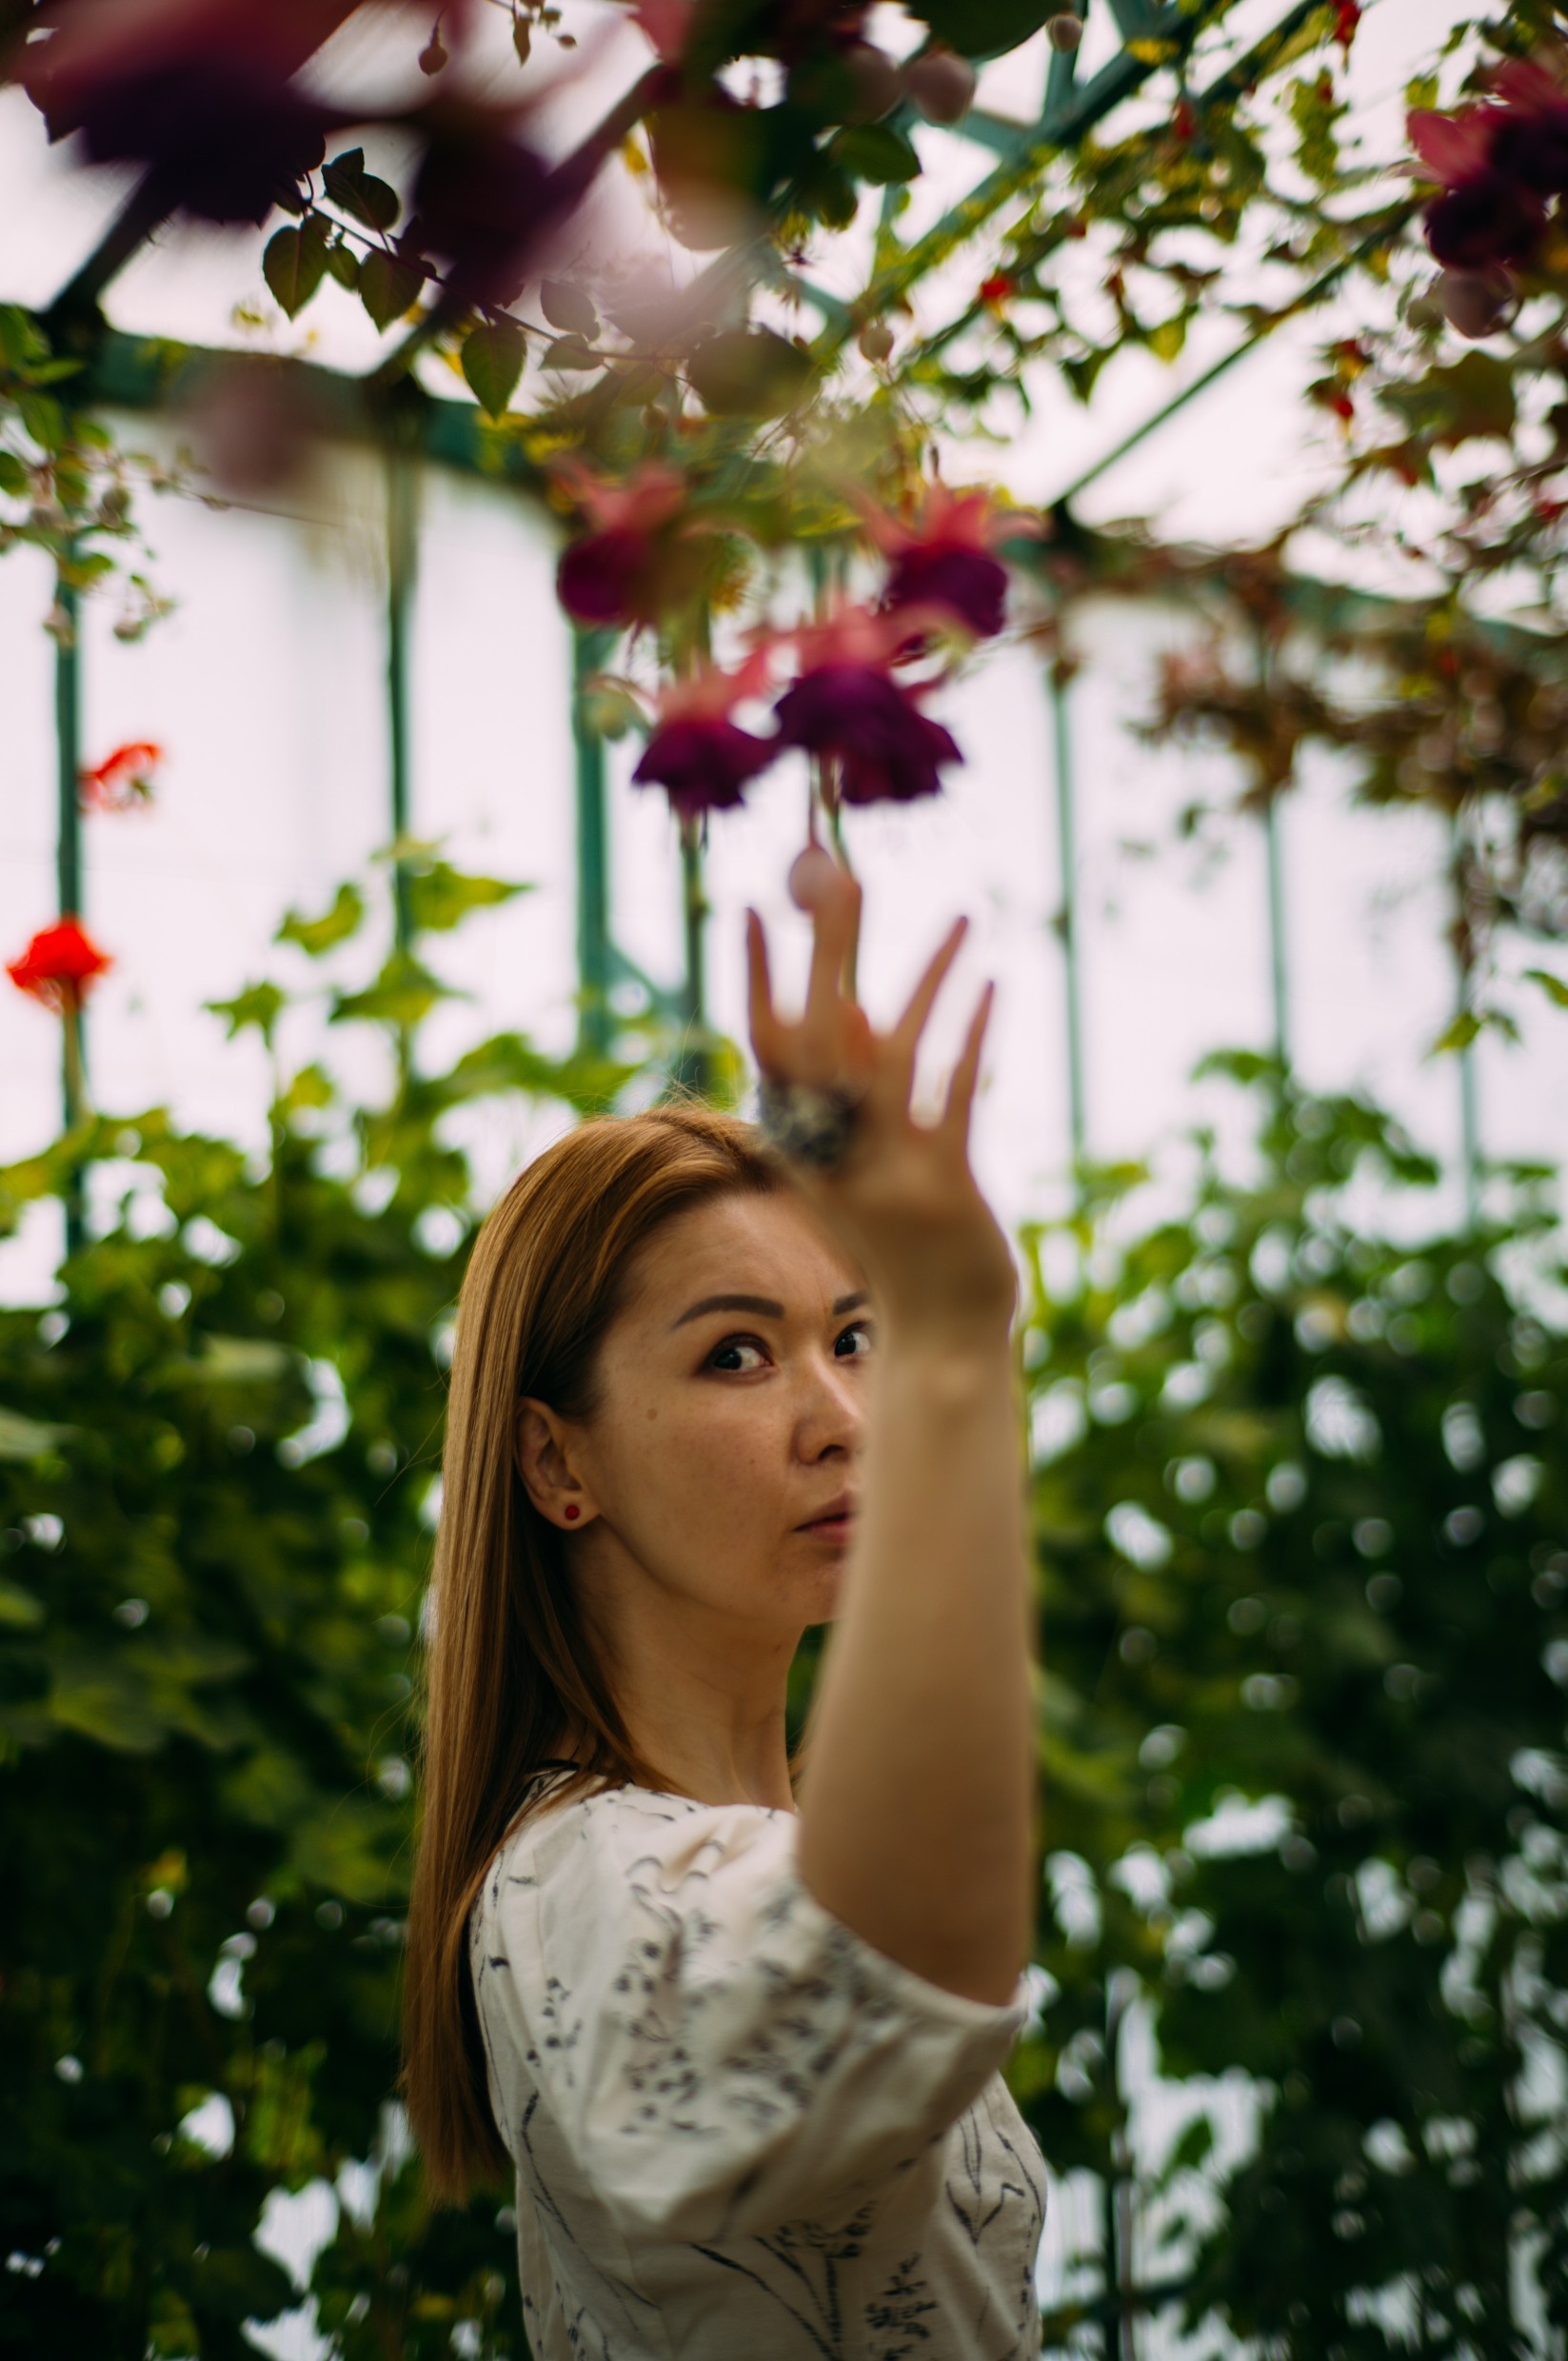
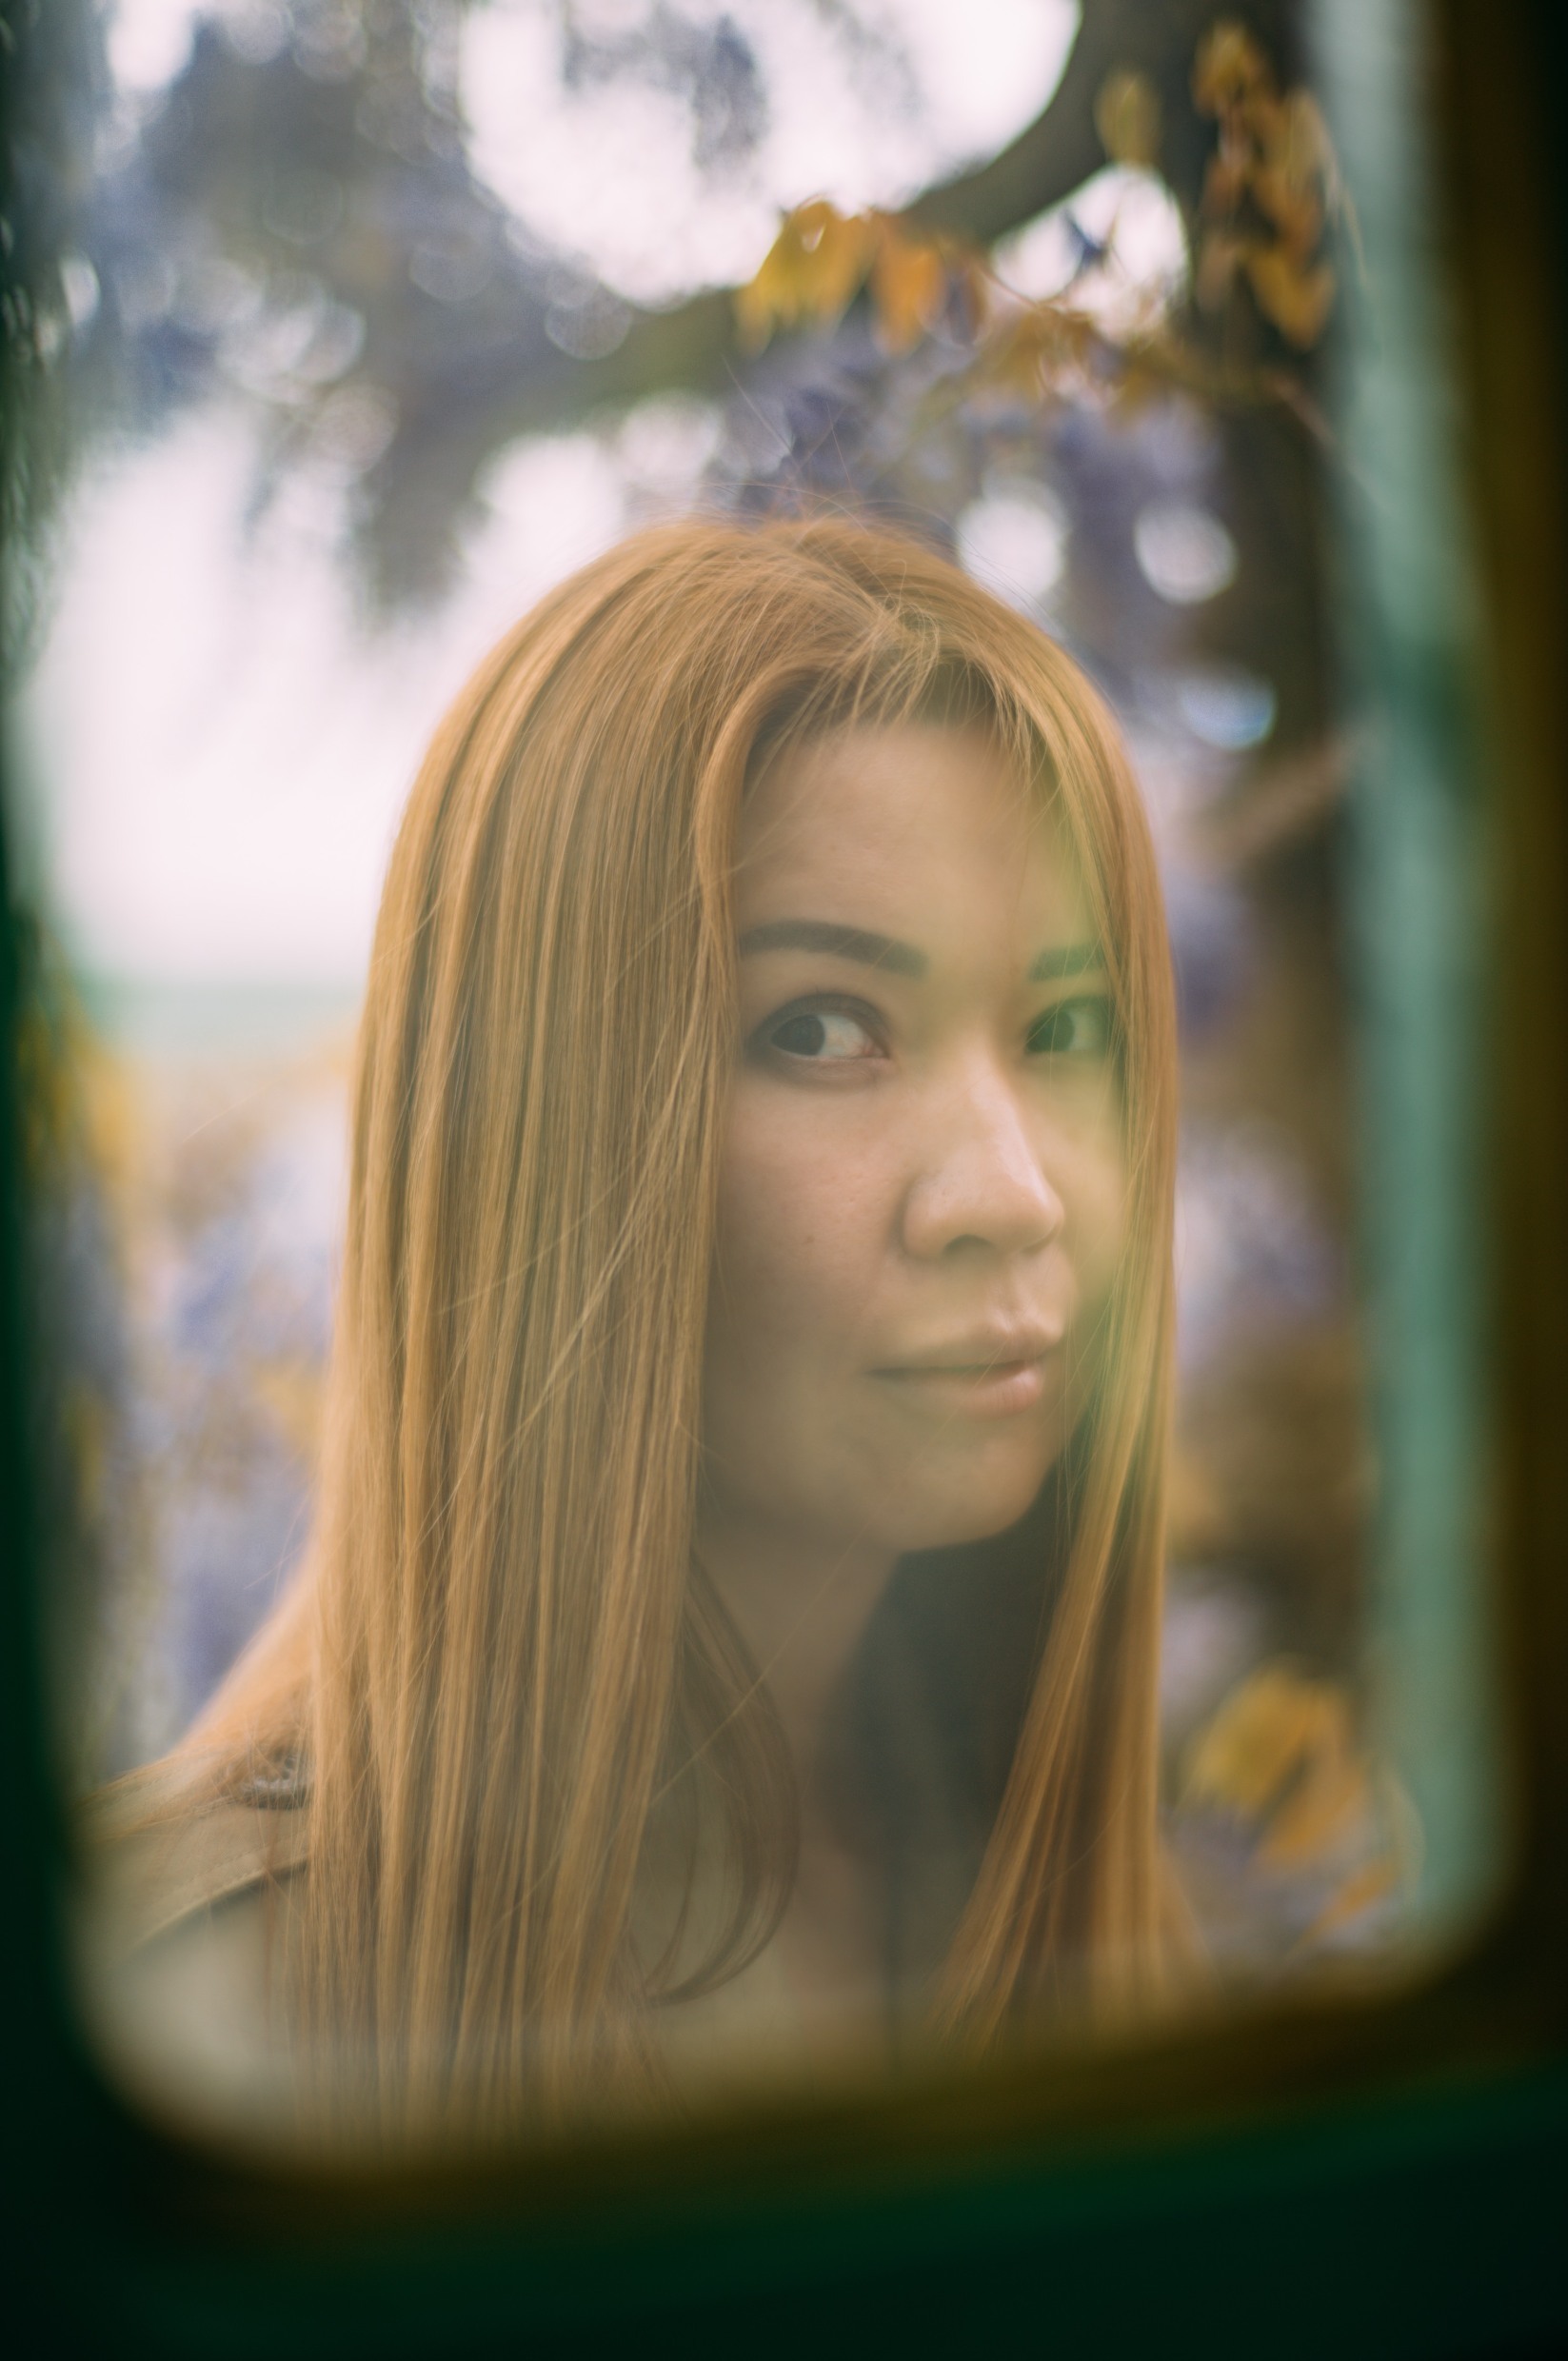
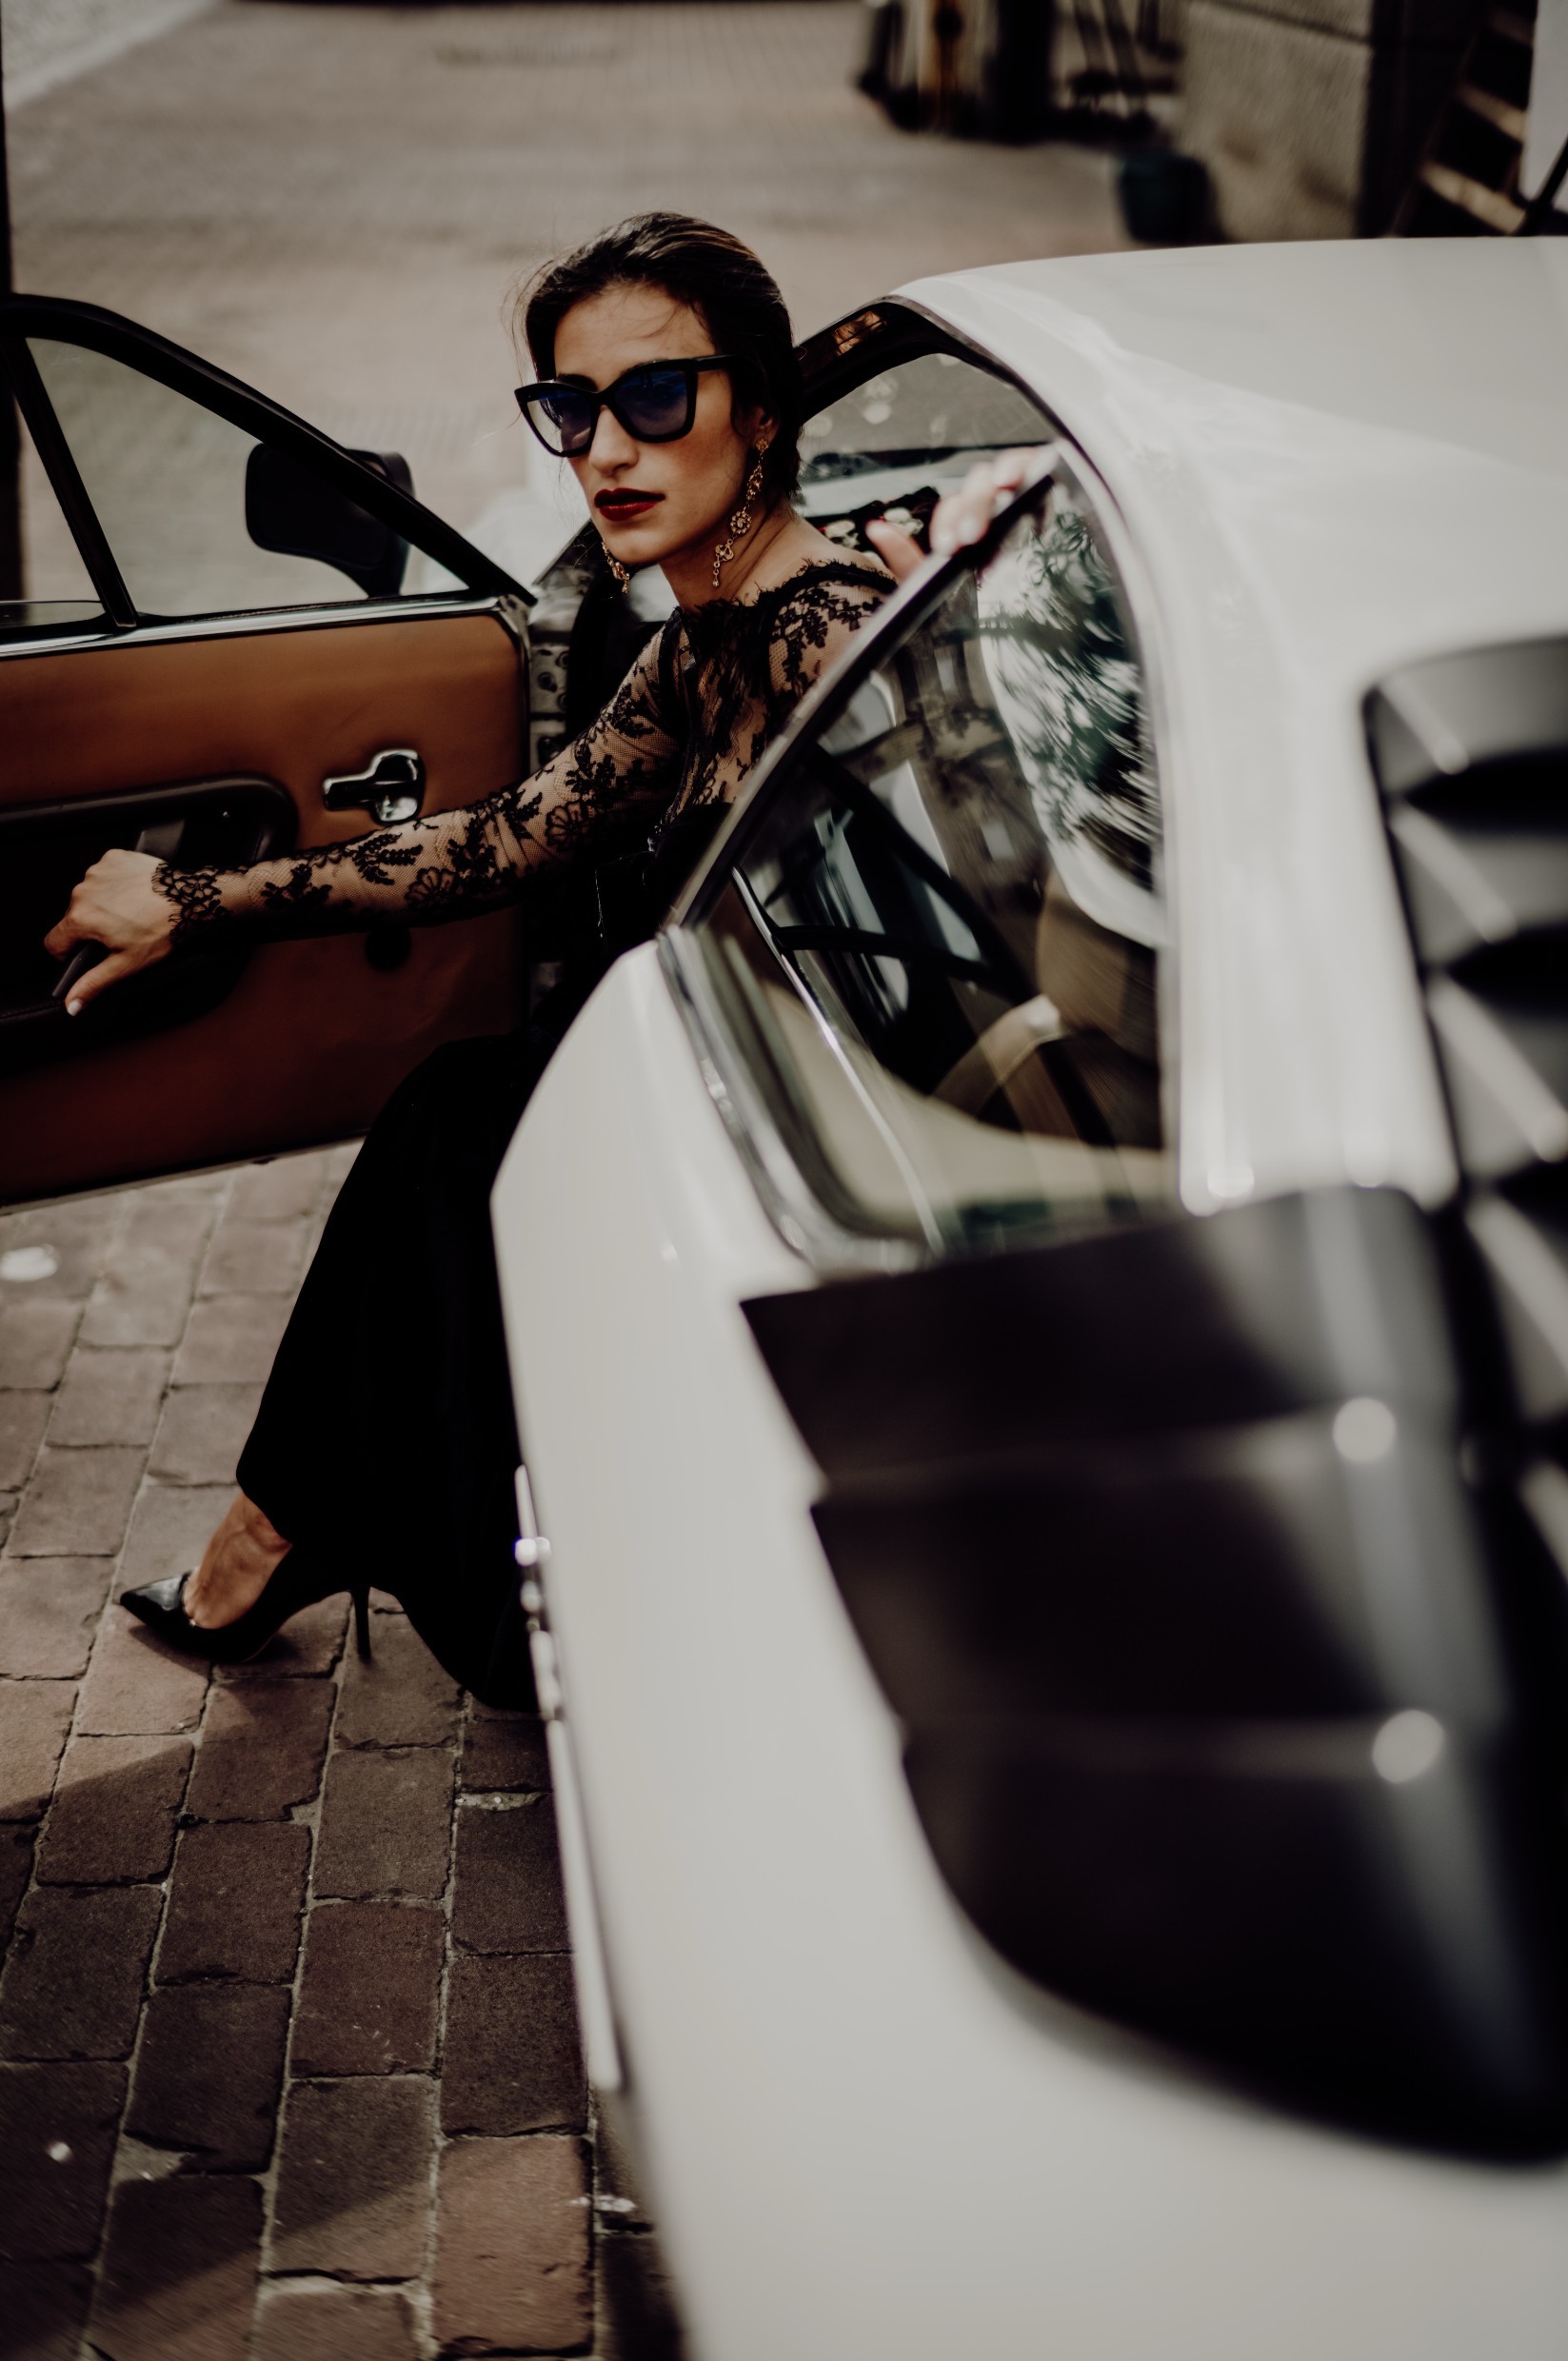
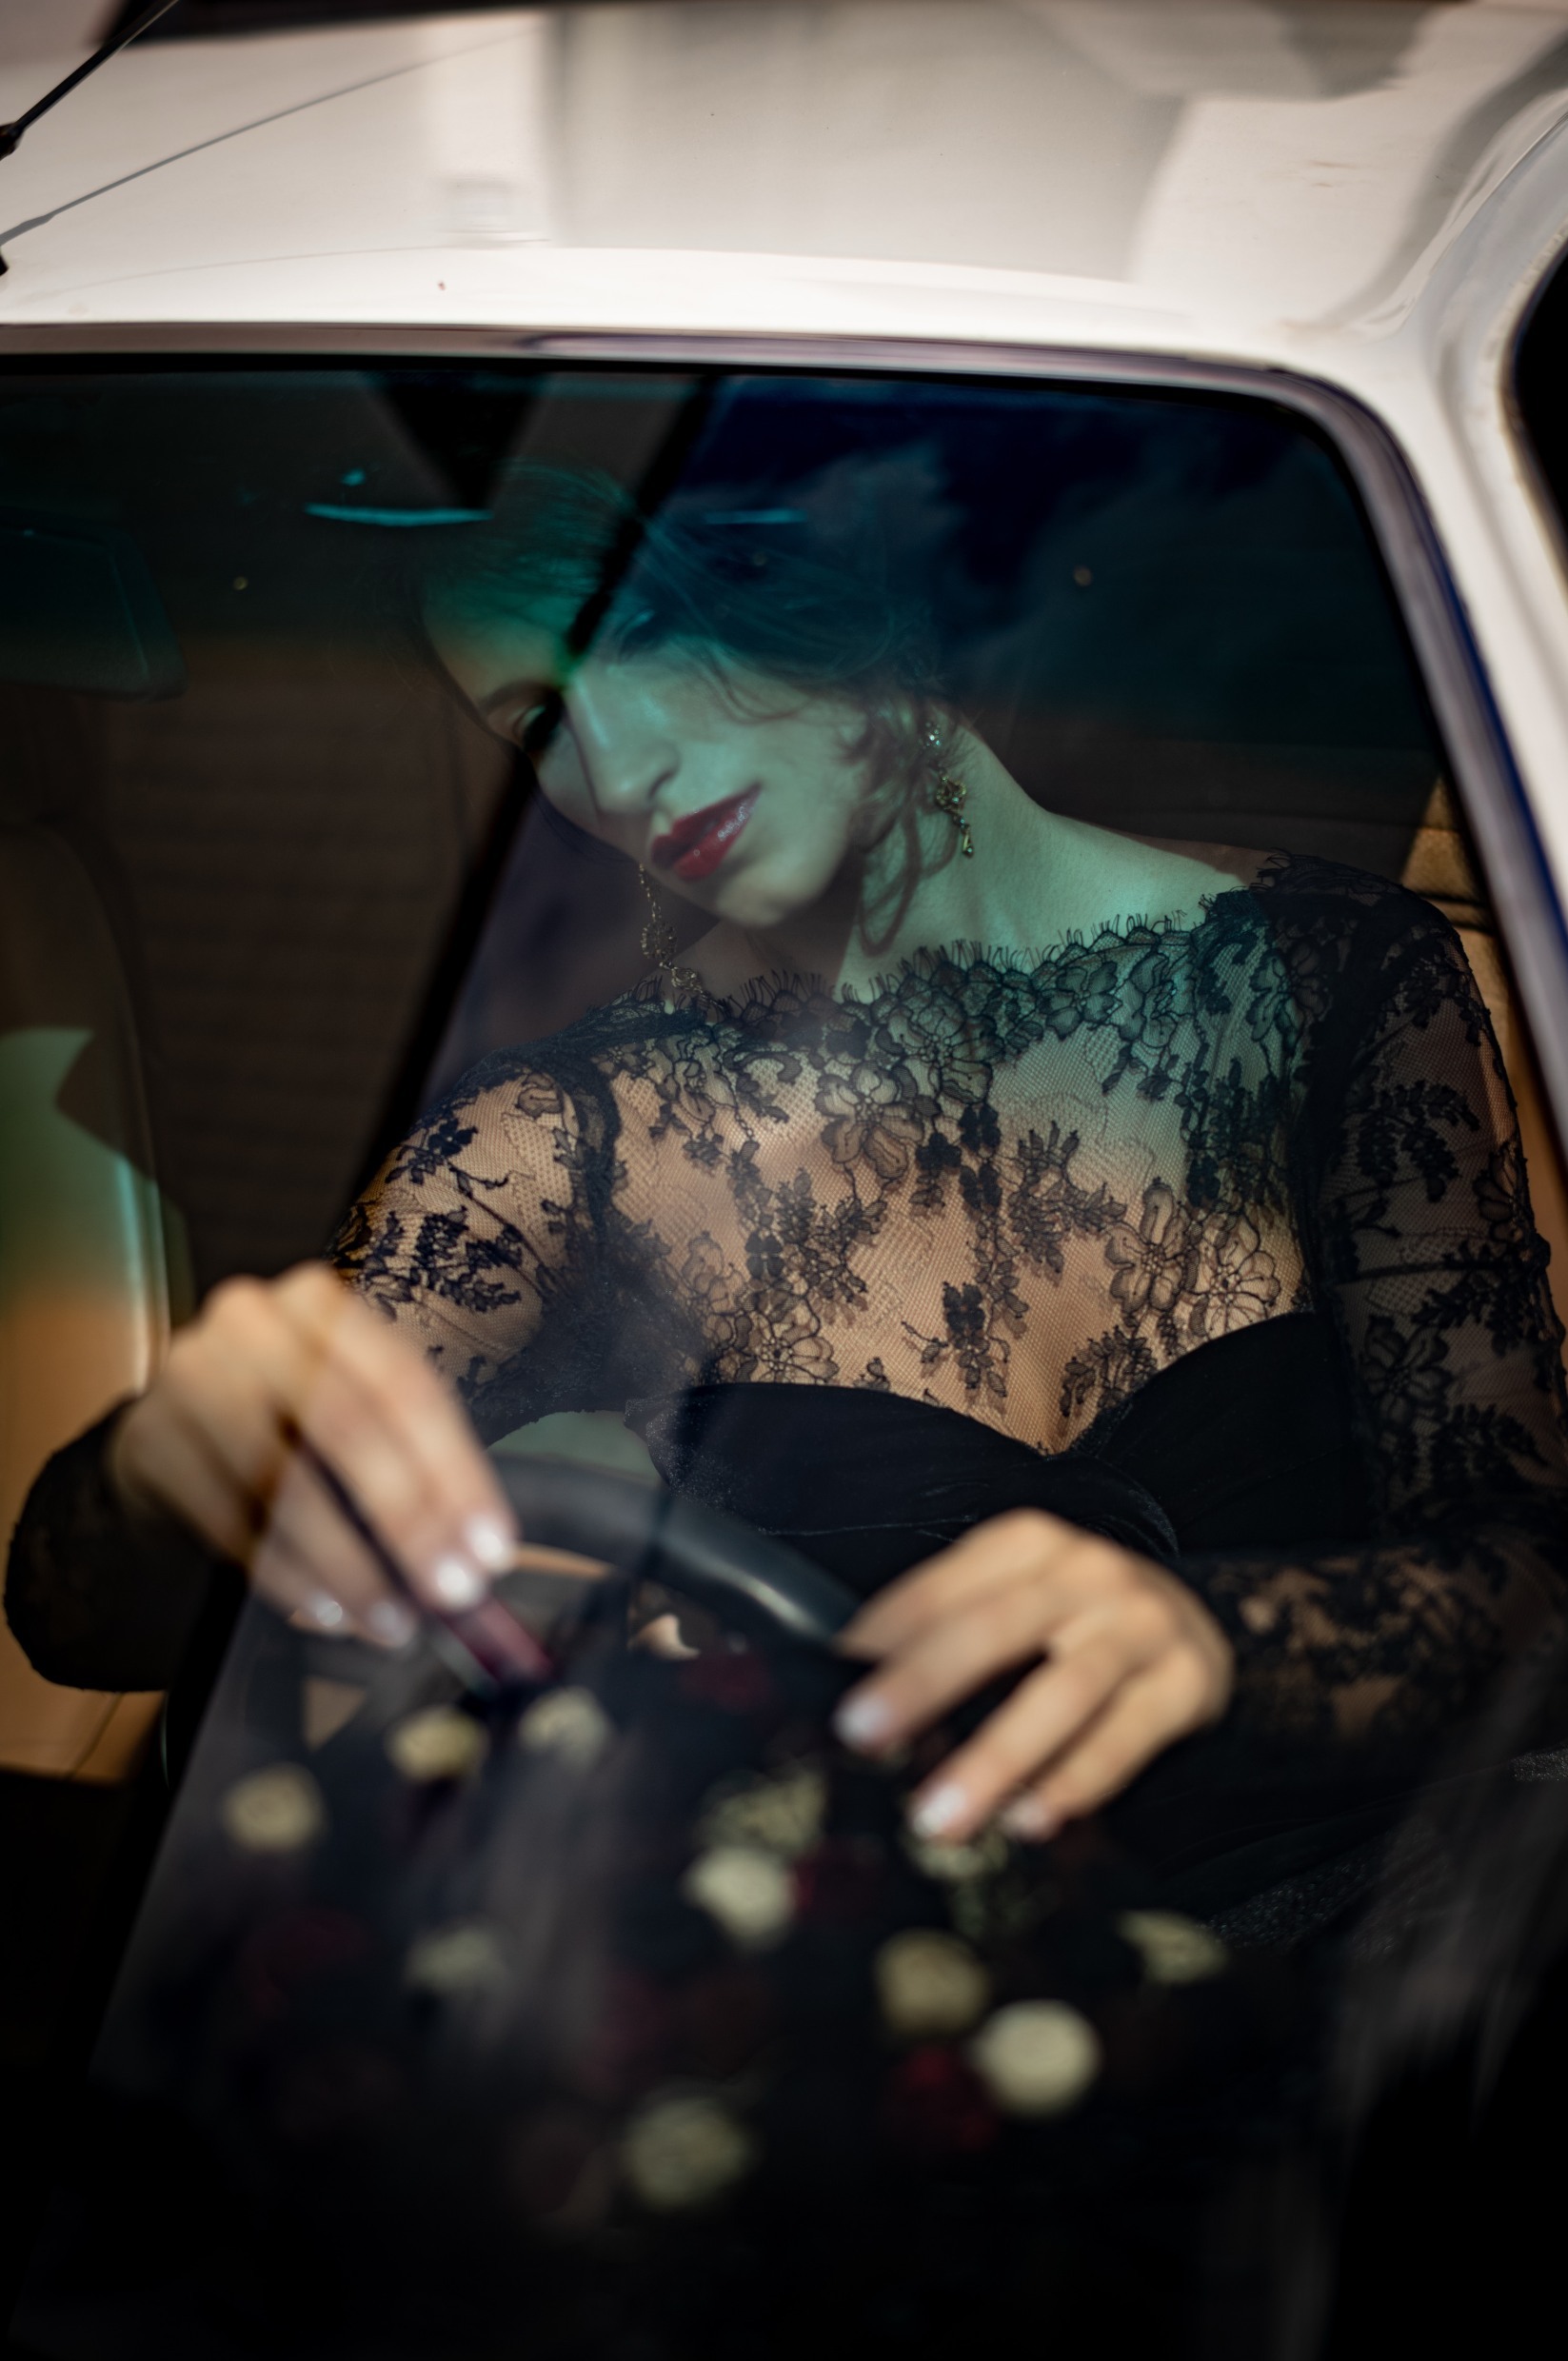
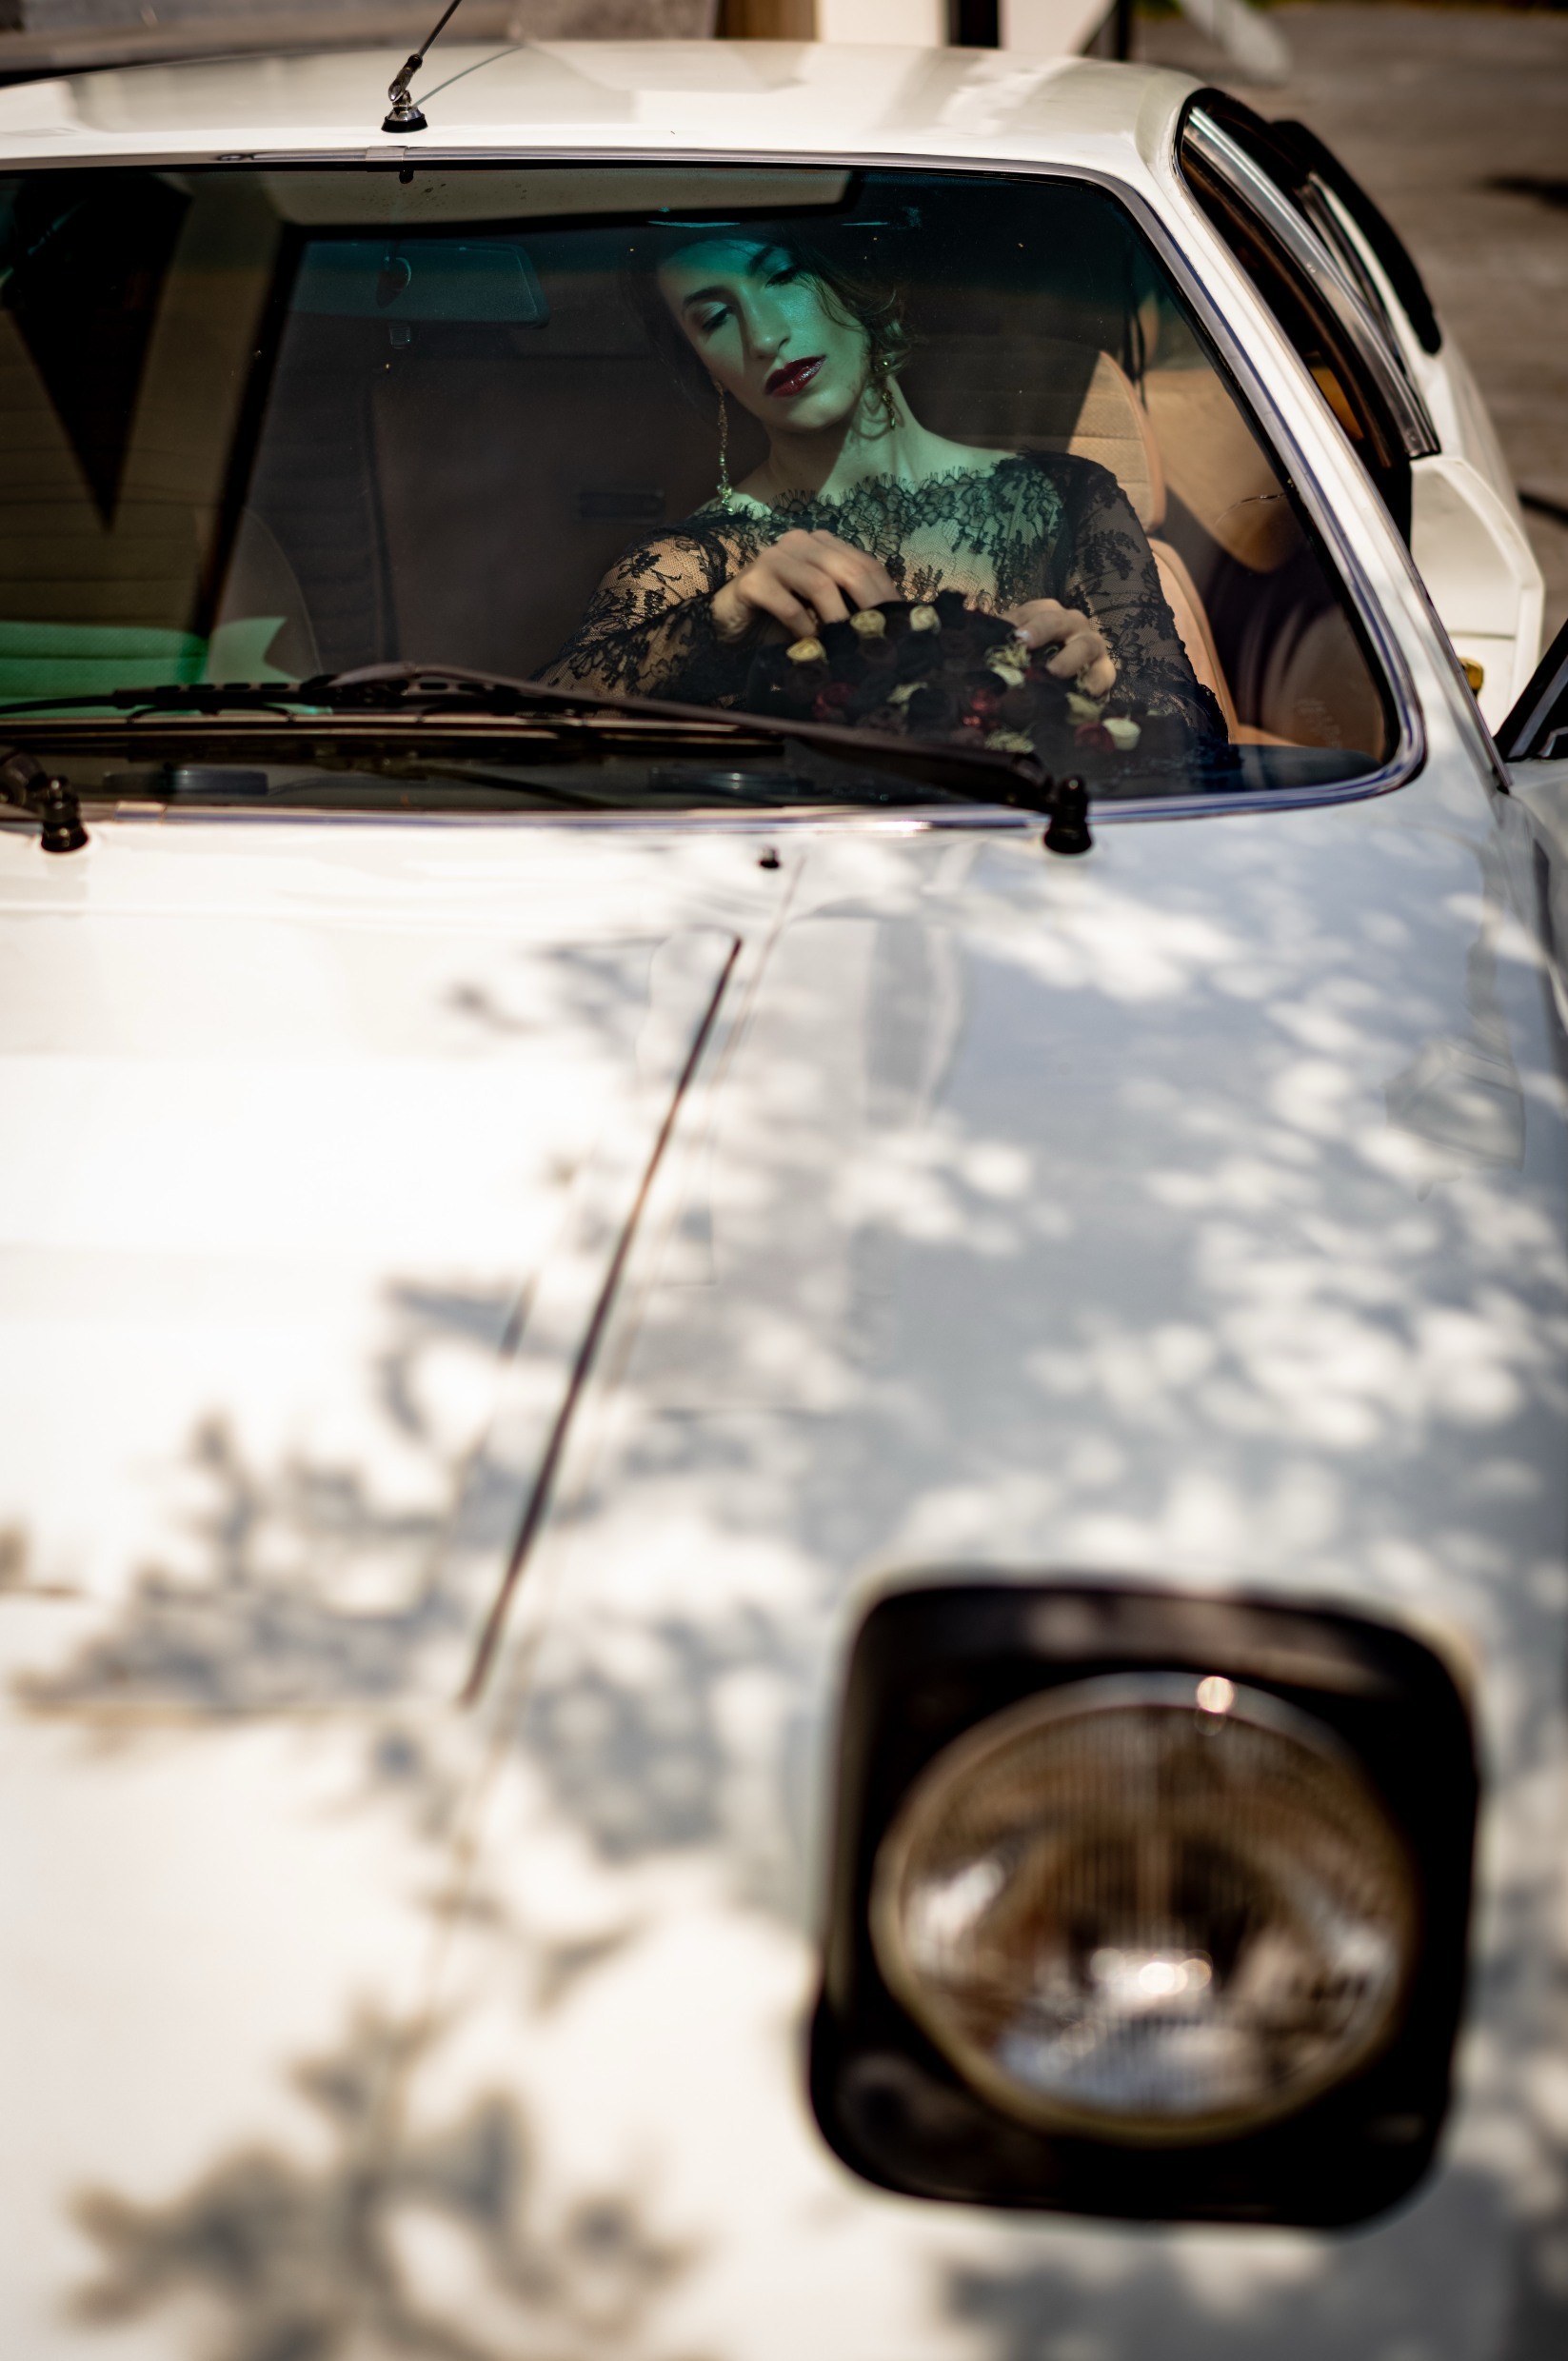
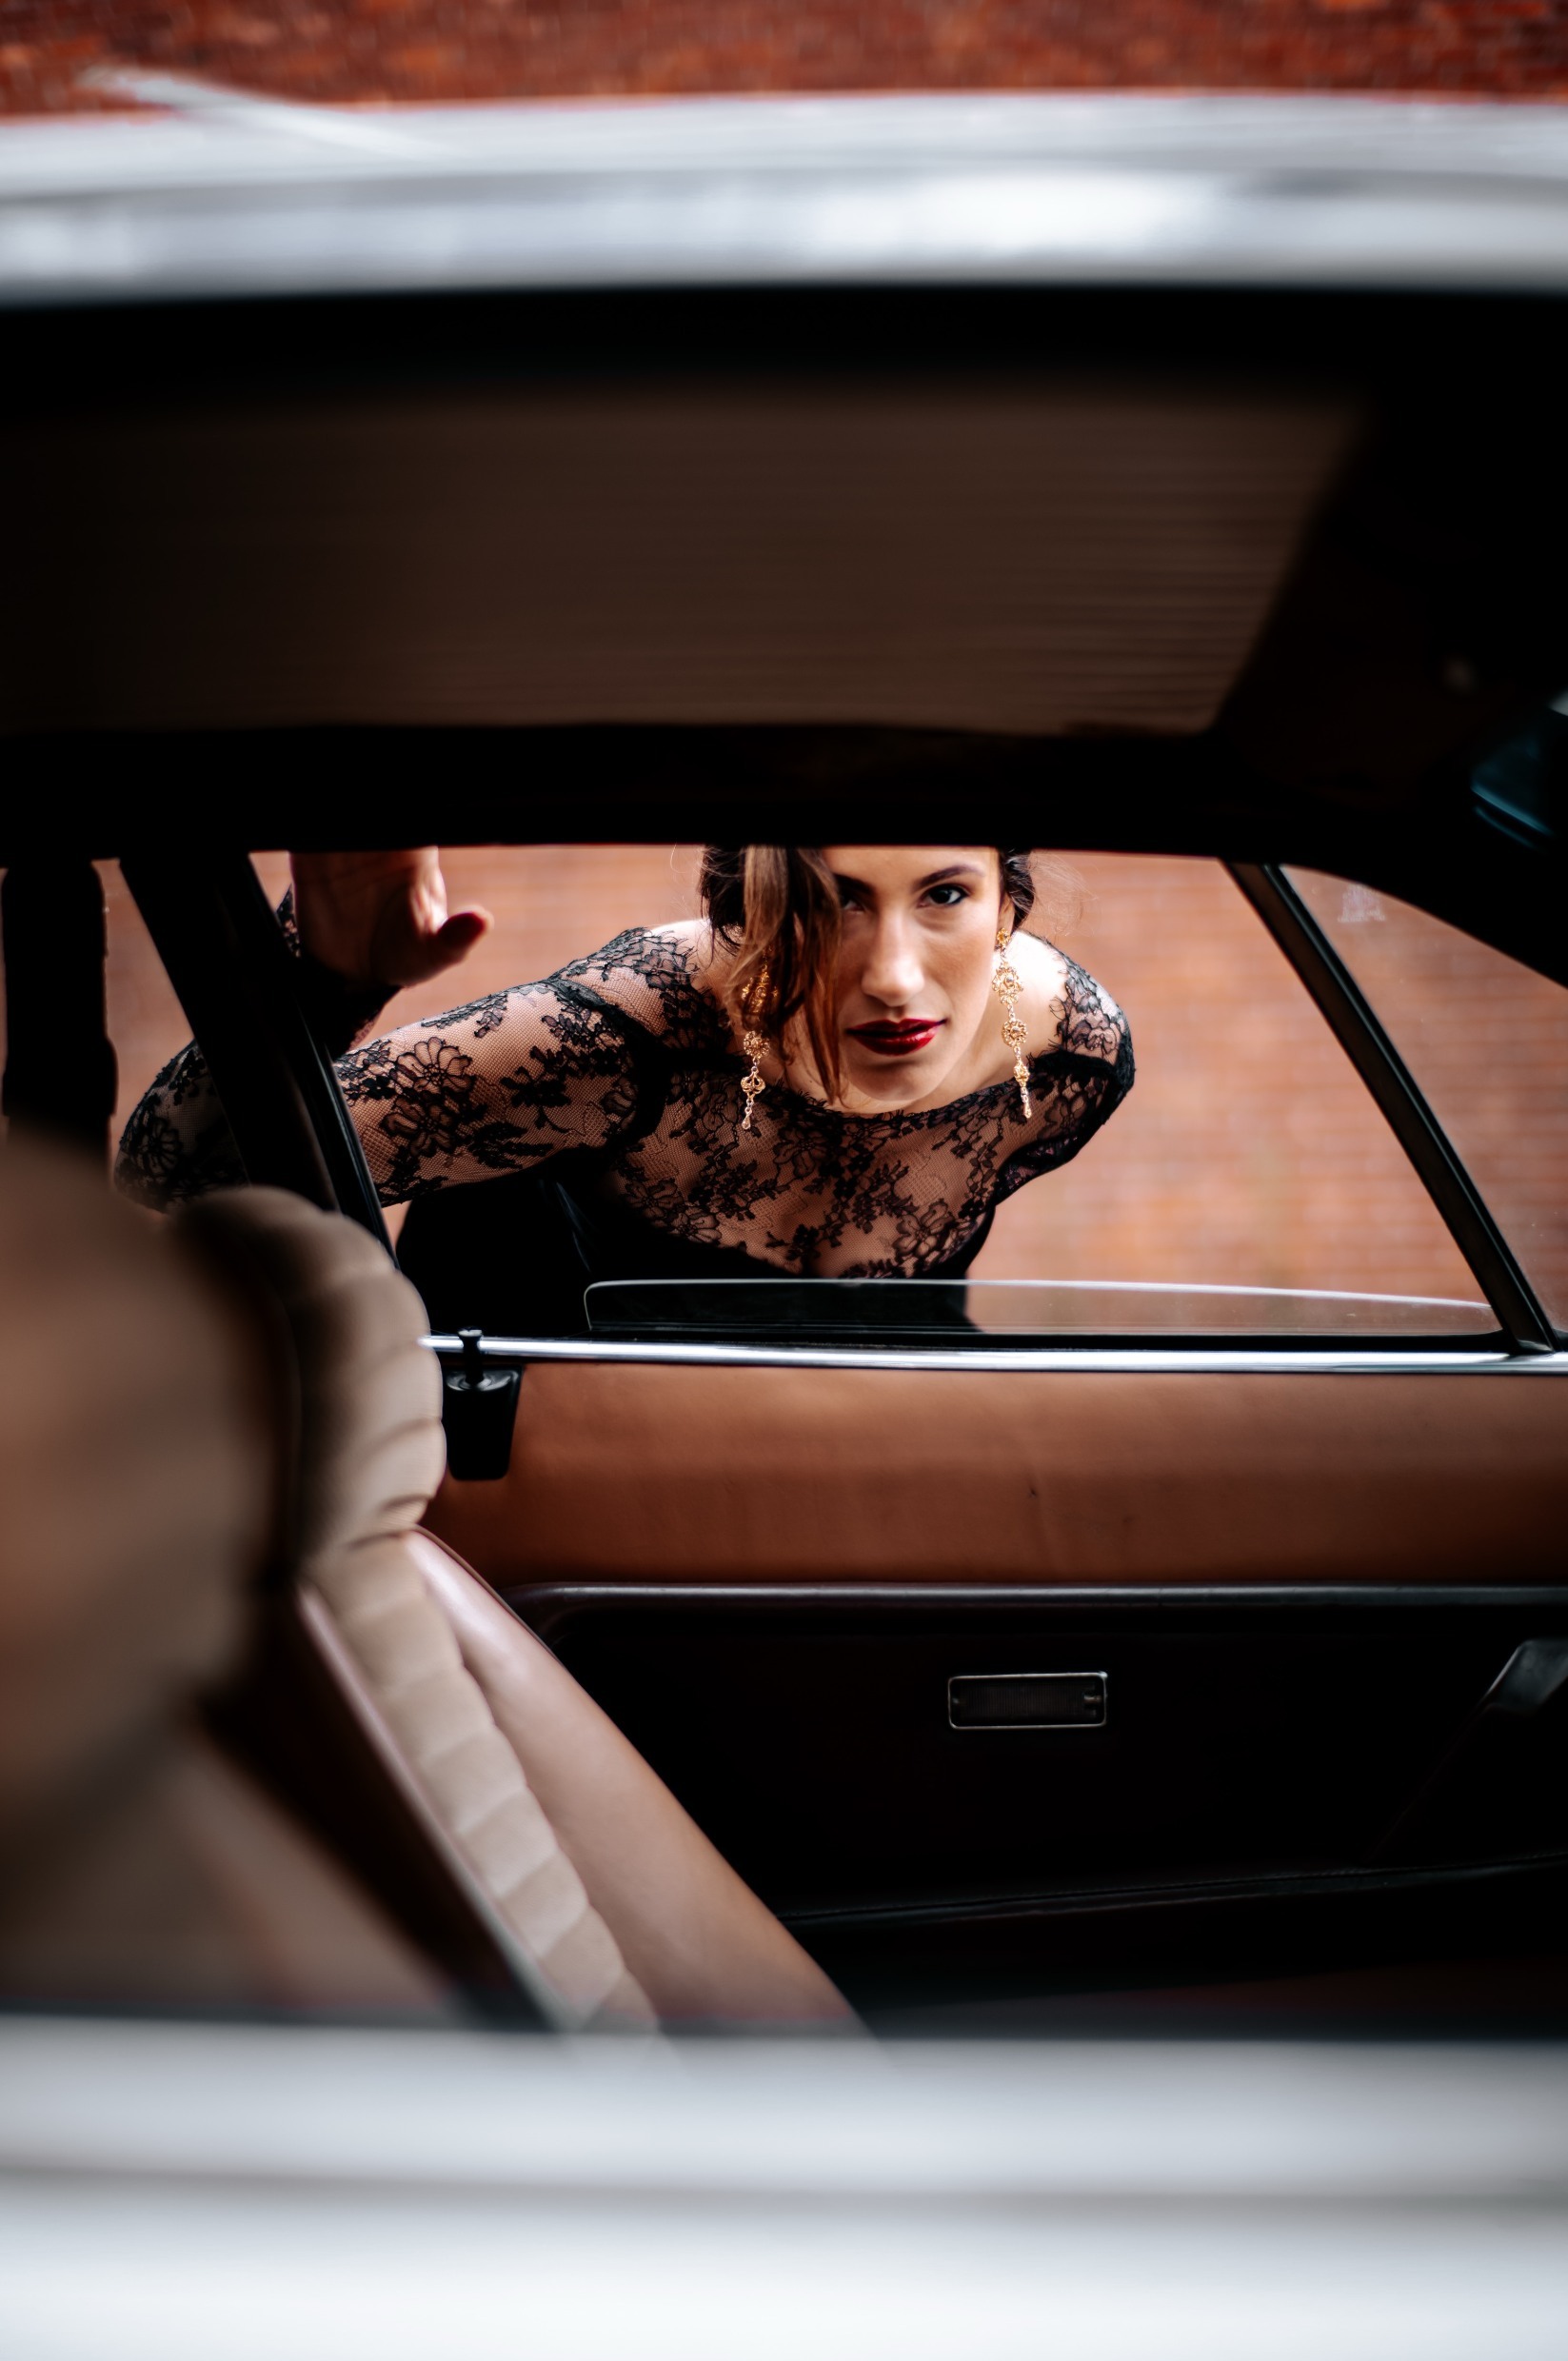
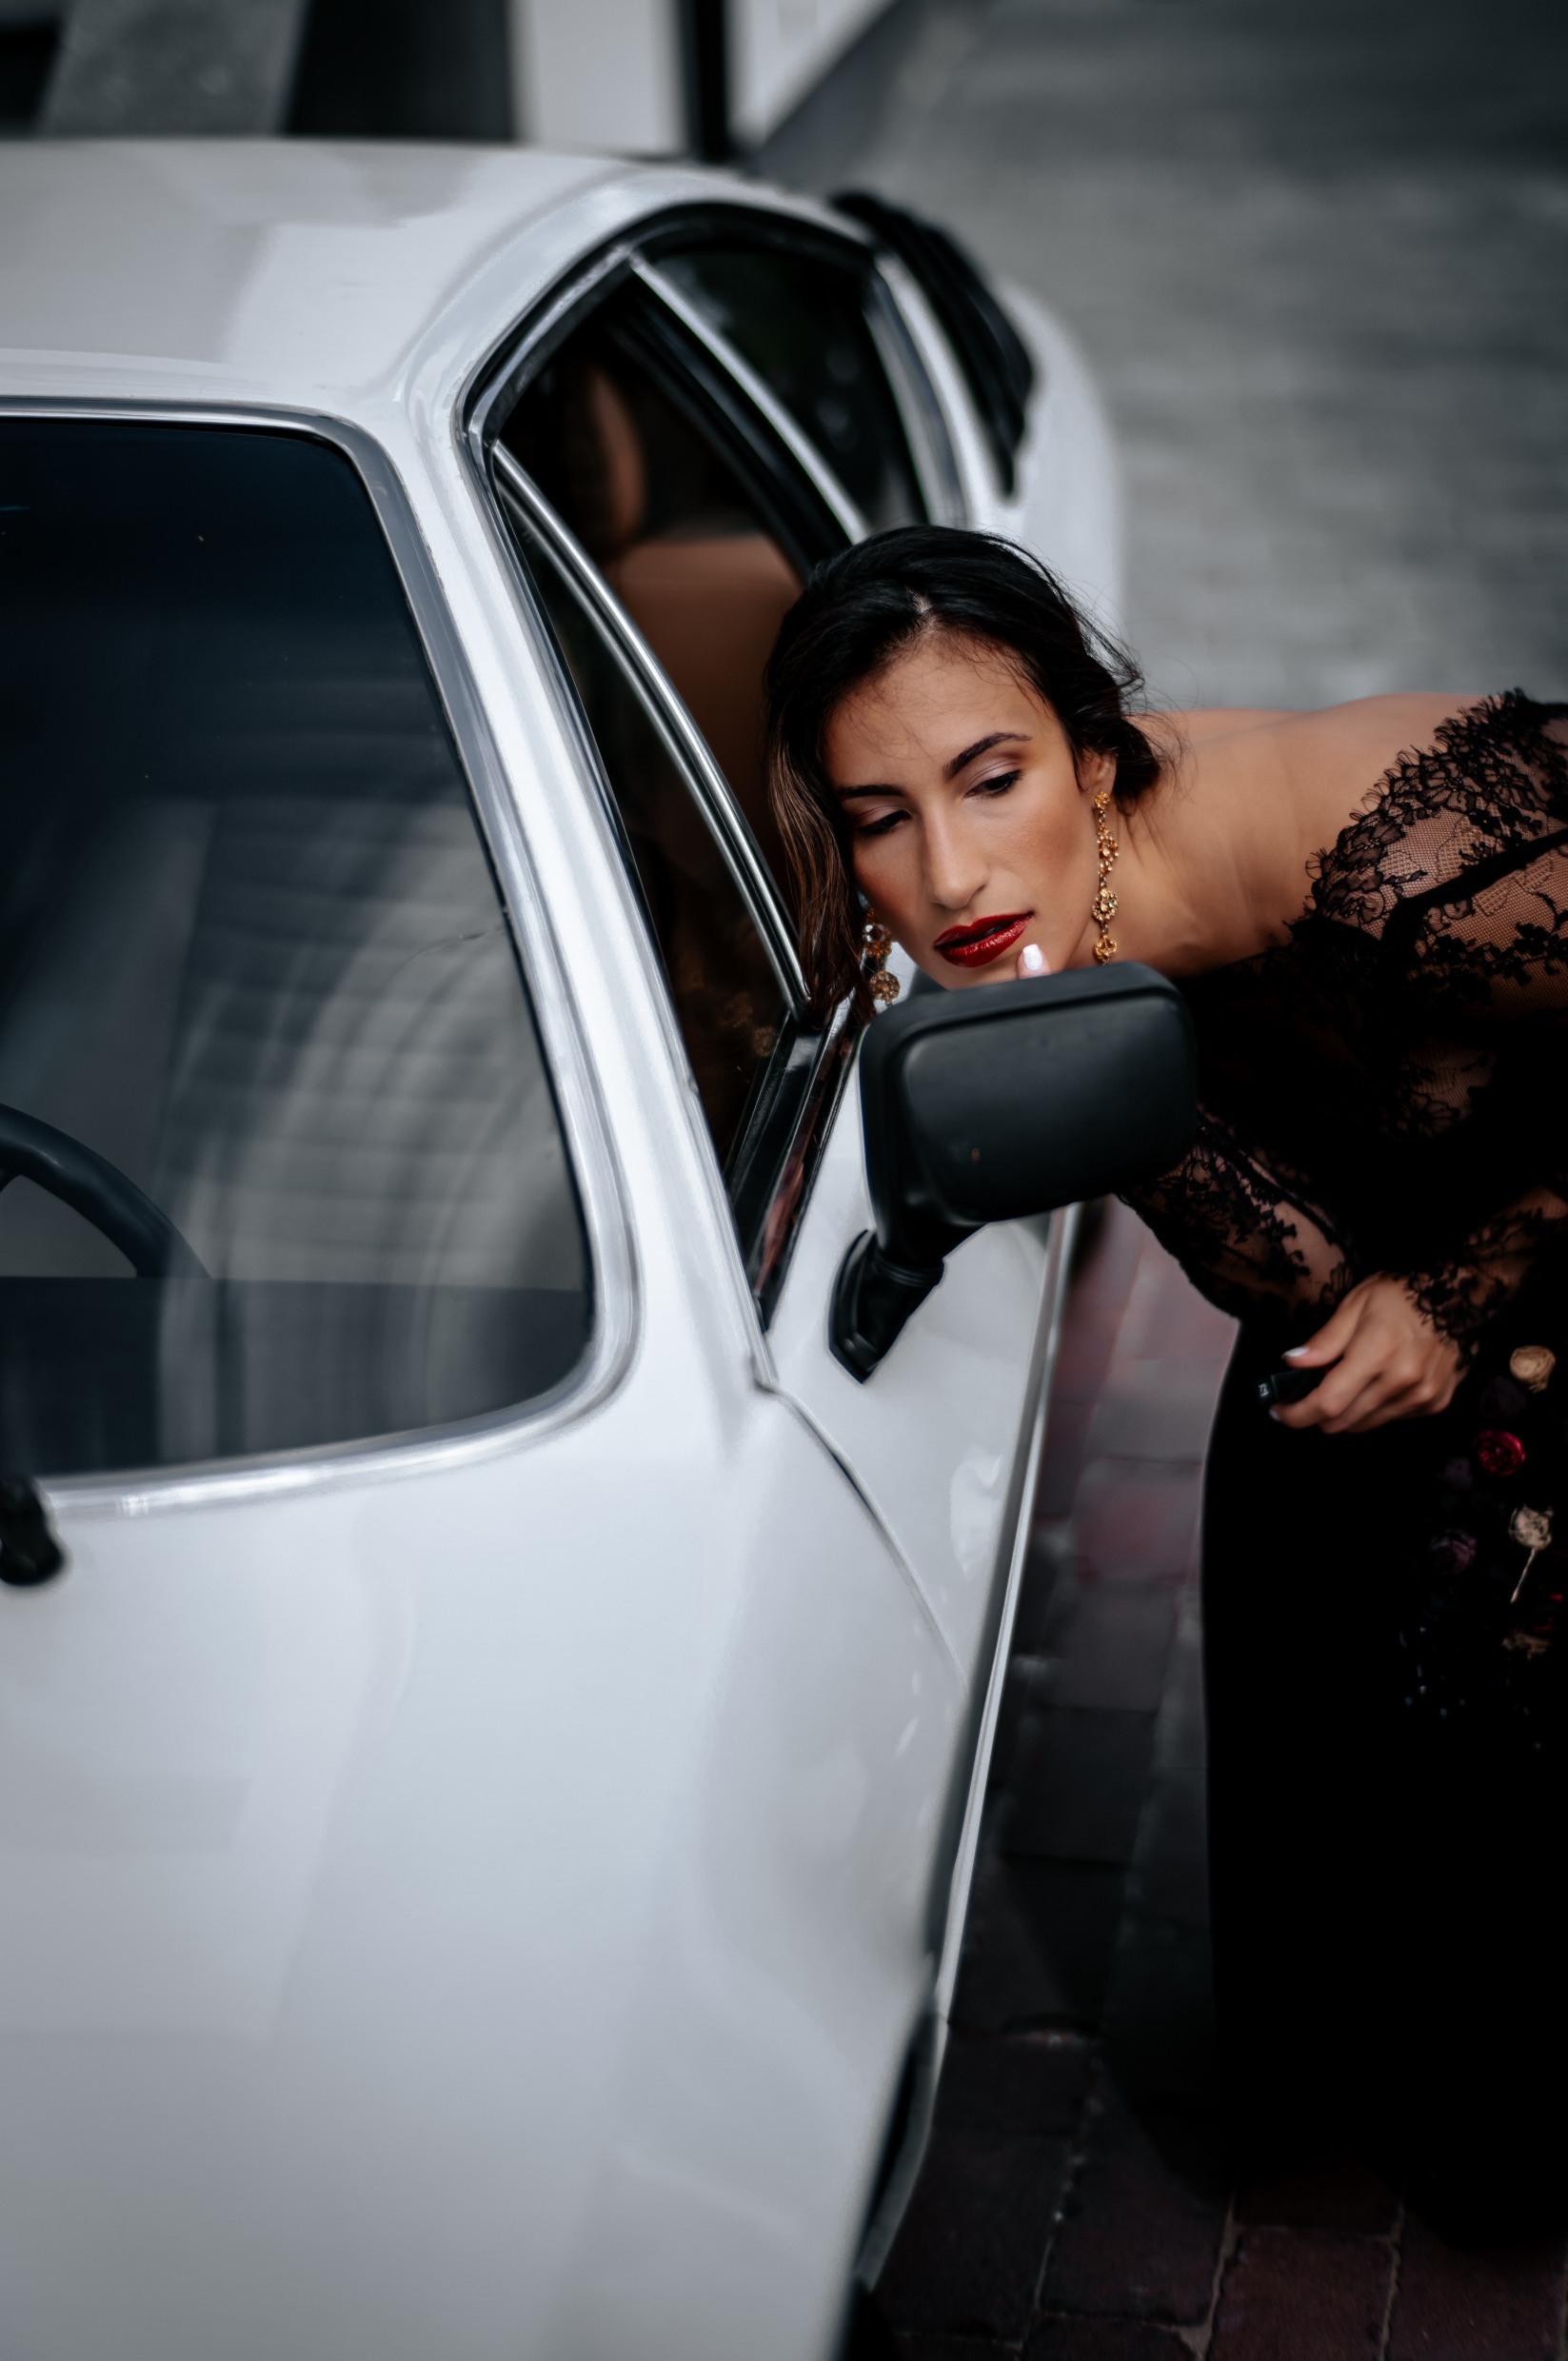
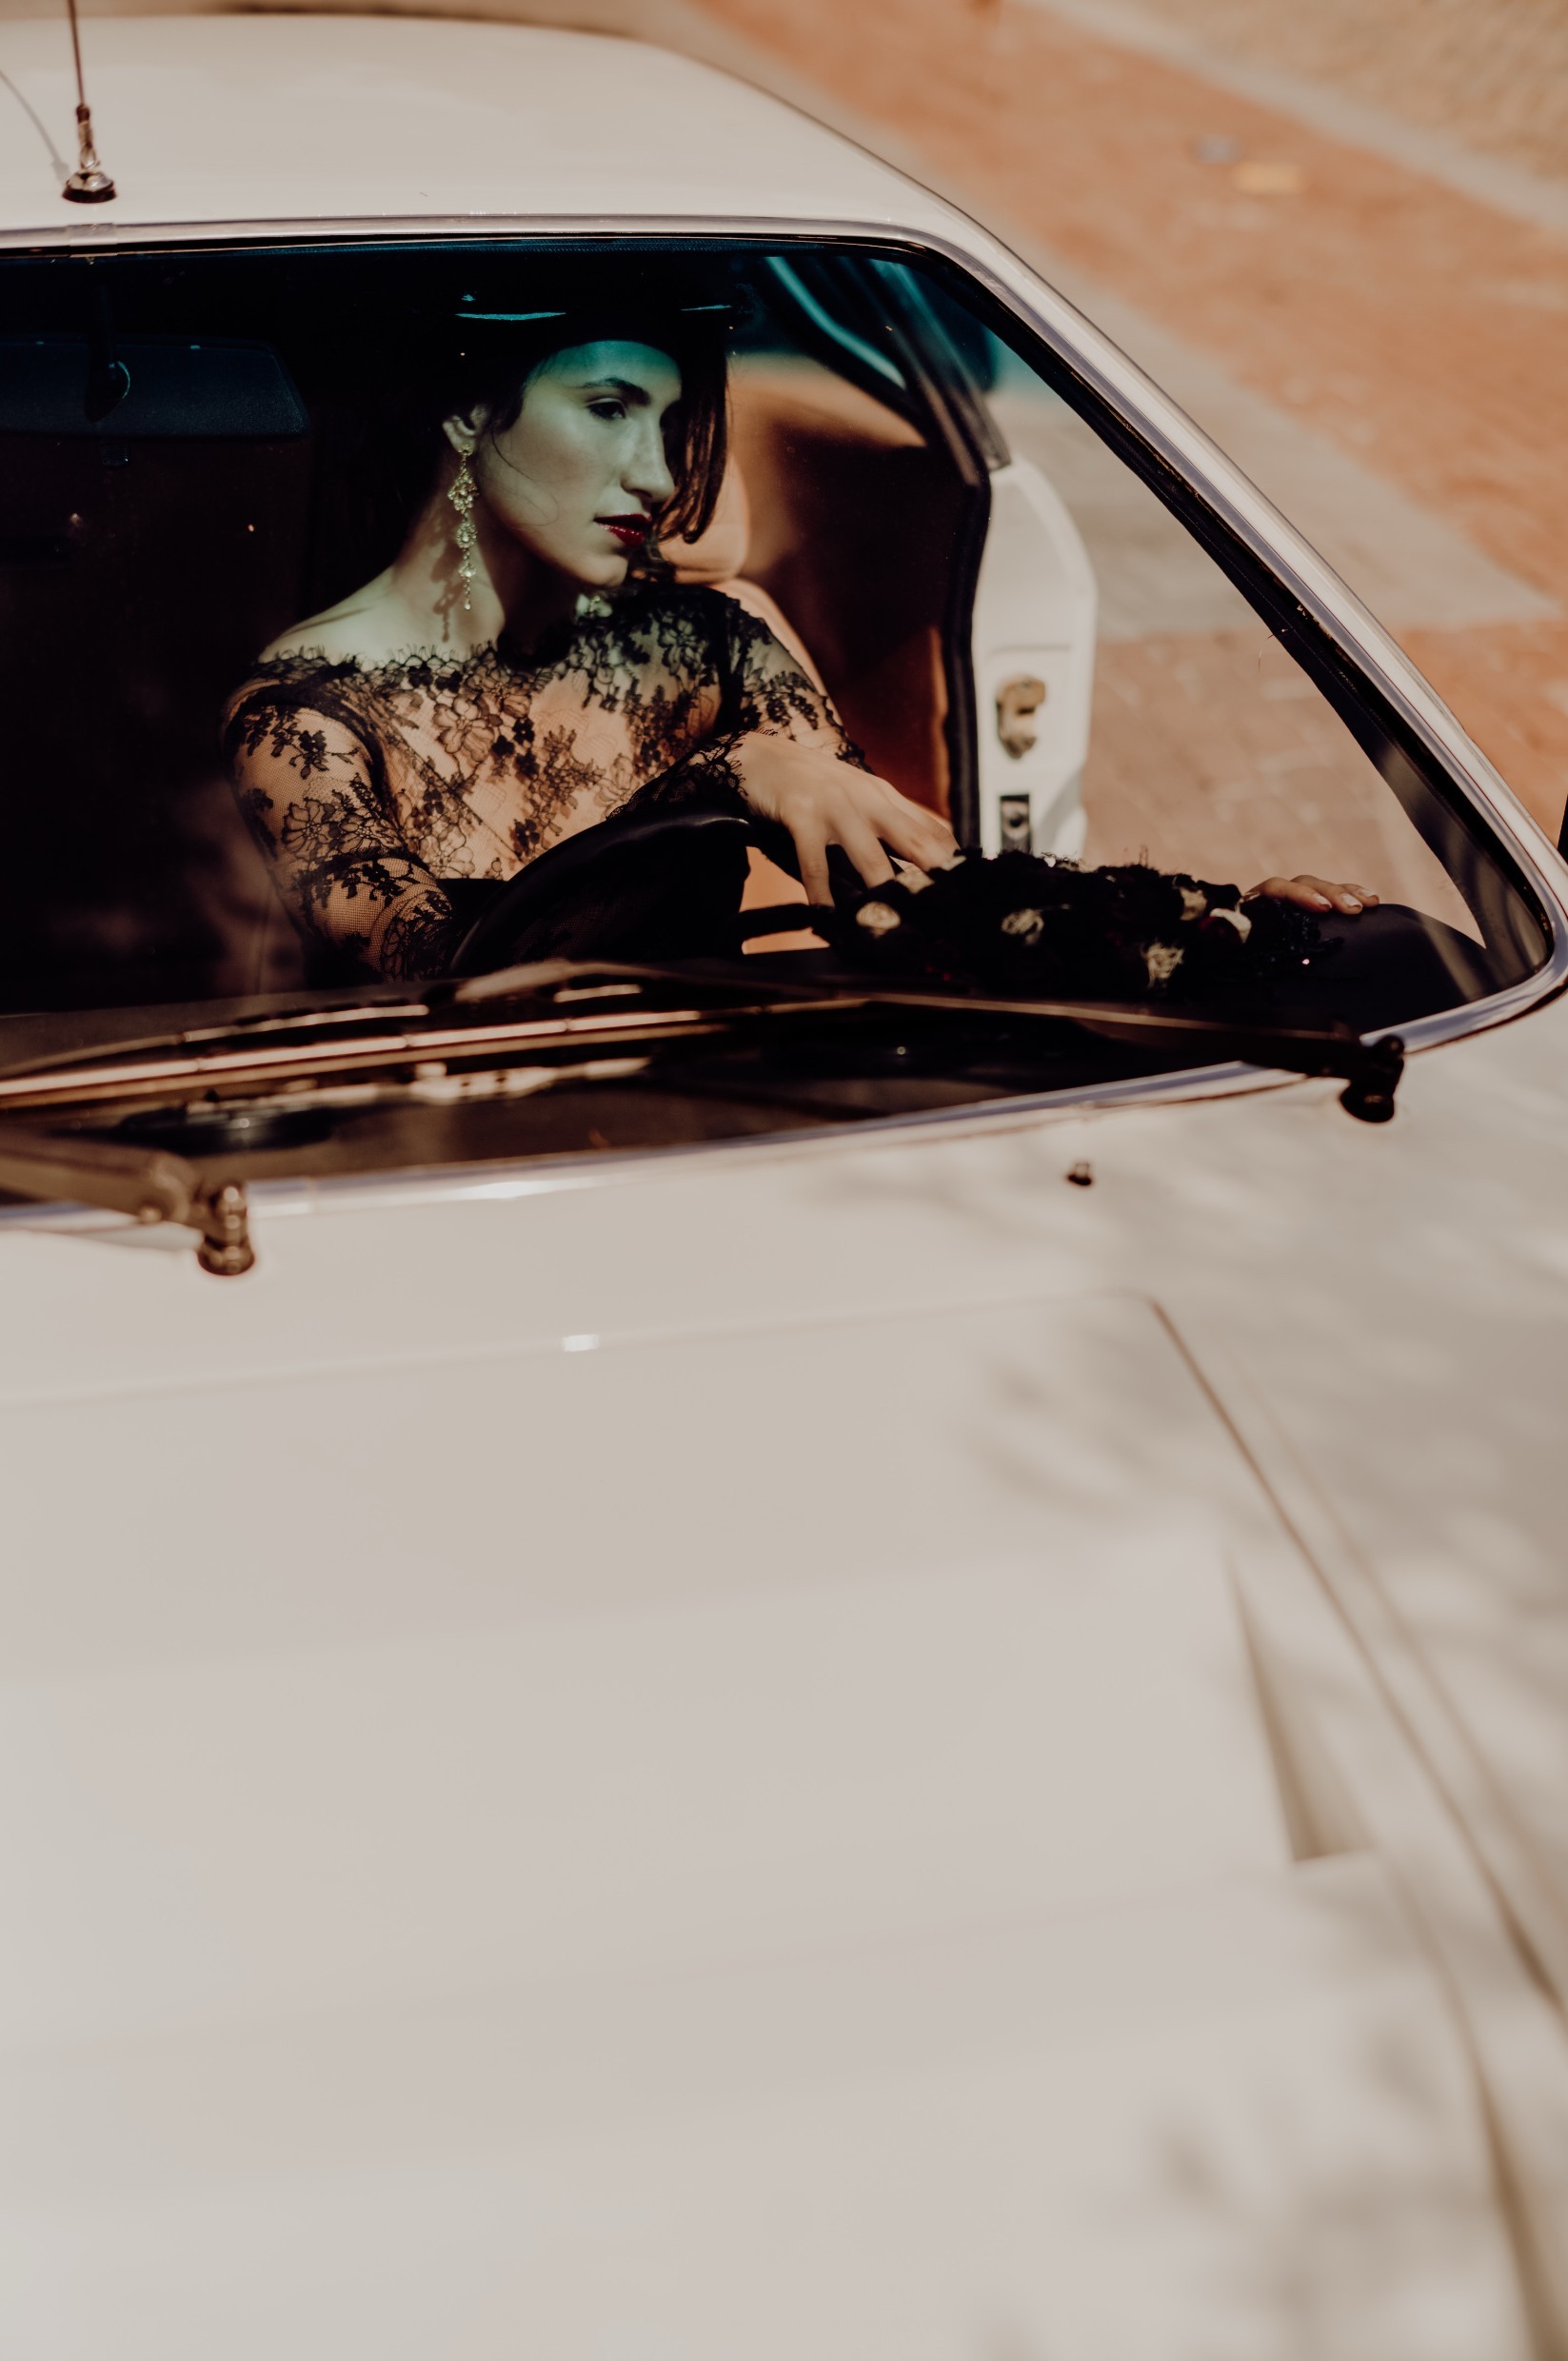
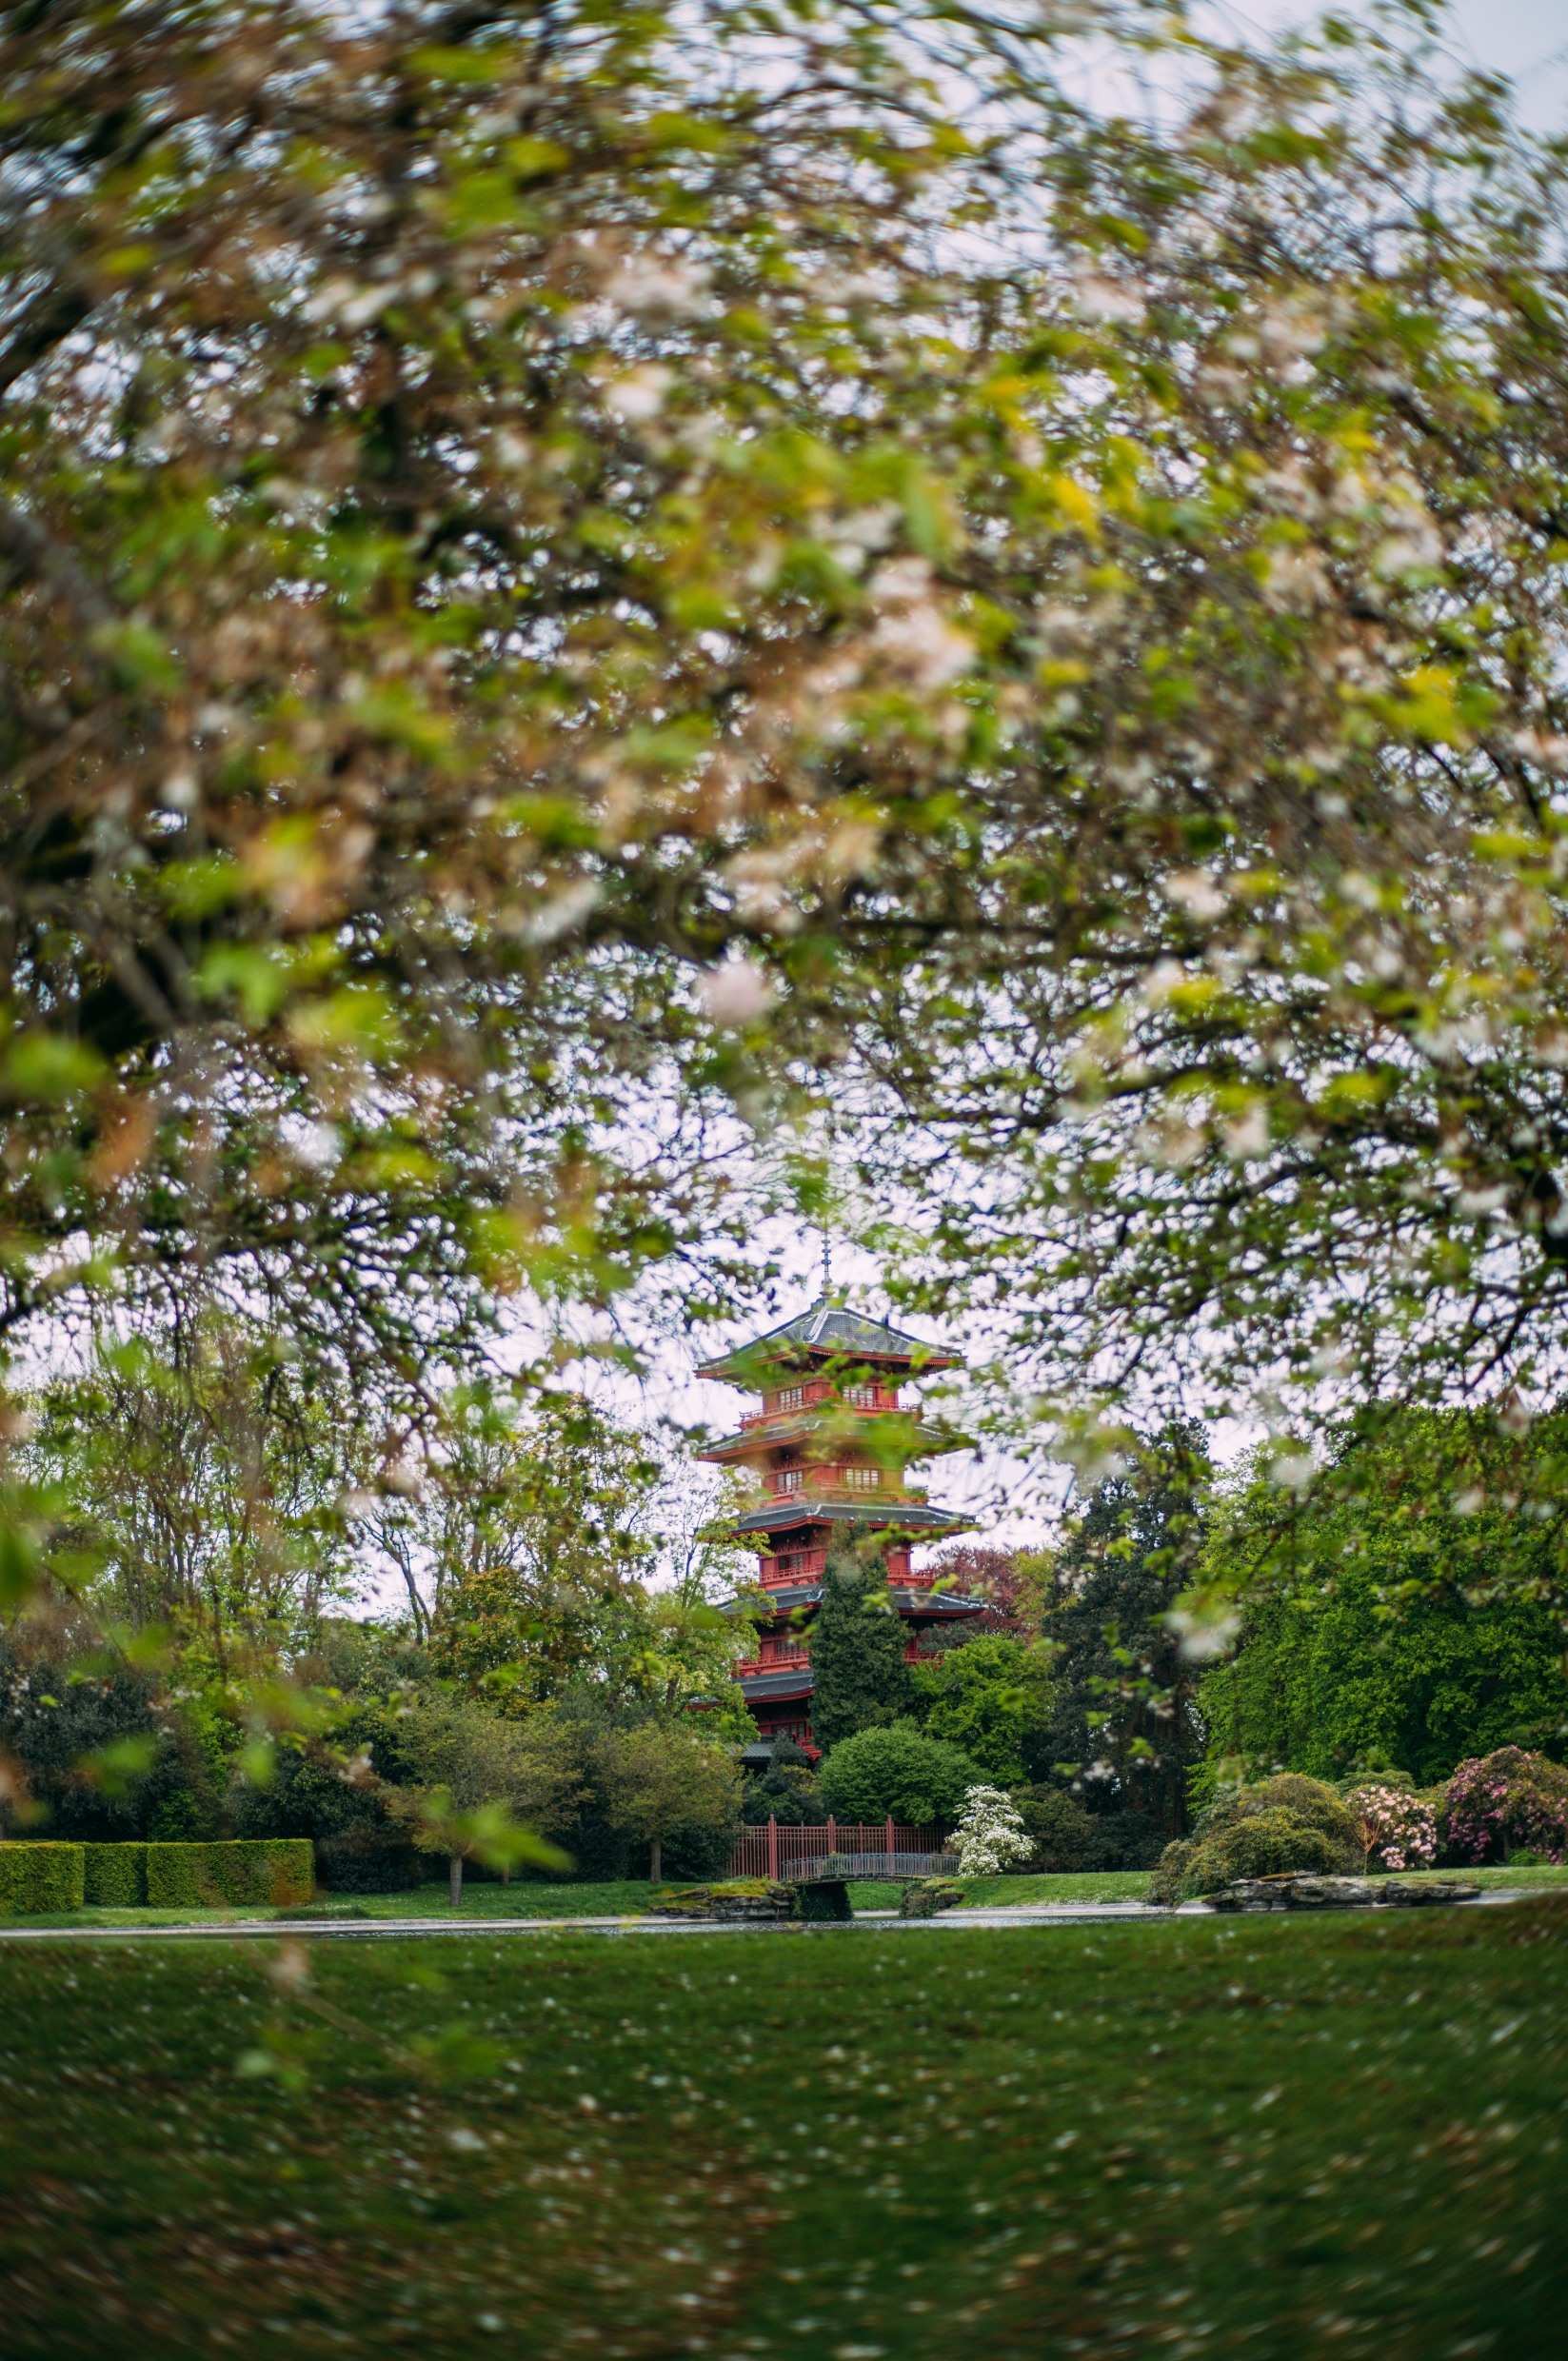


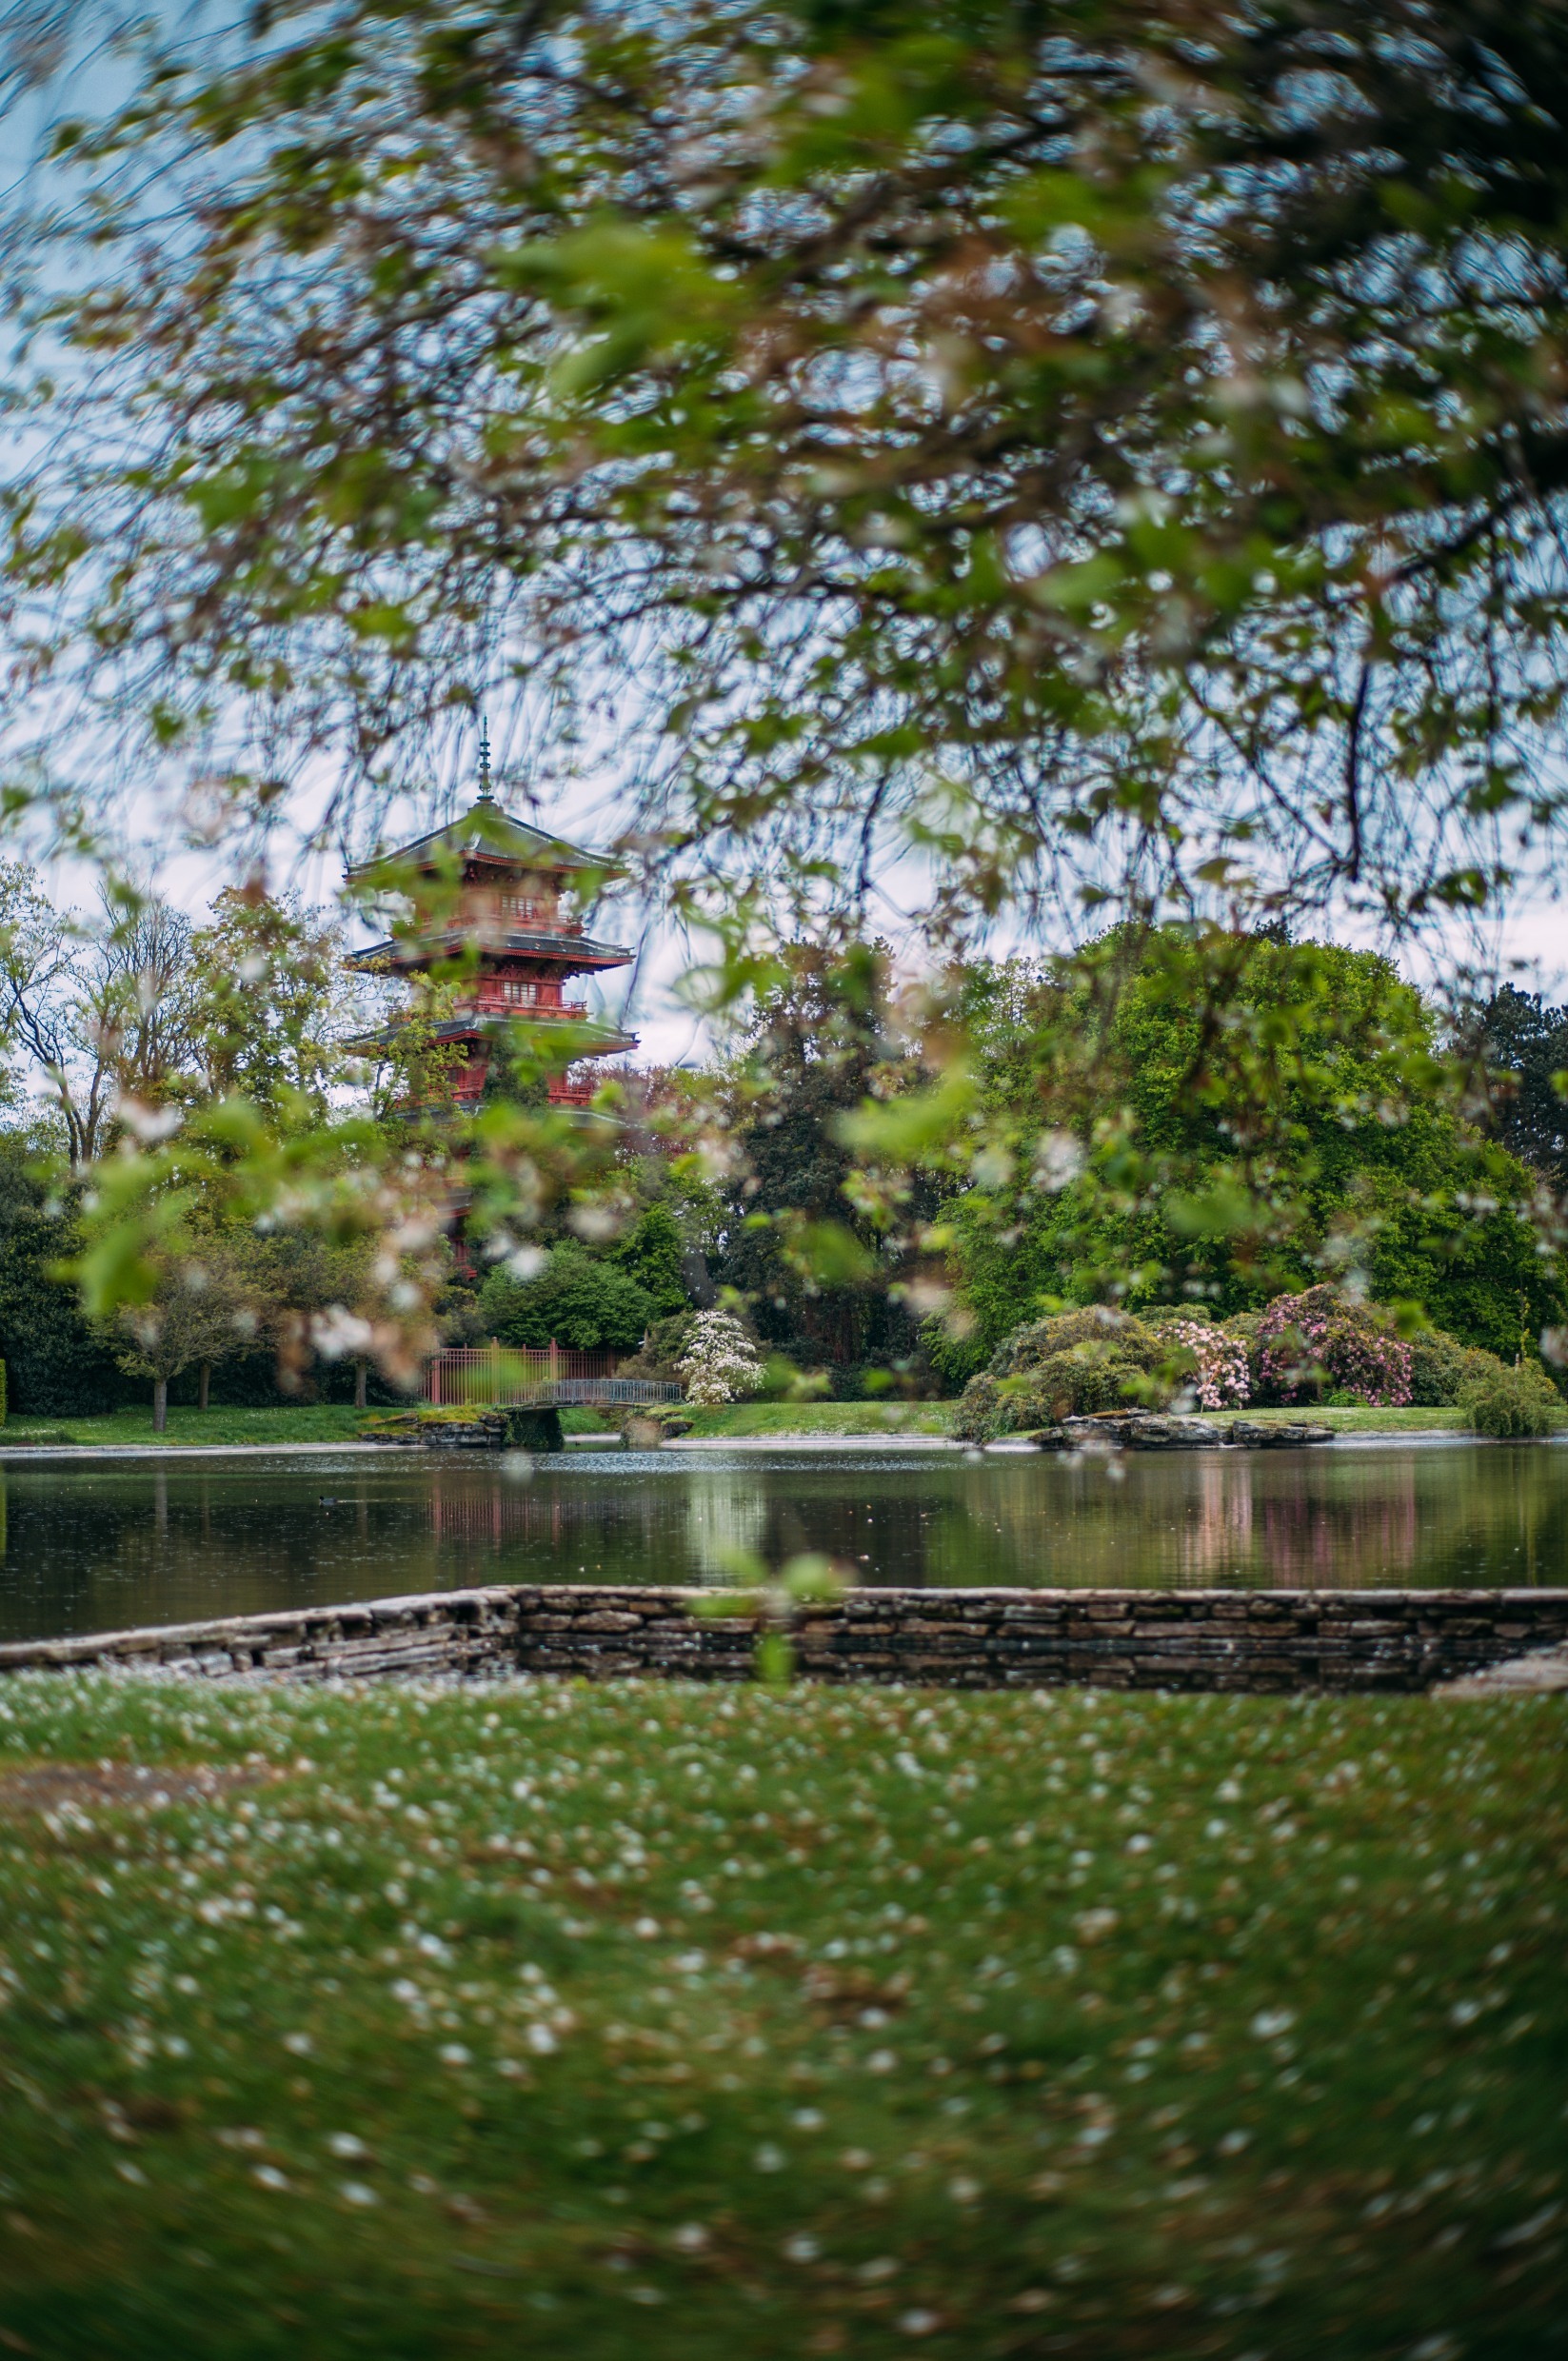


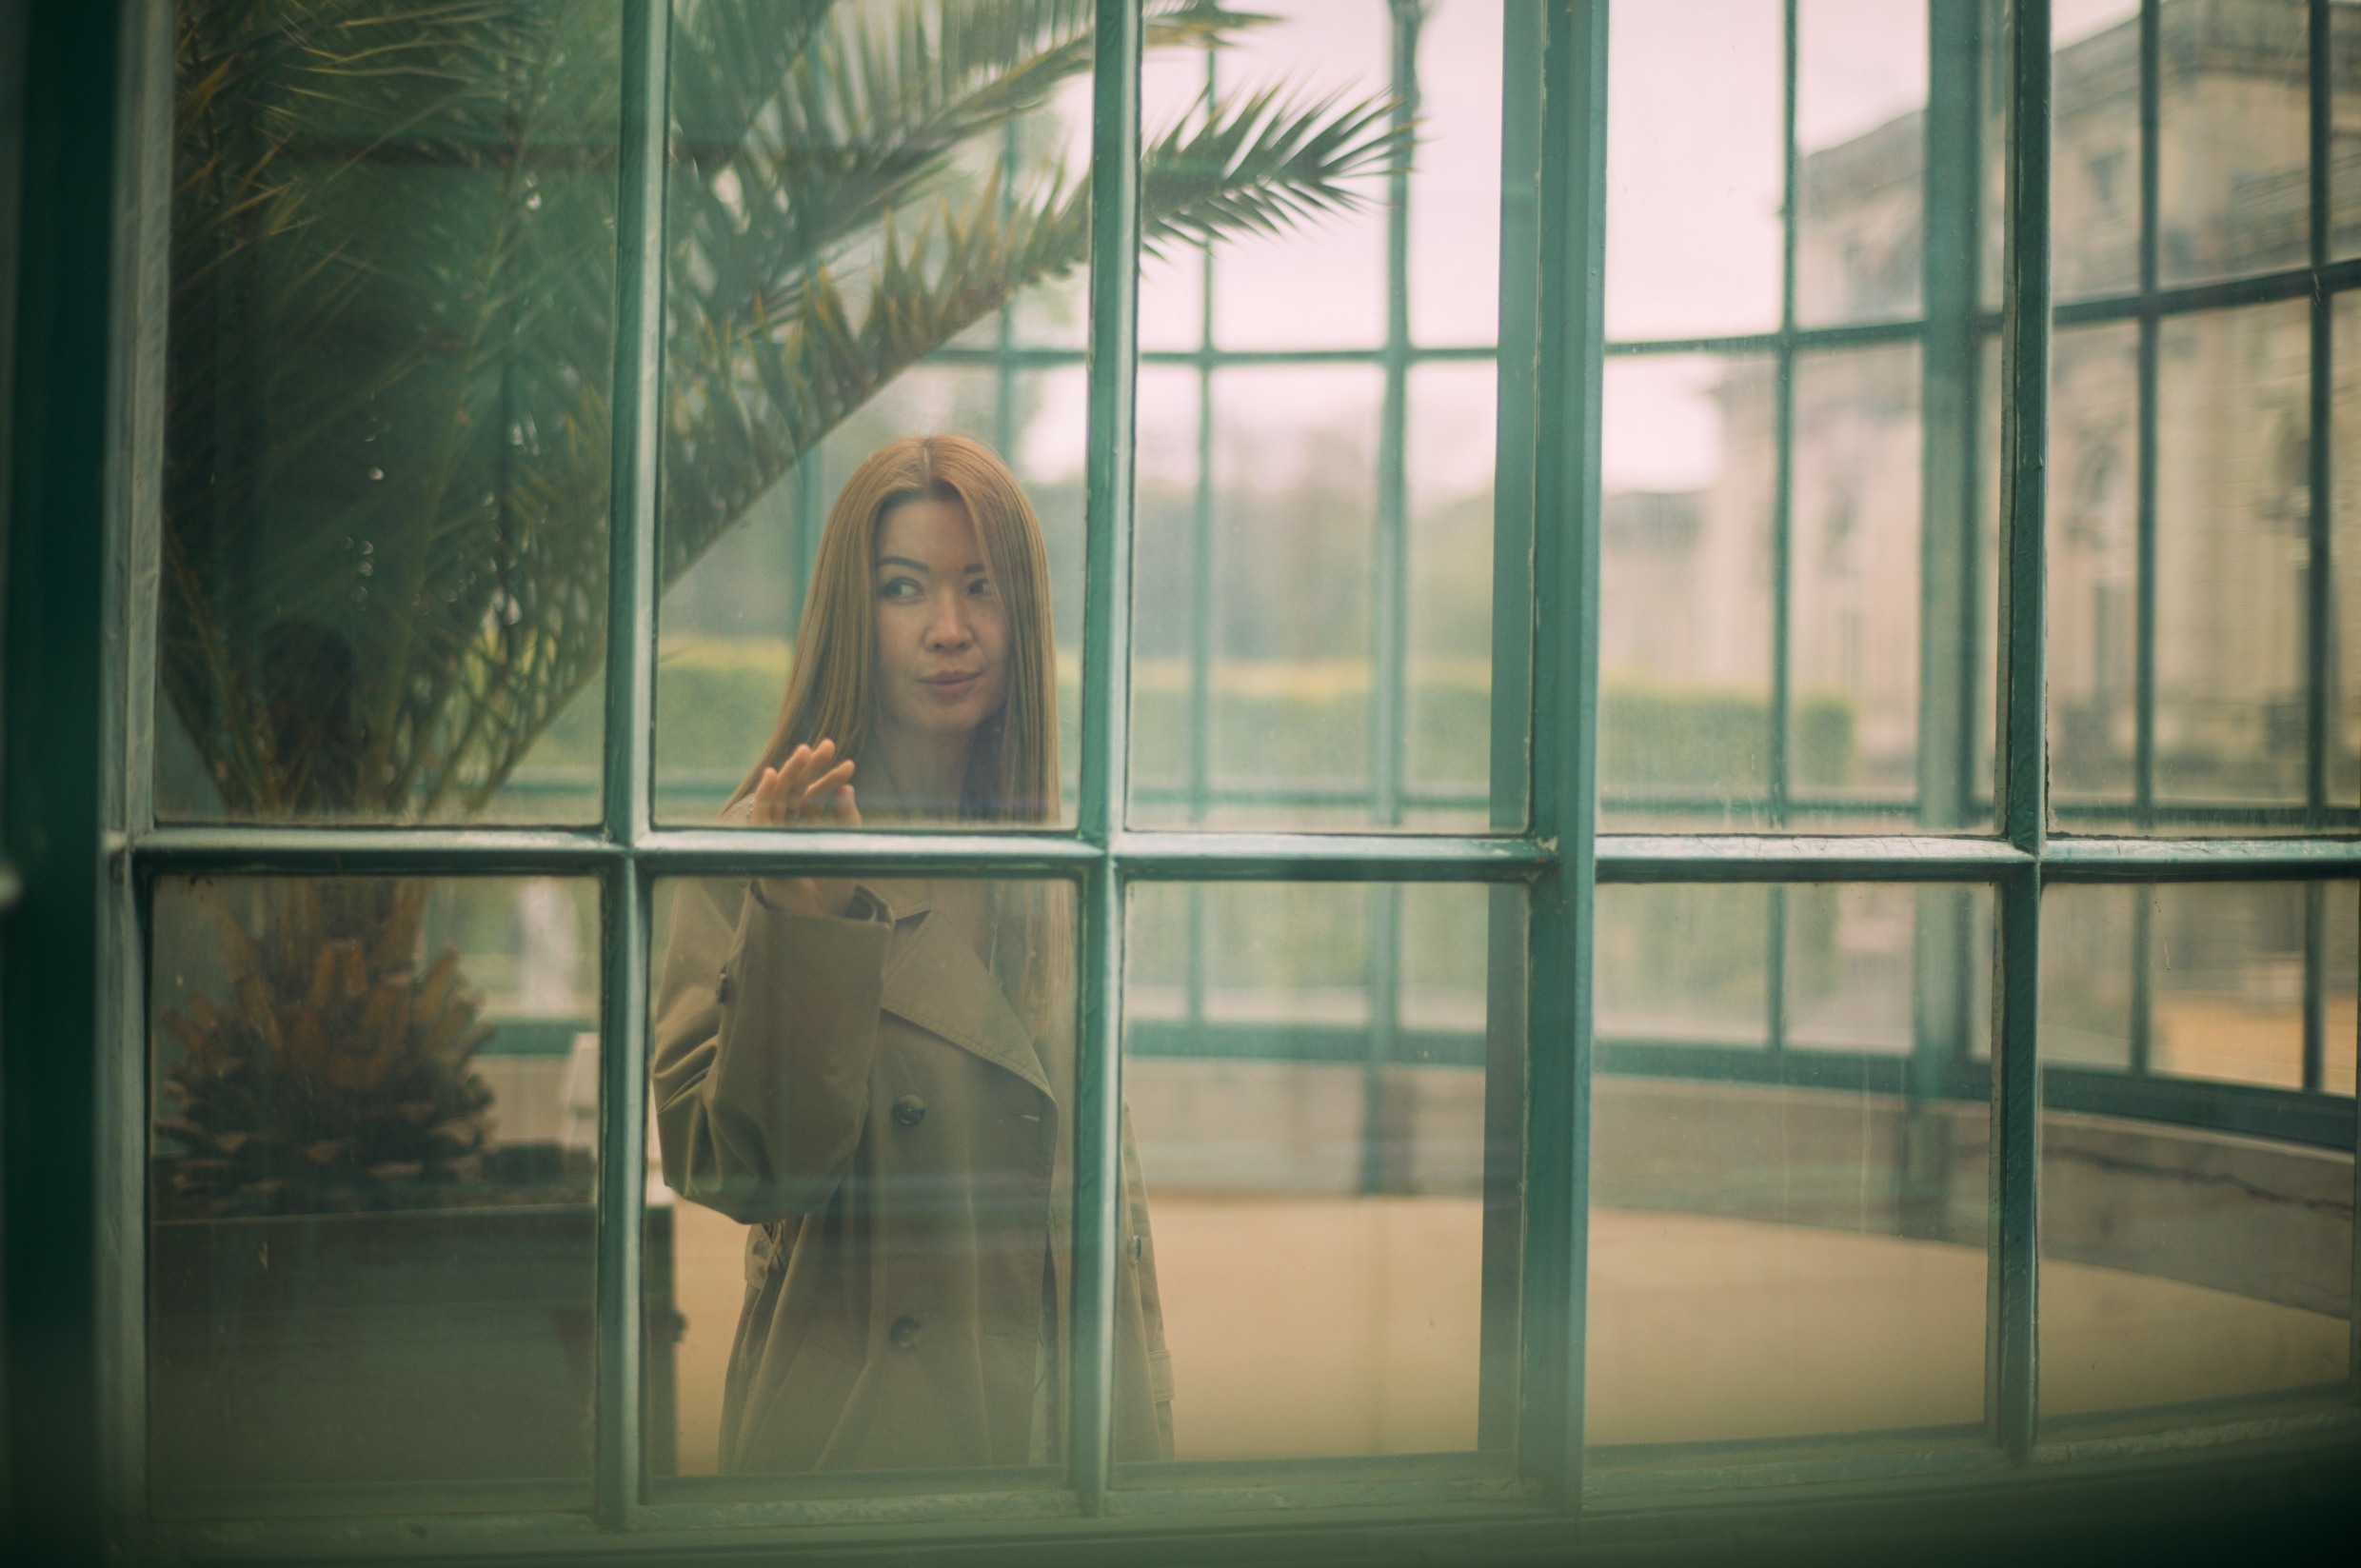
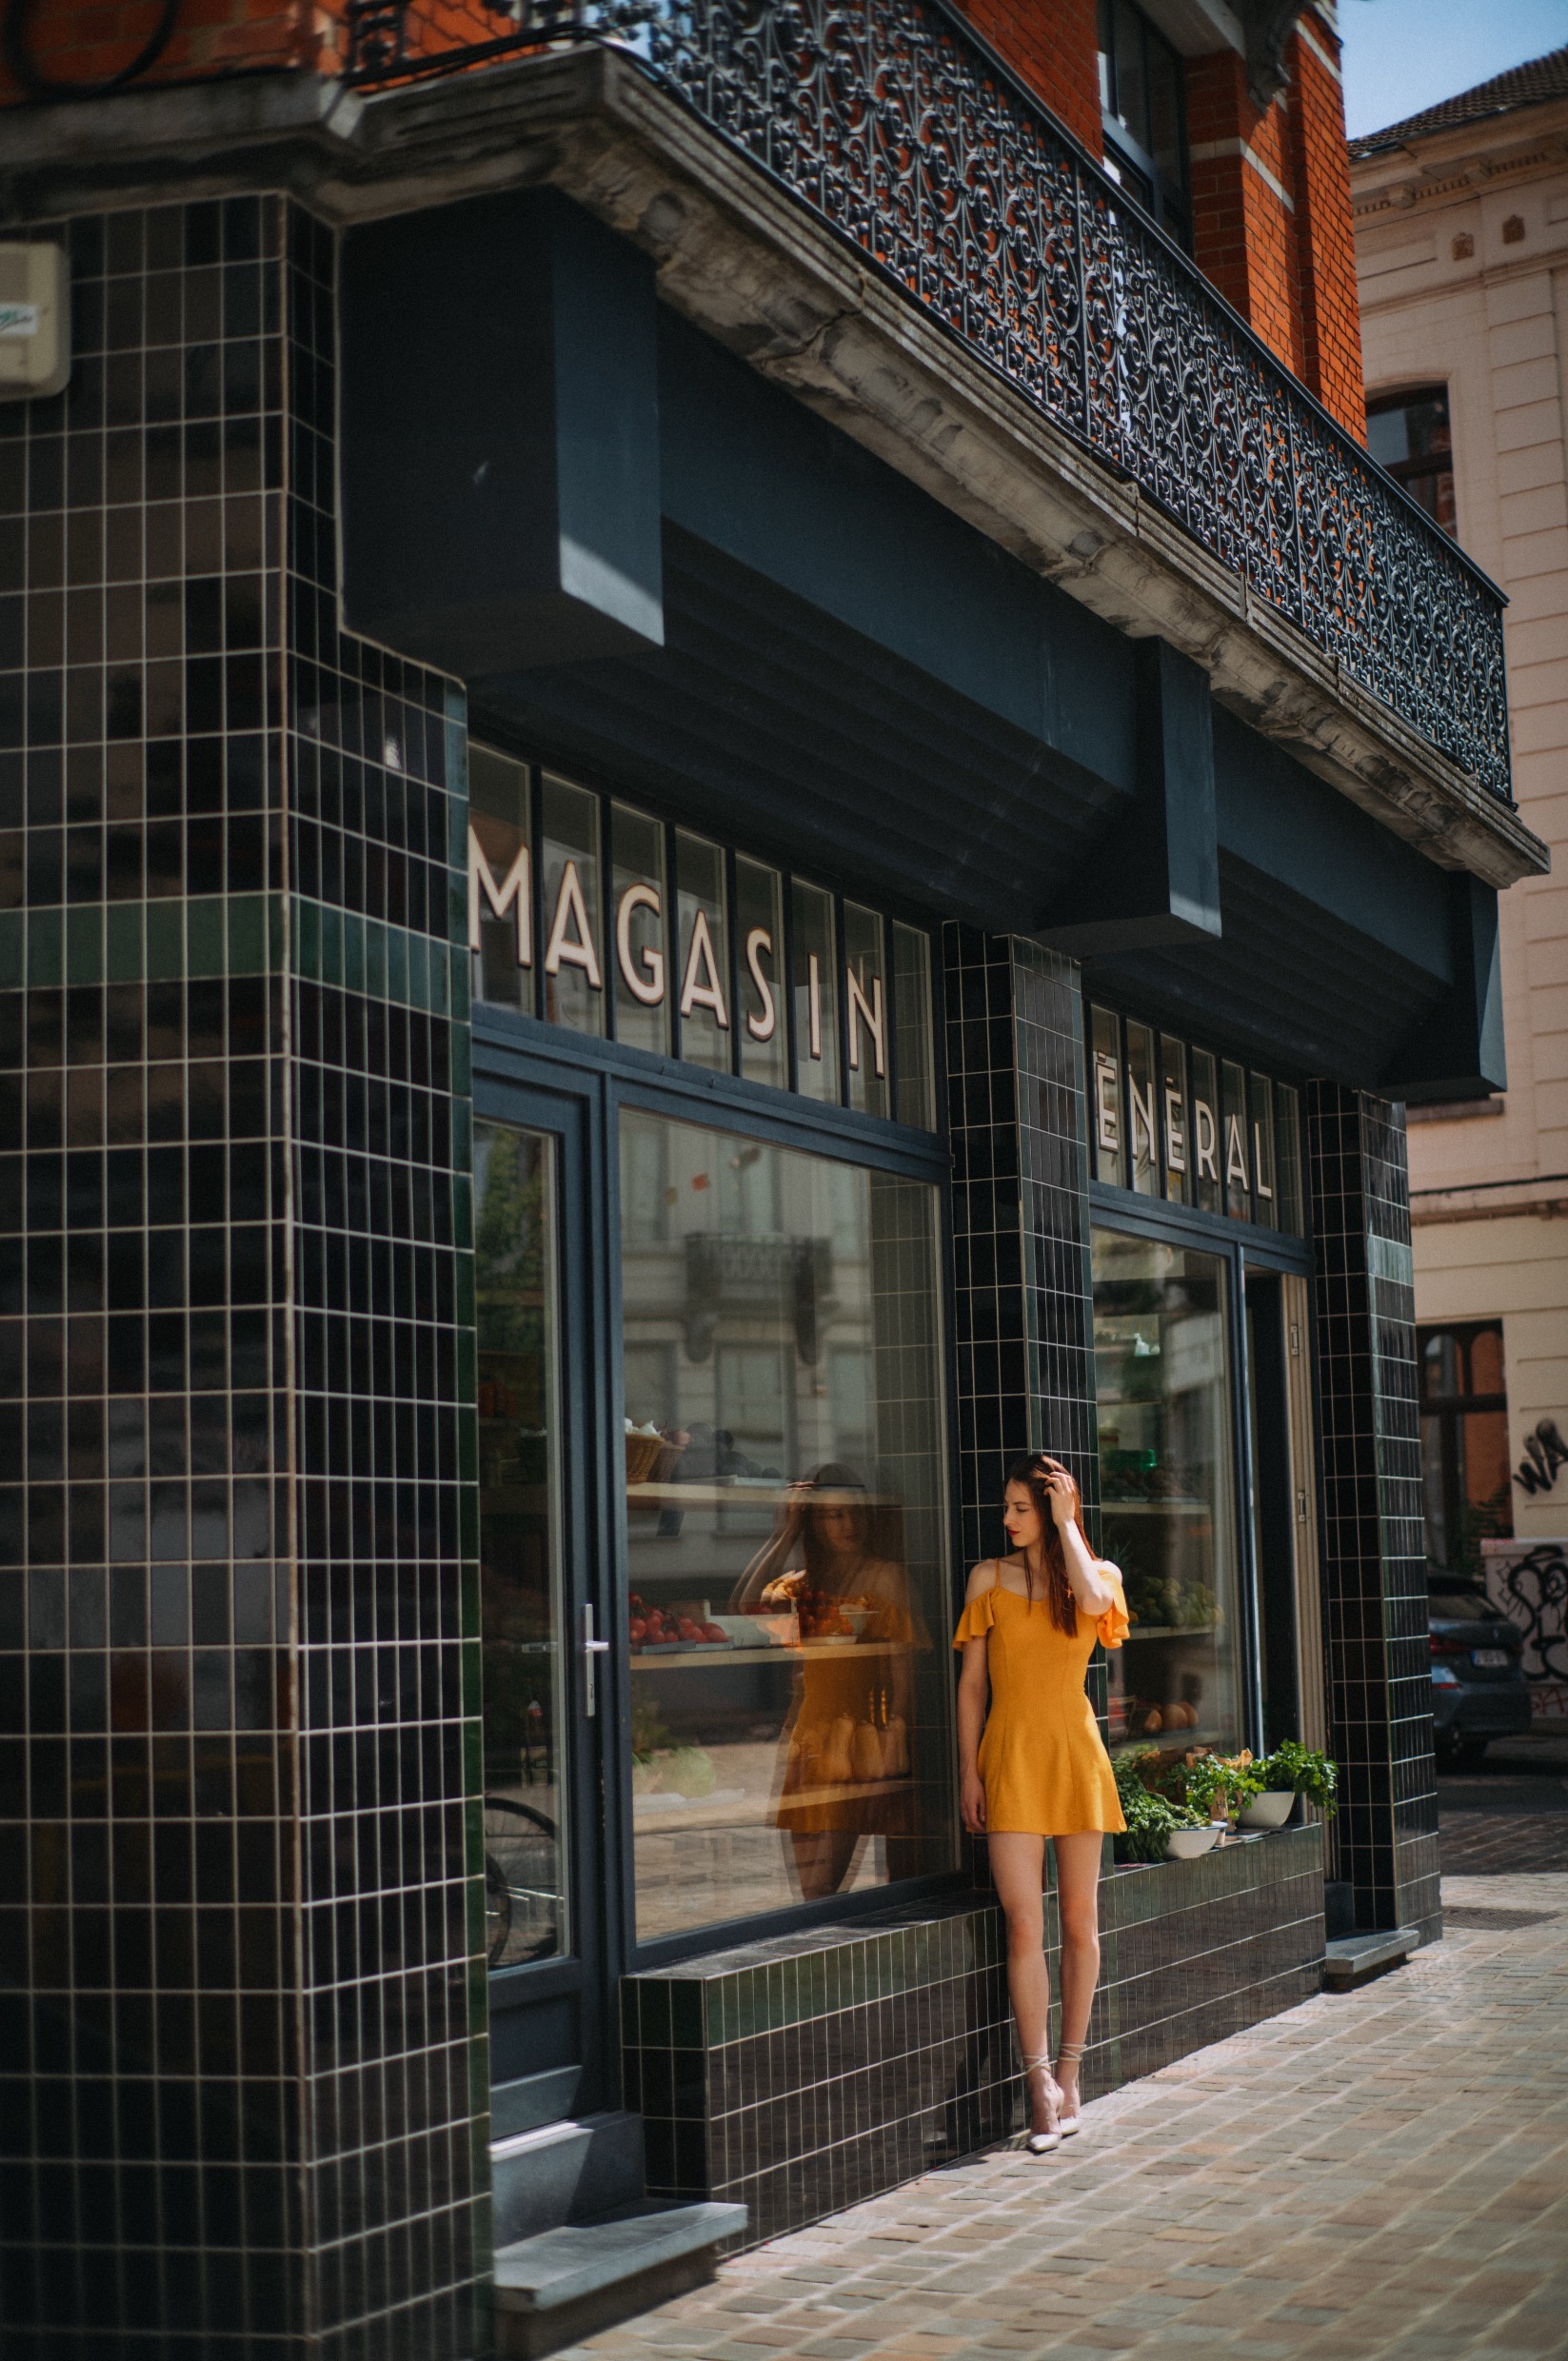


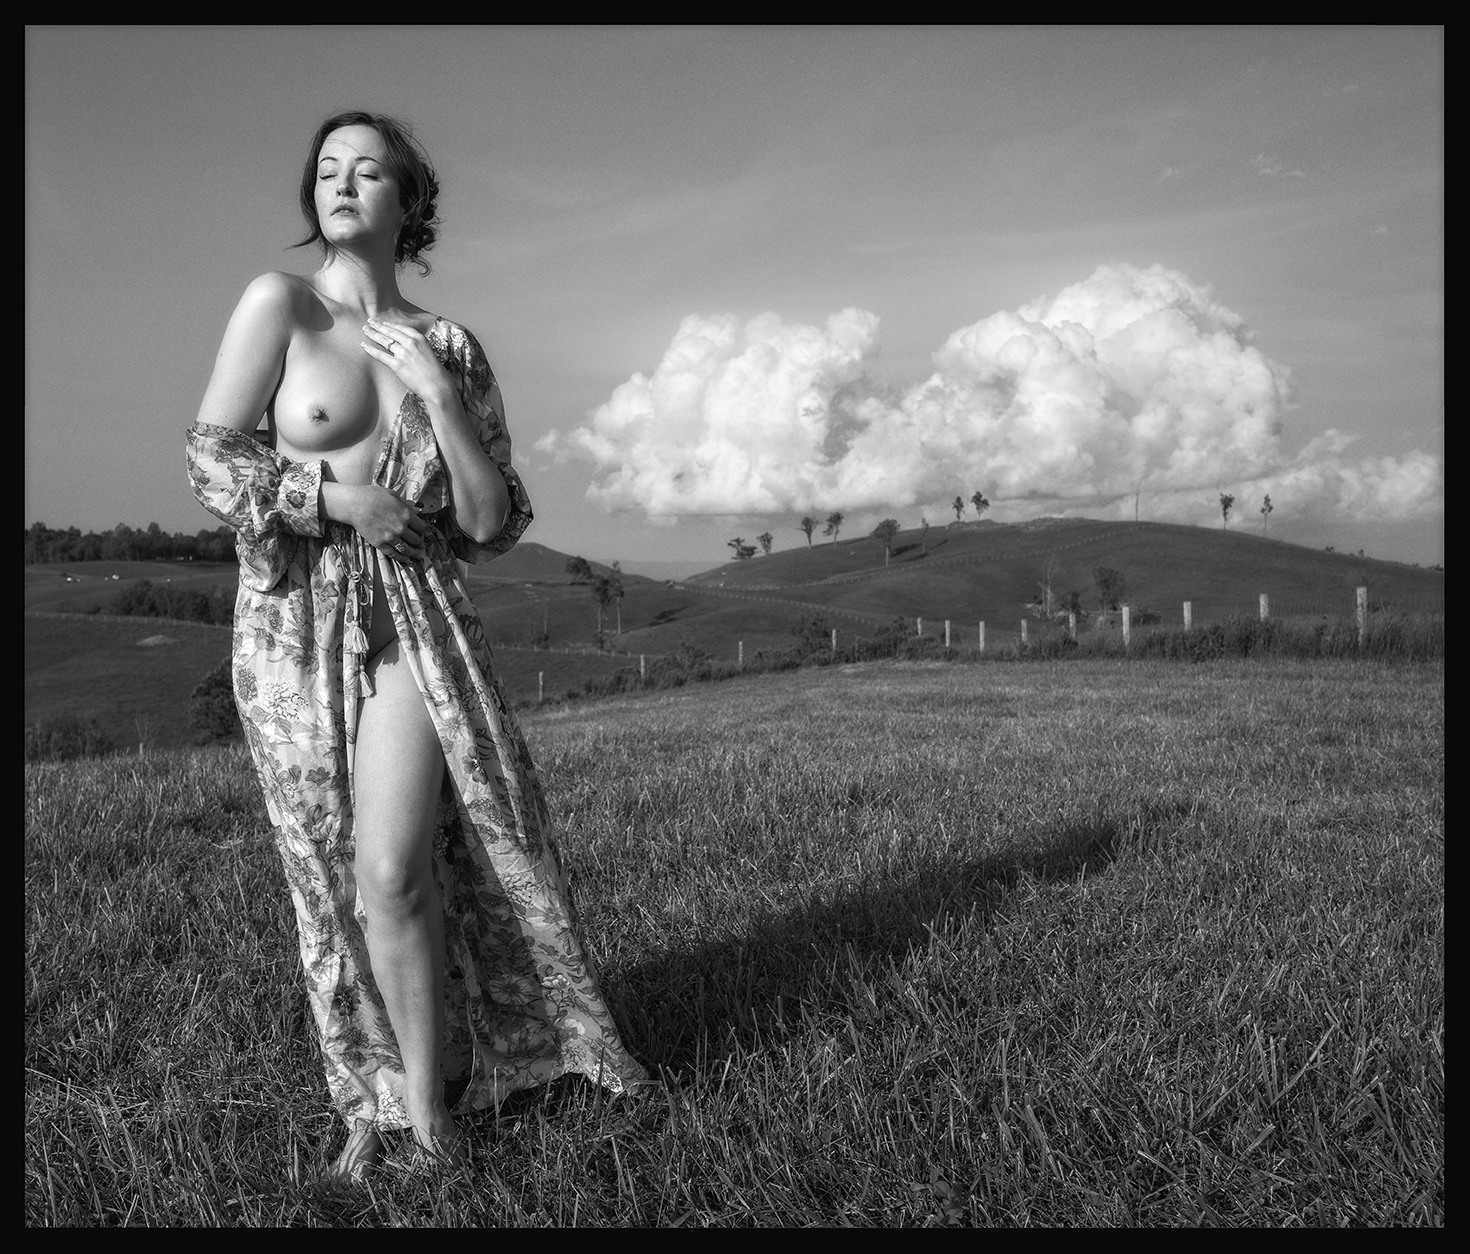


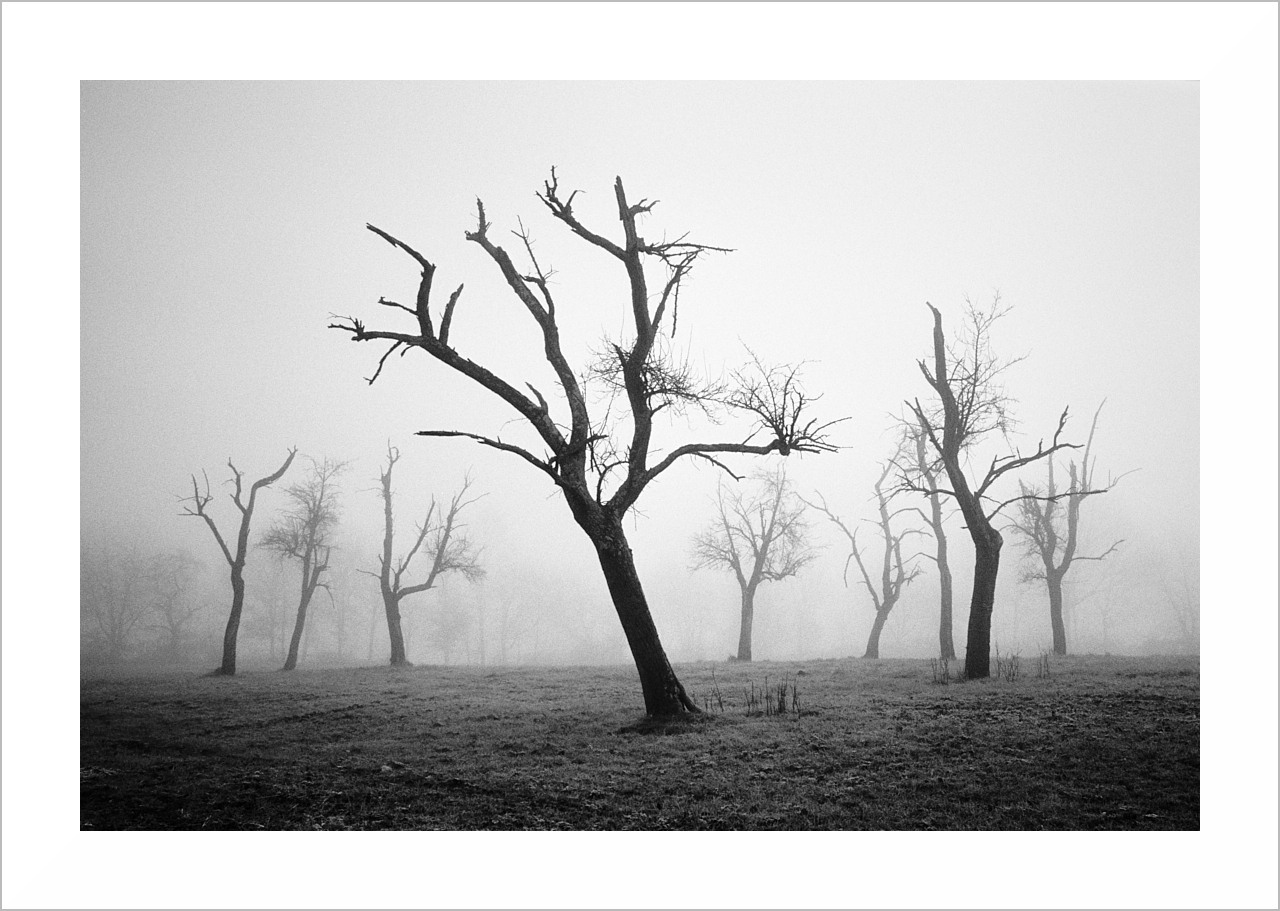

.thumb.jpg.a8c0eceb5c93f775e75e8b4465e4cf9c.jpg)