Aryel Posted January 23, 2022 Author Share #81 Posted January 23, 2022 Advertisement (gone after registration) 8 hours ago, M.Hilo said: Once you slide in the negative carrier is there still a way to slightly raise the top glass? If there is that's when you position the negative correctly. While projecting the image in the dark. No, I don’t think, I do not see any and the manual doesn’t mention it either… I will give the last portrait another go, hoping to get the borders right and dodging the top part slightly longer. I think I will insert it in the other direction, this way if there is an issue the darker side will show on the opposite side. I am not sure I understand what you mean by balance. I guess it is related to what I find the most difficult in photography: ‘to see’. Either whilst shooting or whilst printing. I find it more challenging than anything else. Exciting too! Thank you so much for your encouragement on the photo! Will share once I try again. Quote Link to post Share on other sites More sharing options...
Advertisement Posted January 23, 2022 Posted January 23, 2022 Hi Aryel, Take a look here Negative carriers size for black borders. I'm sure you'll find what you were looking for!
M.Hilo Posted January 23, 2022 Share #82 Posted January 23, 2022 (edited) 1 hour ago, Aryel said: No, I don’t think, I do not see any and the manual doesn’t mention it either… I will give the last portrait another go, hoping to get the borders right and dodging the top part slightly longer. I think I will insert it in the other direction, this way if there is an issue the darker side will show on the opposite side. I am not sure I understand what you mean by balance. --- Placing the film strip outside of the enlarger is always going to be more difficult, but it is not impossible. Your picture of the carrier with this negative in it shows that. As Stray cat says you need to make sure to keep the carrier tight and closed while placing it into the enlarger. A lightbox will help to see what you're doing. I use a lightbox in my darkroom on which I have taped transparent red foil. Not to protect the paper (even though it does) but to protect my eyes. Our eyes adjust to the relative dark and I prefer to not disturb that. Re the balance, this image is bottom heavy, which is fine but you need to keep that in mind. The first print shows that more, the top being quite light. The light coming from outside is nice. With the second print you corrected into the right direction. Perhaps a little too much on top and the light from outside became less interesting for me, too normal. Images with both interior and exterior light are special. We must be aware of that. I assume you're printing on RC (plastic) paper and not fiber? If it were fiber you'd have an additional issue because that dries up darker. Keep in mind this is only me giving printing preferences. Others (you included) may see it differently. There exists no fixed truth. And, we all see something different. I for one have an old Imac here at home that doesn't even know the word calibration. Which head are you using on the Kienzle, and how long is your basic exposure time? Edited January 23, 2022 by M.Hilo 1 Quote Link to post Share on other sites More sharing options...
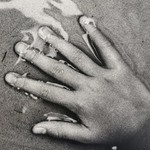
Aryel Posted January 23, 2022 Author Share #83 Posted January 23, 2022 (edited) I currently use my phone as a light box under the negative holder. Downloaded a white screen app and this works well… I print on fiber paper and use selenium toning on the final prints (or at least the ones I think are final). The enlarger has both a vcc head and a condenser. I use the vcc for now. I feel it is easier to learn from… The picture above was printed as follow: ilford mgfb glossy paper, multigrade developer and ilford selenium toner. F11, 23 seconds grade 3.5. I dodged the top part for 3 seconds and used a very small round shape to dodge the face 5 seconds. Kind of painting it… will try it again later this evening. Many thanks 🙂 edit: I am looking at the prints again, I think I will try to burn in the top a tiny bit rather than dodge it Edited January 23, 2022 by Aryel Quote Link to post Share on other sites More sharing options...
Aryel Posted January 23, 2022 Author Share #84 Posted January 23, 2022 I just reprinted the portrait, will share the new version once finished (washing now). in the mean time, this is the one where I got both borders by being more careful and gripping. Welcome, dear visitor! As registered member you'd see an image here… Simply register for free here – We are always happy to welcome new members! Really appreciate all the help and feedback. 1 Quote Link to post Share on other sites Simply register for free here – We are always happy to welcome new members! Really appreciate all the help and feedback. ' data-webShareUrl='https://www.l-camera-forum.com/topic/326504-negative-carriers-size-for-black-borders/?do=findComment&comment=4365532'>More sharing options...
Pyrogallol Posted January 23, 2022 Share #85 Posted January 23, 2022 Open out the negative frame a little more to allow a bigger black border all round. Cameras vary in negative size even if they are all supposed to be 24x36mm. As well, wider angle lenses will give a bigger negative and longer focal length lenses a smaller one (I may have said that before). I posted some more black border pictures here earlier today 1 Quote Link to post Share on other sites More sharing options...
M.Hilo Posted January 23, 2022 Share #86 Posted January 23, 2022 Aryel, I still wonder about your white-ish borders. Can you do a print of one of these same negatives using the condenser head? How thick in millimetres is the negative mask you are using? Quote Link to post Share on other sites More sharing options...
Aryel Posted January 24, 2022 Author Share #87 Posted January 24, 2022 Advertisement (gone after registration) 21 hours ago, Pyrogallol said: Open out the negative frame a little more to allow a bigger black border all round. Cameras vary in negative size even if they are all supposed to be 24x36mm. As well, wider angle lenses will give a bigger negative and longer focal length lenses a smaller one (I may have said that before). I posted some more black border pictures here earlier today Thanks a lot for sharing. Yes, you mentioned it before and I agree, looks like filling a bit more is the way to go. Will probably try next week end. As a side note, really love your kitchen print. I don’t really understand why but it has a special mood and love how the blacks contribute to the image. 21 hours ago, M.Hilo said: Aryel, I still wonder about your white-ish borders. Can you do a print of one of these same negatives using the condenser head? How thick in millimetres is the negative mask you are using? Yes, definitely. You also made me realise that I have two diffusers box (it goes inside the vcc head) and I only use the one for medium format (previous owner suggested not to worry about it and I even forgot it was there). I will also try to swap this. The masks are about 2mm each and 38mm in length. Thanks a lot! Quote Link to post Share on other sites More sharing options...
M.Hilo Posted January 24, 2022 Share #88 Posted January 24, 2022 The masks for the Leitz 35mm enlargers are half that thick: 1 mm. Still I don't think this will have anything to do with the weird-but-nice borders. Yes, if I were you I would do the same 35mm negative using the correct diffuser box and after that also the condenser head. It is good to understand the differences. Not only to find what suits you most, like the borders. It will also give you different possibilities in the future. I have had the Leitz Focomats Ic and IIc for a long time. The Ic does 35mm only, the IIc does 35mm up to 6x9. It happens with 35mm that I switch from the Ic to the IIc. Mostly for negatives where 100 percent even illumination is critical. I imagine your enlarger, having both the condenser head and vcc head will add to your possibilities too. 1 Quote Link to post Share on other sites More sharing options...
Aryel Posted January 26, 2022 Author Share #89 Posted January 26, 2022 This is the new version of the portrait, still printed with the wrong diffuser box inside. I bought a file. I will keep this set of masks untouched as I quite like the results. I will file my old ones. Next time I print I will print the final image in 3 versions (2 diffuser box and 1 condenser). Curious to see how different the image will be using the same grade on the diffuser and condenser heads. Welcome, dear visitor! As registered member you'd see an image here… Simply register for free here – We are always happy to welcome new members! 1 Quote Link to post Share on other sites Simply register for free here – We are always happy to welcome new members! ' data-webShareUrl='https://www.l-camera-forum.com/topic/326504-negative-carriers-size-for-black-borders/?do=findComment&comment=4368174'>More sharing options...
M.Hilo Posted January 26, 2022 Share #90 Posted January 26, 2022 You're getting somewhere. Perhaps the top right is a little heavy and perhaps that whole top banner is a bit unquiet. But you're doing well with this difficult negative. For sure, compared to the 2nd version, the light is back again. I had a better comparison look and the second print seems to be slightly out of focus. The grain isn't as sharp as in the other two (could be the enlarger or yes/no sharpening of the file), the detail in the hair lost the spark nr.1 and nr. 3 have. Nr. 2 also looks more b/w. When you do the next bunch, I would make new teststrips. In particular when using the condenser head. Good luck with filing your other mask. For us 'filing amateurs' it is not an easy thing to do. I have only managed to roughly enlarge the rectangular hole of the Leitz holders. After that I mask with the easel. Quote Link to post Share on other sites More sharing options...
Aryel Posted January 26, 2022 Author Share #91 Posted January 26, 2022 (edited) Thanks a lot for the feedback, just to make sure that we are talking about the same versions: first image is my first printing trial for this one: Welcome, dear visitor! As registered member you'd see an image here… Simply register for free here – We are always happy to welcome new members! second version: this was actually a scan of the negative made by the lab: 3rd image is my second print: I scanned the prints in colour, I prefer it this way as I like the selenium tones… this is why the second image looks more b/w. I will let it rest for a while. When I revisit I will give it a try with the condenser head and maybe push the contrast a tiny bit more: I find that the scanned print looks better than the original print as it looks sharper. Thanks a lot for your guidance and advice. Edited January 26, 2022 by Aryel 1 Quote Link to post Share on other sites Simply register for free here – We are always happy to welcome new members! second version: this was actually a scan of the negative made by the lab: 3rd image is my second print: I scanned the prints in colour, I prefer it this way as I like the selenium tones… this is why the second image looks more b/w. I will let it rest for a while. When I revisit I will give it a try with the condenser head and maybe push the contrast a tiny bit more: I find that the scanned print looks better than the original print as it looks sharper. Thanks a lot for your guidance and advice. ' data-webShareUrl='https://www.l-camera-forum.com/topic/326504-negative-carriers-size-for-black-borders/?do=findComment&comment=4368271'>More sharing options...
Aryel Posted January 29, 2022 Author Share #92 Posted January 29, 2022 I filed my masks yesterday, also switched to the condenser head. I will need to file the masks more but I am having lot of fun exploring the endless possibilities! Welcome, dear visitor! As registered member you'd see an image here… Simply register for free here – We are always happy to welcome new members! If they were cheaper, I’d be very tempted to make a small collection. 1 Quote Link to post Share on other sites Simply register for free here – We are always happy to welcome new members! If they were cheaper, I’d be very tempted to make a small collection. ' data-webShareUrl='https://www.l-camera-forum.com/topic/326504-negative-carriers-size-for-black-borders/?do=findComment&comment=4370936'>More sharing options...
Aryel Posted January 31, 2022 Author Share #93 Posted January 31, 2022 Had quite a bit of fun this weekend after filing a bit more: Using the easel to mask off: Welcome, dear visitor! As registered member you'd see an image here… Simply register for free here – We are always happy to welcome new members! Letting it go wild: 1 Quote Link to post Share on other sites Simply register for free here – We are always happy to welcome new members! Letting it go wild: ' data-webShareUrl='https://www.l-camera-forum.com/topic/326504-negative-carriers-size-for-black-borders/?do=findComment&comment=4372663'>More sharing options...
Recommended Posts
Join the conversation
You can post now and register later. If you have an account, sign in now to post with your account.
Note: Your post will require moderator approval before it will be visible.