MikeMyers Posted August 28, 2021 Share #1 Posted August 28, 2021 Advertisement (gone after registration) I wanted to start a new topic, specifically for scanning B&W film using a Plustek scanner, and the VueScan software. I've gotten a lot of wonderful information in a different topic here, which was created by someone who is using different equipment. From all the responses there, I think it's better to forget about making a perfect scan, and instead learn the process. Most of my "instructions" came from this write-up: https://crawfordphotoschool.com/digital/bw-neg-scanning.php The way I interpret what he is saying, is it is most important to configure the scanner to get as much information as possible from the scan. I think he is saying that I should create a "flat" image, with minimal contrast, and the "blacks" should not appear black, along with the whites not appearing white. The reason as I understand it, is to avoid "clipping" where information from the negative gets lost - as it would in over-exposure or under-exposure. Since ALL the information will be included in my scan, I can then "bring out" the desired image in my image processing software. I opened VueScan, and modified my settings to match what he shows in that article, and after reading the explanations that follow, I think I now know the reason for these settings. (I see now that I was making lots of mistakes in the past in my scanner settings - so many mistakes. I thought the scanner settings were intended to get a nice looking image. Following his advice, what I should be doing is getting all the information in my negative into the scanned image, and only later should I make the image look "good". I scanned one image to test this. It took much longer to capture the scan than with my old settings, but the image came out looking like the examples on his website. It's now saved as a 124 meg file. I think that's because he suggested I use 7200 dpi. I used to use 3600. It's obviously impossible to post an image that big in this forum - what I'll do, is to post a "screen capture". I feel like I'm in the first grade, so much yet to learn. Welcome, dear visitor! As registered member you'd see an image here… Simply register for free here – We are always happy to welcome new members! Quote Link to post Share on other sites Simply register for free here – We are always happy to welcome new members! ' data-webShareUrl='https://www.l-camera-forum.com/topic/324032-scanning-leica-bw-film-plustek-optifilm-vuescan/?do=findComment&comment=4265428'>More sharing options...
Advertisement Posted August 28, 2021 Posted August 28, 2021 Hi MikeMyers, Take a look here Scanning - Leica + B&W Film + Plustek OptiFilm + VueScan. I'm sure you'll find what you were looking for!
250swb Posted August 28, 2021 Share #2 Posted August 28, 2021 It is a very long held practice with any scanner to create a low contrast image of the negative that doesn't challenge the dynamic range of the scanner. That said it also requires that you need to know what to do with it in post processing, like restoring contrast etc. Quote Link to post Share on other sites More sharing options...
ianman Posted August 28, 2021 Share #3 Posted August 28, 2021 32 minutes ago, MikeMyers said: The way I interpret what he is saying, is it is most important to configure the scanner to get as much information as possible from the scan. I think he is saying that I should create a "flat" image Yes. This is exacly what was suggested to you in the other thread. Do not apply any corrections during the scan... all your "settings" should be switched to off. Just get a high resolution RAW image and do the rest in PP. 2 Quote Link to post Share on other sites More sharing options...
MikeMyers Posted August 28, 2021 Author Share #4 Posted August 28, 2021 (edited) 1 hour ago, 250swb said: It is a very long held practice with any scanner to create a low contrast image of the negative that doesn't challenge the dynamic range of the scanner. That said it also requires that you need to know what to do with it in post processing, like restoring contrast etc. I have an admission. When I first started to scan with my Epson, I "copied" the settings others used, but never tried to find out "why" they used those settings. In the other thread, I learned a lot, most of which now makes sense. Big difference between "copying" and "learning". In the PhotoLab4 forum, I learned the importance of calibrating my display, which I have done. Actually, I have two displays on my Mac Mini, a rather old Epson high definition monitor, and an old iMac being used as a second display. During the day, in my rather bright room, the ASUS looks dark, and the (uncalibrated) iMac looks great. In the evening and at night, the ASUS shows me things the way others will see them (if their monitors are calibrated), which is why I won't be editing any of my scanned images until much later. To answer the second thing you pointed out, "it also requires that you need to know what to do with it in post processing, like restoring contrast etc." - - I've learned a lot in the DxO forum about how to properly use PhotoLab4, but I've never posted an image there yet that others in the forum wouldn't show me how to make it even better. I guess I've made it up to "high school", but there's always a lot more. My life is always like that..... Bottom line, I'm experimenting with a different camera, and experimenting with b&w film, and experimenting in scanning an image into my computer, and only then do I feel like I'm on solid ground. For me, it's all a challenge, but it's also very rewarding and enjoyable. 😳 Edited August 28, 2021 by MikeMyers Quote Link to post Share on other sites More sharing options...
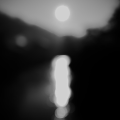
MikeMyers Posted August 29, 2021 Author Share #5 Posted August 29, 2021 The more I worked on editing the above photo, the less I liked it. I wanted the "shrubbery" at the top, but I should have lowered the camera so it didn't block the photo like at the left. When I got the boats and water to look nice, the leaves at the top were too dark, so I lightened them, and then played with the water to get it to look like what I remember. I also cropped out stuff that just confused the image. The Ilford 100 has very fine grain, but anything I did to make the image sharper emphasized the grain - although I keep telling myself that film grain is good, not a problem. The grain *is* the photo. This was a photo from back in February, when I was first shooting the M3 - it had been sitting for the previous 50 or 60 years. I will be picking up my next roll of film on Monday, which I was much more careful in composing the images, and trying to capture some scenes that I thought were interesting. Advice, suggestions, corrections on the processing are welcome. I never bothered with this photo back in February, but it seemed like a good candidate to practice scanning. Welcome, dear visitor! As registered member you'd see an image here… Simply register for free here – We are always happy to welcome new members! 1 Quote Link to post Share on other sites Simply register for free here – We are always happy to welcome new members! ' data-webShareUrl='https://www.l-camera-forum.com/topic/324032-scanning-leica-bw-film-plustek-optifilm-vuescan/?do=findComment&comment=4265541'>More sharing options...
frame-it Posted August 29, 2021 Share #6 Posted August 29, 2021 (edited) 3 hours ago, MikeMyers said: The more I worked on editing the above photo, the less I liked it. I wanted the "shrubbery" at the top, but I should have lowered the camera so it didn't block the photo like at the left. When I got the boats and water to look nice, the leaves at the top were too dark, so I lightened them, and then played with the water to get it to look like what I remember. I also cropped out stuff that just confused the image. The Ilford 100 has very fine grain, but anything I did to make the image sharper emphasized the grain - although I keep telling myself that film grain is good, not a problem. The grain *is* the photo. This was a photo from back in February, when I was first shooting the M3 - it had been sitting for the previous 50 or 60 years. I will be picking up my next roll of film on Monday, which I was much more careful in composing the images, and trying to capture some scenes that I thought were interesting. Advice, suggestions, corrections on the processing are welcome. I never bothered with this photo back in February, but it seemed like a good candidate to practice scanning. Welcome, dear visitor! As registered member you'd see an image here… Simply register for free here – We are always happy to welcome new members! i like the screen shot posted above, i think it looks better, low contrast and a bit misty. Edited August 29, 2021 by frame-it Quote Link to post Share on other sites More sharing options...
ianman Posted August 29, 2021 Share #7 Posted August 29, 2021 Advertisement (gone after registration) Should the color space be "gray" ? Quote Link to post Share on other sites More sharing options...
MikeMyers Posted August 29, 2021 Author Share #8 Posted August 29, 2021 4 hours ago, ianman said: Should the color space be "gray" ? I think it says "gray" because it knew this was a "TIFF image". I tried it just now for several times for regular screen captures, and it always said "RGB", but it then said they were a "PNG image". I guess when the Plustek saved the file as a "TIFF", it saved the "Kind:" setting as "gray". I'm just guessing here - thanks for pointing it out. I suppose I should try this by saving the scanned image as a color image, not grayscale, and then it might change the "Kind:" setting? Quote Link to post Share on other sites More sharing options...
MikeMyers Posted August 29, 2021 Author Share #9 Posted August 29, 2021 (edited) 7 hours ago, frame-it said: i like the screen shot posted above, i think it looks better, low contrast and a bit misty. The screen capture was probably more accurate, as it was a cloudy day, and yes, a bit misty. I removed all the changes I made, but for cropping. I'm pretty sure this version is more accurate. I think I agree with you. Welcome, dear visitor! As registered member you'd see an image here… Simply register for free here – We are always happy to welcome new members! Edited August 29, 2021 by MikeMyers Quote Link to post Share on other sites Simply register for free here – We are always happy to welcome new members! ' data-webShareUrl='https://www.l-camera-forum.com/topic/324032-scanning-leica-bw-film-plustek-optifilm-vuescan/?do=findComment&comment=4265716'>More sharing options...
Ornello Posted August 29, 2021 Share #10 Posted August 29, 2021 19 hours ago, MikeMyers said: The more I worked on editing the above photo, the less I liked it. I wanted the "shrubbery" at the top, but I should have lowered the camera so it didn't block the photo like at the left. When I got the boats and water to look nice, the leaves at the top were too dark, so I lightened them, and then played with the water to get it to look like what I remember. I also cropped out stuff that just confused the image. The Ilford 100 has very fine grain, but anything I did to make the image sharper emphasized the grain - although I keep telling myself that film grain is good, not a problem. The grain *is* the photo. This was a photo from back in February, when I was first shooting the M3 - it had been sitting for the previous 50 or 60 years. I will be picking up my next roll of film on Monday, which I was much more careful in composing the images, and trying to capture some scenes that I thought were interesting. Advice, suggestions, corrections on the processing are welcome. I never bothered with this photo back in February, but it seemed like a good candidate to practice scanning. Welcome, dear visitor! As registered member you'd see an image here… Simply register for free here – We are always happy to welcome new members! 35mm Delta 100 should produce a print that has no obvious graininess. Of course the image is the grain, but it should be so fine as to be imperceptible on a 10x print. Quote Link to post Share on other sites More sharing options...
MikeMyers Posted August 30, 2021 Author Share #11 Posted August 30, 2021 Two thoughts: First, I was wondering what the proper scan setting would be, and when I looked up my scanner specs, it said 7200dpi. Unless anyone thinks this is wrong, that's what I'll continue to use, even though it takes longer. Second, I wrote VueScan tech support how I could get a printout of all my settings. Ed Hamrick wrote back: Use "File | Save options". That doesn't accomplish what I wanted, which was a printout of all my settings. So, I made a screen capture of all my current settings. a) Should I make any changes? b) Is there an easier way to make a printout like this? Welcome, dear visitor! As registered member you'd see an image here… Simply register for free here – We are always happy to welcome new members! Quote Link to post Share on other sites Simply register for free here – We are always happy to welcome new members! ' data-webShareUrl='https://www.l-camera-forum.com/topic/324032-scanning-leica-bw-film-plustek-optifilm-vuescan/?do=findComment&comment=4266032'>More sharing options...
frame-it Posted August 30, 2021 Share #12 Posted August 30, 2021 once the options are saved for that film, you can load those options at a later date when you scan the same film stock. Quote Link to post Share on other sites More sharing options...
MikeMyers Posted August 30, 2021 Author Share #13 Posted August 30, 2021 (edited) @frame-it - that's the problem. In a few months I'm likely to have dozens of saved ".ini" files, with no idea what the settings are, or how they differ. I guess I'm old fashioned - if I take the above five images and print them, not only can I know what my settings were, I can verify that I'm using the same settings in the future. Ed Hamrick doesn't seem to think this is important - and maybe in a year or two from now, I'll know this so well that I'll never need the printouts. I'll be scanning again later today, maybe with the images I captured last week, and I expect to use the same settings, unless someone here suggests changes. This was for Ilford ASA 100 film, and the film I'm shooting currently is Tri-X 400. Maybe that requires modified settings? Slowly, I'm getting more and more familiar with all the configuration settings - MUCH better now than last week. (I suspect that most people just set this up once, and forget it. Maybe I'm making much too big a deal over learning this?) I had sort of organized my film negative collection from a lifetime ago, from when I went to college to when I stopped shooting film. They're all in strips of 6 images, in large sheets that go in a multi-ring binder. I went through all of them yesterday, writing on each page what those negatives were of. An A7A "Light Pad" I bought from B&H made this much easier, and I used software on my iPhone to see the negatives as a "positive". I went through several apps I downloaded, until I got disgusted and did a search on Google - and found an excellent (and free) app from Kodak that does what I want. You can read about it here: https://apps.apple.com/us/app/kodak-mobile-film-scanner/id1446701931 I can even save the "positive" images on my phone image gallery if I want to. Edited August 30, 2021 by MikeMyers Quote Link to post Share on other sites More sharing options...
frame-it Posted August 30, 2021 Share #14 Posted August 30, 2021 12 minutes ago, MikeMyers said: Maybe I'm making much too big a deal over learning this? yes. save the settings above as Tmax100..e.g Tmax100.ini next time when you use ilford fp4, save that one as IFfp4. simple..so when you scan tmax after a month, simply load the tmax.ini of course if you prefer to enter everything manually that's up to you Quote Link to post Share on other sites More sharing options...
250swb Posted August 30, 2021 Share #15 Posted August 30, 2021 So far so good Mike, but you don't show your settings for the 'Filter' page and in that everything should be switched off for B&W, and generally for colour scanning as well. You should do your sharpening in Lightroom. Quote Link to post Share on other sites More sharing options...
MikeMyers Posted August 30, 2021 Author Share #16 Posted August 30, 2021 34 minutes ago, 250swb said: the 'Filter' page and in that everything should be switched off for B&W Oops, I never copied that page, as nothing was selected. Grain reduction and Sharpen were both set to "None", all as you suggest. As I learned here, the only "processing" I do in scanning is to crop, if there are areas in the image that I don't care about. Even then, the final cropping is done in DxO PhotoLab4. (I wish there was a setting in VueScan to document all my settings, but I guess I need to do it manually.) 1 Quote Link to post Share on other sites More sharing options...
MikeMyers Posted August 30, 2021 Author Share #17 Posted August 30, 2021 2 hours ago, frame-it said: of course if you prefer to enter everything manually that's up to you Look up the definition for "Senior Moment". I'm lucky if I can remember what I had to eat yesterday, let alone all these settings. I think your idea will work great for me once I get adapt at doing all this, but for right now, I suspect I will review the settings every time I fire up the scanner. I probably am making too big a deal over this stuff, but it's getting easier all the time. Every so often, I go through all the settings on my (mostly digital) cameras, and make sure they are what I think I want. Too many cameras, and too many settings. Film is easier - set the ASA, set the shutter speed, set the aperture, and focus - and with the Leicameter that list is shorter. It's wonderful that digital gives us a zillion choices to adjust things just so..... and it's also terrible that digital gives us a zillion choices, any one of which can ruin the image if it's not reasonable. 🙂. In that sense, film is wonderful - set the exposure, focus, and spend ALL the rest of the time composing a great photo. (Maybe that's part of why I have always enjoyed it so much....) Quote Link to post Share on other sites More sharing options...
frame-it Posted August 30, 2021 Share #18 Posted August 30, 2021 5 hours ago, MikeMyers said: I suspect I will review the settings every time I fire up the scanner. you will have to modify the basic setting every time anyway, because of different shooting conditions Quote Link to post Share on other sites More sharing options...
MikeMyers Posted August 31, 2021 Author Share #19 Posted August 31, 2021 I scanned two B&W negatives today that I shot back in the 1960's, at a Railroad Station in Ann Arbor, Michigan. Different film, different everything, but my new preview settings got me the dull, low-contrast image that I now accept is a good starting point for editing. Both came out "good", and both needed similar editing. Were you referring to black&white film, color film, or both? I don't know what to expect for the future, but so far I haven't changed my settings from those that I posted up above (all for B&W negatives). Only time will tell. If I get to a negative of a scene I took in bright sunlight, with a lot of contrast, it will be interesting if the above settings work or not (with white point and black point both set to zero). Quote Link to post Share on other sites More sharing options...
MikeMyers Posted August 31, 2021 Author Share #20 Posted August 31, 2021 Two photos taken in the 1960's or 1970's, probably with my Leica M2, but possibly my Nikon SP. Each one took about an hour, and even so, I had to re-adjust the brightness once more just now. If my histogram is to be believed, they should be OK. Funny thing - for digital, I take five to eight images of any given scene. For my film negatives, I used to only take one single exposure, then move on to the next picture. I think I'm getting sloppy - I should get it right for the first and only image. I dunno about dust - it took forever to get all the dust out. As for the scenes, the beautiful railroad station is now a restaurant, there is only one track running by it, and the trains nowadays are so boring compared to what I remember growing up. I don't know how I could improve these over what you see here, but suggestions are welcome!! Film and scanning - sure puts a big smile on my face when I finish!! Welcome, dear visitor! As registered member you'd see an image here… Simply register for free here – We are always happy to welcome new members! Quote Link to post Share on other sites Simply register for free here – We are always happy to welcome new members! ' data-webShareUrl='https://www.l-camera-forum.com/topic/324032-scanning-leica-bw-film-plustek-optifilm-vuescan/?do=findComment&comment=4266595'>More sharing options...


Recommended Posts
Join the conversation
You can post now and register later. If you have an account, sign in now to post with your account.
Note: Your post will require moderator approval before it will be visible.