Ko.Fe. Posted October 24, 2019 Share #41 Posted October 24, 2019 Advertisement (gone after registration) I have Silverfast CD with my Plustek 8200 scanner. I only use Silverfast for scanning. I'll check if it has Silverfast HDR install on it. Quote Link to post Share on other sites More sharing options...
Advertisement Posted October 24, 2019 Posted October 24, 2019 Hi Ko.Fe., Take a look here Homemade method of simulating FILM with Leica M9 - Testers & feedback welcome!. I'm sure you'll find what you were looking for!
GrampaDoug Posted October 26, 2019 Share #42 Posted October 26, 2019 Is there a Mac OS version? Quote Link to post Share on other sites More sharing options...
FTI Posted October 27, 2019 Share #43 Posted October 27, 2019 Many thanks for this. Can you tell me how it's supposed to run on my windows 10? I can't seem to get it to run. 1 Quote Link to post Share on other sites More sharing options...
camalogica Posted October 28, 2019 Author Share #44 Posted October 28, 2019 On 10/27/2019 at 12:34 PM, FTI said: Many thanks for this. Can you tell me how it's supposed to run on my windows 10? I can't seem to get it to run. Usually with: m9tofilm.exe -i "E:\DATA\LeicaM9\dng\160\02_CABANAL" -o "F:\DEV\output" -f superia200 Should work, being the -i the input folder with all the DNGs and -o the output folder. And -f the film type (superia200 or trix400) Or maybe you get an error? Could you provide me more details? Thanks for trying it! Tomás 1 Quote Link to post Share on other sites More sharing options...
camalogica Posted October 28, 2019 Author Share #45 Posted October 28, 2019 On 10/26/2019 at 3:03 AM, GrampaDoug said: Is there a Mac OS version? Not yet, as said before I'll do it ASAP. But it takes some time to create the project in XCode and so on... so I think around one month or so. Tomás 1 Quote Link to post Share on other sites More sharing options...
evikne Posted October 28, 2019 Share #46 Posted October 28, 2019 I am really looking forward to the Mac OS version. Do you have any plans for more film types as well? Quote Link to post Share on other sites More sharing options...
camalogica Posted October 28, 2019 Author Share #47 Posted October 28, 2019 (edited) Advertisement (gone after registration) 4 hours ago, evikne said: I am really looking forward to the Mac OS version. Do you have any plans for more film types as well? Thanks for the interest! Unluckly I'm super busy at work... so it will take me some time to port it to OS X. I've tested with Wine in OSX (and in Ubuntu) and the app works perfectly, so, in the meantime, if you want you can run it this way. The command is the same (with wine before). For example: wine m9tofilm.exe -i "/Volumes/Nifty HD/CAMALOGICA_DATA/DATA/LeicaM9/dng/400/TESTS" -o "/Users/tgp/Documents/WIN7_DATA/DEV/output" -f superia200 -frame false Welcome, dear visitor! As registered member you'd see an image here… Simply register for free here – We are always happy to welcome new members! About more films, at the beginning I did all the process with the HP5, mainly because it's more cheaper film than Trix400, and I did a few tries... To answer your question: Yes, it's possible to add more films, but it takes some work to do all the tests shots (with real film) plus obtaining all the film calibration data in the laboratory. Cheers! Edited October 28, 2019 by camalogica 1 Quote Link to post Share on other sites Simply register for free here – We are always happy to welcome new members! About more films, at the beginning I did all the process with the HP5, mainly because it's more cheaper film than Trix400, and I did a few tries... To answer your question: Yes, it's possible to add more films, but it takes some work to do all the tests shots (with real film) plus obtaining all the film calibration data in the laboratory. Cheers! ' data-webShareUrl='https://www.l-camera-forum.com/topic/302444-homemade-method-of-simulating-film-with-leica-m9-testers-feedback-welcome/?do=findComment&comment=3843707'>More sharing options...
ianman Posted October 28, 2019 Share #48 Posted October 28, 2019 7 minutes ago, camalogica said: The command is the same (with wine before). For example: Macos users will need to install wine first. I've not done it yet but there seems to be a good set of instructions here: https://www.sysnettechsolutions.com/en/macos/install-wine-macos-mojave-10-14/ 2 Quote Link to post Share on other sites More sharing options...
camalogica Posted October 28, 2019 Author Share #49 Posted October 28, 2019 1 minute ago, ianman said: Macos users will need to install wine first. I've not done it yet but there seems to be a good set of instructions here: https://www.sysnettechsolutions.com/en/macos/install-wine-macos-mojave-10-14/ I've just done it (High Sierra, not Catalina, which seems not to have support). I've installed XQuartz (https://www.xquartz.org/) and Wine (https://dl.winehq.org/wine-builds/macosx/download.html) "Installer for Wine Stable". It has worked perfectly. Kind regards! Tomás 2 Quote Link to post Share on other sites More sharing options...
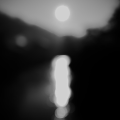
Ko.Fe. Posted October 31, 2019 Share #50 Posted October 31, 2019 (edited) Welcome, dear visitor! As registered member you'd see an image here… Simply register for free here – We are always happy to welcome new members! Tests with b1.02 Edited October 31, 2019 by Ko.Fe. 1 1 Quote Link to post Share on other sites Simply register for free here – We are always happy to welcome new members! Tests with b1.02 ' data-webShareUrl='https://www.l-camera-forum.com/topic/302444-homemade-method-of-simulating-film-with-leica-m9-testers-feedback-welcome/?do=findComment&comment=3845023'>More sharing options...
Ko.Fe. Posted October 31, 2019 Share #51 Posted October 31, 2019 Tests with b1.02 Welcome, dear visitor! As registered member you'd see an image here… Simply register for free here – We are always happy to welcome new members! 1 Quote Link to post Share on other sites Simply register for free here – We are always happy to welcome new members! ' data-webShareUrl='https://www.l-camera-forum.com/topic/302444-homemade-method-of-simulating-film-with-leica-m9-testers-feedback-welcome/?do=findComment&comment=3845026'>More sharing options...
Ko.Fe. Posted October 31, 2019 Share #52 Posted October 31, 2019 Welcome, dear visitor! As registered member you'd see an image here… Simply register for free here – We are always happy to welcome new members! 1 Quote Link to post Share on other sites Simply register for free here – We are always happy to welcome new members! ' data-webShareUrl='https://www.l-camera-forum.com/topic/302444-homemade-method-of-simulating-film-with-leica-m9-testers-feedback-welcome/?do=findComment&comment=3845027'>More sharing options...
camalogica Posted October 31, 2019 Author Share #53 Posted October 31, 2019 8 hours ago, Ko.Fe. said: Tests with b1.02 I think I have to review all the noise engine... it seems to me that it has too much noise! Thanks for your tests! I like most of them! What do you think of them? Do you like them? Cheers! Tomás Quote Link to post Share on other sites More sharing options...
Ko.Fe. Posted October 31, 2019 Share #54 Posted October 31, 2019 I like Leica colour more. And I don’t like Superia, which I develop at home. I like Kodak Gold. BW module seems to make bw more natural. Quote Link to post Share on other sites More sharing options...
camalogica Posted October 31, 2019 Author Share #55 Posted October 31, 2019 2 hours ago, Ko.Fe. said: I like Leica colour more. And I don’t like Superia, which I develop at home. I like Kodak Gold. BW module seems to make bw more natural. Thanks for your comments! Quote Link to post Share on other sites More sharing options...
JonPB Posted November 25, 2019 Share #56 Posted November 25, 2019 Interesting project! ``brew cask install wine'' worked just fine for me on macOS Mojave; Wine takes a minute or two to install a few components, then everything appears to run as expected. The TriX 400 simulation yields a very light image for me, whether with no flags (inverted using a system accessibility tool), with a -gamma 2.2 flag (inverted ditto), or with -autodevelop. I arrive at a comparable image in Capture One by adding 1.5 stops of exposure (along with commensurate highlight recovery). I think this aligns with your intent -- to create highlights with tons of headroom from a digital negative that has tons of hidden detail in the shadows -- but it would require some adjustment of my exposures to compensate for. The Superia 200 simulation with the same ISO 400 file has the same exposure behavior with colors that I might call "richly muted." They really aren't rich in any way -- but, while they seem desaturated, they don't seem to lose their impact for it. This is an interesting look that, to my extremely inexperienced eye, more closely resembles Portra than Superia, and I think that's a good thing. I suspect you are making unwarranted assumptions about how each recording medium responds to varying spectra. So I'm not highly confident that you could achieve your stated goal even if you had all the time and resources you wanted to dedicate to this project. But, I still like the output, and I especially like the idea of a command-line digital negative developer that is oriented toward photographers, not scientists or pixel editors. Most digital-to-filmic tools I've tried seem to assume the user wants the curated chromatic distortion of different films but the punchy contrast of digital. I'm happy to say that this tool produces gentle tones that I might actually want to use. Basically, I'm held back by speed and ease of use (a lot of which is likely attributable to Wine), not necessarily by the results, so I hope this project continues to mature. My only programming-related request is the ability to forgo grain simulation. Quote Link to post Share on other sites More sharing options...
camalogica Posted December 4, 2019 Author Share #57 Posted December 4, 2019 On 11/25/2019 at 9:01 PM, JonPB said: Interesting project! ``brew cask install wine'' worked just fine for me on macOS Mojave; Wine takes a minute or two to install a few components, then everything appears to run as expected. The TriX 400 simulation yields a very light image for me, whether with no flags (inverted using a system accessibility tool), with a -gamma 2.2 flag (inverted ditto), or with -autodevelop. I arrive at a comparable image in Capture One by adding 1.5 stops of exposure (along with commensurate highlight recovery). I think this aligns with your intent -- to create highlights with tons of headroom from a digital negative that has tons of hidden detail in the shadows -- but it would require some adjustment of my exposures to compensate for. The Superia 200 simulation with the same ISO 400 file has the same exposure behavior with colors that I might call "richly muted." They really aren't rich in any way -- but, while they seem desaturated, they don't seem to lose their impact for it. This is an interesting look that, to my extremely inexperienced eye, more closely resembles Portra than Superia, and I think that's a good thing. I suspect you are making unwarranted assumptions about how each recording medium responds to varying spectra. So I'm not highly confident that you could achieve your stated goal even if you had all the time and resources you wanted to dedicate to this project. But, I still like the output, and I especially like the idea of a command-line digital negative developer that is oriented toward photographers, not scientists or pixel editors. Most digital-to-filmic tools I've tried seem to assume the user wants the curated chromatic distortion of different films but the punchy contrast of digital. I'm happy to say that this tool produces gentle tones that I might actually want to use. Basically, I'm held back by speed and ease of use (a lot of which is likely attributable to Wine), not necessarily by the results, so I hope this project continues to mature. My only programming-related request is the ability to forgo grain simulation. I insist to use Silverfast HDR, its how I get the best results from the "simulated negative". Vuescan should work pretty much allright with B&W. I haven't done many assumptions besides chemical simulation. Mainly, from my point of view, if the result differs from real film is because of digital camera's limitations (m9). Seriously, film has much much more DR, and also infinite tolerance to highlights. Meanwhile digital is better for blacks. I'll program the -nograin option ASAP 🙂 Thanks for your comments! Tomás 1 Quote Link to post Share on other sites More sharing options...
Ko.Fe. Posted December 5, 2019 Share #58 Posted December 5, 2019 You could have blacks on film. Just have to remember, negative is same as RAW file. But in analog. It will gives blacks on RC glossy paper and even deeper blacks on inkjet prints on matte paper. Welcome, dear visitor! As registered member you'd see an image here… Simply register for free here – We are always happy to welcome new members! Ilford Glossy MG RC paper. Quote Link to post Share on other sites Simply register for free here – We are always happy to welcome new members! Ilford Glossy MG RC paper. ' data-webShareUrl='https://www.l-camera-forum.com/topic/302444-homemade-method-of-simulating-film-with-leica-m9-testers-feedback-welcome/?do=findComment&comment=3867541'>More sharing options...
camalogica Posted December 5, 2019 Author Share #59 Posted December 5, 2019 (edited) For me the only way to verify how close it is to the reality is taking the same shot with two cameras and the same lens under the same conditions. I did this with several tests and the results, mainly in black and white, where really really close. Bellow just an example with the following structure:+------------------------+------------------------+ | original DNG | | +------------------------+------------------------+ | converted DNG | scanned FILM | +------------------------+------------------------+ | developed DNG | developed FILM | +------------------------+------------------------+ Taken with Leica M9 + Zeiss 35mm at F5.6 and 1/125 with ISO 400, and Leica M7 at F5.6 and 1/125 loaded with TriX 400. Welcome, dear visitor! As registered member you'd see an image here… Simply register for free here – We are always happy to welcome new members! For me, the biggest difference is in the highlights. Besides that it's really close (from my point of view). Always possible to get more contrast image, but it depends on the way it's digitally developed. Full res of the image at: https://photos.app.goo.gl/KPUi3qzBYmUnnarGA Just my two cents! Tomás Edited December 5, 2019 by camalogica 1 Quote Link to post Share on other sites Simply register for free here – We are always happy to welcome new members! For me, the biggest difference is in the highlights. Besides that it's really close (from my point of view). Always possible to get more contrast image, but it depends on the way it's digitally developed. Full res of the image at: https://photos.app.goo.gl/KPUi3qzBYmUnnarGA Just my two cents! Tomás ' data-webShareUrl='https://www.l-camera-forum.com/topic/302444-homemade-method-of-simulating-film-with-leica-m9-testers-feedback-welcome/?do=findComment&comment=3868055'>More sharing options...
camalogica Posted December 5, 2019 Author Share #60 Posted December 5, 2019 (edited) Another example, but in color with Superia 200. Both examples were developed using SilverFast HDR, with same parameters. Welcome, dear visitor! As registered member you'd see an image here… Simply register for free here – We are always happy to welcome new members! Full res of the image: https://photos.app.goo.gl/6LVmUzmcfCeY2sF88 Kind regards everybody!! Gonna work on the nograin option! Tomás Edited December 5, 2019 by camalogica 2 Quote Link to post Share on other sites Simply register for free here – We are always happy to welcome new members! Full res of the image: https://photos.app.goo.gl/6LVmUzmcfCeY2sF88 Kind regards everybody!! Gonna work on the nograin option! Tomás ' data-webShareUrl='https://www.l-camera-forum.com/topic/302444-homemade-method-of-simulating-film-with-leica-m9-testers-feedback-welcome/?do=findComment&comment=3868057'>More sharing options...


Recommended Posts
Join the conversation
You can post now and register later. If you have an account, sign in now to post with your account.
Note: Your post will require moderator approval before it will be visible.