Jamie Roberts Posted July 16, 2007 Share #41 Posted July 16, 2007 Advertisement (gone after registration) Yes Jamie i admit, thats a oven flame plus two lamps on the ceiling i would say!!! so if they are not tungsten i wonder what they are..?? well, i simply cannot manage with my M8 images in my posts, even if i try get rid of color noise, my images just dissolve and loose details somehow whereas 5d files just look ok.. any secret that you would like to share with us -amateurs- to get rid of this awful colour noise in M8 if its not your job secret?? thanks and cheers. Evren-- Sure, I'm happy to help! And BTW--your shots are gorgeous But first, I'm wondering if there's daylight in your cooking fire shot too? I see blue highlights on the stainless, and the blue wall behind her head seems too cold to be illuminated by just tungsten... So, with the caveat that even I said the M8 runs out of stuff before the 5d does (though I guess the other way of saying how to use the 5d at ISO 3200 is you need to nail the exposure, no latitude is left--sort of like the M8 at 2500), here is a great tip, IMO... (hey, it works for 5d IS0 3200 shots too)... This assumes a RAW file. I use C1, because it gives me the best results with stuff like this... You must also output to a TIFF. Doens't need to be 16bpp, but if you JPEG this, your blue channel will still be noisier. 1) convert the image in PS to LAB mode 2) create a copy of the background layer 3) go to channels... select the A channel 4) go to Surface Blur or Guassian Blur. Smear away!! A lot. 5) repeat on the B channel Note--in RGB or CMYK, you would be destroying your image doing this. Completely. But because the L channel in LAB carries all the luminance / brightness information, you can really smear colour without affecting sharpness at all. 6) select the L channel. If it's clean, sharpen it with unsharp mask (make sure you use the Threshold command to ensure you don't sharpen luma noise--unless you like it). If you're going to do more correction, I'd do this later, though. Vary the transparency of the copied layer to taste. Convert back to sRGB. Presto... no M8 colour noise. Sharper high ISO pictures. Now, for an interesting variant on Steps 3, 4 and 5; use Noise Ninja instead of Surface blur or Gaussian blur. You can now control the amount of noise / blurring individually in luminance or within the colour channels. For tungsten, blur the B channel (yellow blue) more than the A channel. When you convert back to RGB, you should see a big difference in the blue channel. BTW--this sounds like more work than it is But remember, if one of the channels is shot, then this becomes a lot harder. Oh--one more tip--as counter-intuitive as this sounds, adding noise to one or more channels also works to mask more offensive noise. Quote Link to post Share on other sites More sharing options...
Advertisement Posted July 16, 2007 Posted July 16, 2007 Hi Jamie Roberts, Take a look here not impressed,,. I'm sure you'll find what you were looking for!
nerve Posted July 16, 2007 Author Share #42 Posted July 16, 2007 Evren, let me start first of all by saying that your pictures are beautiful. The middle one of the first batch with the motorcycle silhouetted in frame is incredible... Embrace the look of the M8, pack an Oscar Day Bag with the M8, a 35lux, and a 50lux, save your back, and keep shooting these beautiful images. Thx Bernd! even if i complain a lot about my M8, i hardly use my 5d these days though, lol! PS. yes, i do have the " Oscar"!! , such a great bag, isnt it?.. best wishes. Quote Link to post Share on other sites More sharing options...
Jamie Roberts Posted July 16, 2007 Share #43 Posted July 16, 2007 Well Jamie and Guy have HUGE advantages to most of you because they know every piece of gear I own -- so at least their guesses were with something they know I use a lot Bingo Jamie -- 5D, but only at ISO 400, with the 'crappy' (though I like it!) 28/1.8 EF lens at f2.8 @ 1/15th. Cheers, LOL!! It's true Jack, we know you're a Canon (now Leica again!) guy!! But it didn't look like the BetterLight! However, I'm still gratified to know I can pick out the 28 EF signature, though! Woohoo! Quote Link to post Share on other sites More sharing options...
nerve Posted July 16, 2007 Author Share #44 Posted July 16, 2007 Evren-- Sure, I'm happy to help! And BTW--your shots are gorgeous But first, I'm wondering if there's daylight in your cooking fire shot too? I see blue highlights on the stainless, and the blue wall behind her head seems too cold to be illuminated by just tungsten... So, with the caveat that even I said the M8 runs out of stuff before the 5d does (though I guess the other way of saying how to use the 5d at ISO 3200 is you need to nail the exposure, no latitude is left--sort of like the M8 at 2500), here is a great tip, IMO... (hey, it works for 5d IS0 3200 shots too)... This assumes a RAW file. I use C1, because it gives me the best results with stuff like this... You must also output to a TIFF. Doens't need to be 16bpp, but if you JPEG this, your blue channel will still be noisier. 1) convert the image in PS to LAB mode 2) create a copy of the background layer 3) go to channels... select the A channel 4) go to Surface Blur or Guassian Blur. Smear away!! A lot. 5) repeat on the B channel Note--in RGB or CMYK, you would be destroying your image doing this. Completely. But because the L channel in LAB carries all the luminance / brightness information, you can really smear colour without affecting sharpness at all. 6) select the L channel. If it's clean, sharpen it with unsharp mask (make sure you use the Threshold command to ensure you don't sharpen luma noise--unless you like it). If you're going to do more correction, I'd do this later, though. Vary the transparency of the copied layer to taste. Convert back to sRGB. Presto... no M8 colour noise. Sharper high ISO pictures. Now, for an interesting variant on Steps 3, 4 and 5; use Noise Ninja instead of Surface blur or Gaussian blur. You can now control the amount of noise / blurring individually in luminance or within the colour channels. For tungsten, blur the B channel (yellow blue) more than the A channel. When you convert back to RGB, you should see a big difference in the blue channel. BTW--this sounds like more work than it is But remember, if one of the channels is shot, then this becomes a lot harder. Oh--one more tip--as counter-intuitive as this sounds, adding noise to one or more channels also works to mask more offensive noise. This is really a great help Jamie, thx a lot!! i do appreciate this.. btw, i am in love with your M8 colour profiles in my C1, just came to my mind now! Glad you liked my images.. i consider myself a lucky amateur who has a chance to meet real professionals like you, Guy or Sean Reid through this Leica forums. thanks again, ill try this technique.. best. Quote Link to post Share on other sites More sharing options...
sean_reid Posted July 16, 2007 Share #45 Posted July 16, 2007 Hi folks! in my opinion there's a point that no one seems to think about since the "digital era": i had a M4 for such a long time that i can't remember, but i am sure just of this thing: i never used a film with iso higher then 800 to shot. So i'm sure, by knowing leica user all around the world, and frequenting my photographers group, that i'm not the only one.How many of you did always had a body with a 1200 or higher iso film with him?... In the early 1990s I did an extensive project in the subways of New York City and Budapest all with TMZ at ISO 1600 and 3200. Thousands of pictures all made at those ISO levels. Some people use high ISO and some don't. There's no reason for the first group to make assumptions about the second, and vice versa. In fact, I wish people (speaking generically) would stop generalizing their experiences into universal truths. I happen to like the M8 through a (true) ISO 1600 and sometimes, in BW, even at IS0 3200. Nonetheless, to keep us honest here, I want to clear up a pervasive misconception. Some of the noise reduction in the Canon files comes from smoothing *but* the files themselves also tend to be quite clean to begin with. Clean as in high S/N ratio clean not "scrubbed with NR" clean. One can see this starting at low ISO levels. I say this having done a lot of careful and extensive side-by-side camera testing: M8, DMR, D200, 1Ds, 5D, 1DsMkII, etc. (These comments, mind you, are coming from a man who loves the M8. Still, facts is facts. Some of us actually enjoy the grain-like luminance noise in the M8 files.) Have I often delivered work to clients that was made at ISO 1600 and 3200? - absolutely. Am I alone in this? - no. Lots of documentary work relies upon high ISO. "Don't take my Kodachrome away?" For me, make that..."Don't take my high ISO away." Are we expecting too much for cameras? Digital cameras rise to increasing levels of performance and photographers learn to make good use of the new capabilities. No one's 'gonna pry my M8 or my 5D from my hands and, at ISO 3200, it's the 5D if I'm being paid. You can't go home again. Cheers, Sean Quote Link to post Share on other sites More sharing options...
Guest localplayer Posted July 16, 2007 Share #46 Posted July 16, 2007 "I probably did right after I sold my original one back in December, but I also mentioned I thought it would make a great dedicated B&W camera. And I have just purchased another..." makes sense...i didn't listen as usual and bought one too. it has its place in the world and does really well at what it does. probably nothing out of it will run in SI but maybe I can push some images somewhere else...yet to be proven. Quote Link to post Share on other sites More sharing options...
stunsworth Posted July 16, 2007 Share #47 Posted July 16, 2007 Advertisement (gone after registration) My standard procedure with the Canons I've used - 300D/20D/5D (anyone want to buy a 300D?) and the M8 is that when shooting at very high ISOs I've always had to consider that the resulting image may need converting to b&w - no ham in that, I prefer b&w anyway <grin> Quote Link to post Share on other sites More sharing options...
charlesphoto99 Posted July 16, 2007 Share #48 Posted July 16, 2007 Thx Bernd! even if i complain a lot about my M8, i hardly use my 5d these days though, lol! PS. yes, i do have the " Oscar"!! , such a great bag, isnt it?.. best wishes. Best would be a 28 summicron, as there is no equivalent to the 35 1.4 L on a full frame. Yet at least. And sometimes there just isn't the room to back up! Quote Link to post Share on other sites More sharing options...
sean_reid Posted July 16, 2007 Share #49 Posted July 16, 2007 Not sure how much more ISO than this that you may ever need. Hi Guy, Come out east to shoot a couple weddings with me and I'll show you how much more ISO one could want. I'm looking forward to high quality ISO 6400 and I will use it well. Cheers, Sean Quote Link to post Share on other sites More sharing options...
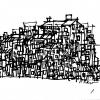
sean_reid Posted July 16, 2007 Share #50 Posted July 16, 2007 I agree that many DSLR images appear "smeared" when compared to the M8's -- BUT I personally feel much of it is in how the file is processed... Here is a silver statue shot from inside a church, shot hand-held at about 1/15th, to compliment Guy's silver shurch shot above. Do you think it is smeared or not? Can you tell what camera this image is from? Which lens? Let's have some fun! , Way to mix things up Jack....<G> How dare you fly straight into the face of dogma! Cheers, Sean Quote Link to post Share on other sites More sharing options...
Jamie Roberts Posted July 16, 2007 Share #51 Posted July 16, 2007 Hi Guy, Come out east to shoot a couple weddings with me and I'll show you how much more ISO one could want. I'm looking forward to high quality ISO 6400 and I will use it well. Cheers, Sean Sean-- a truer word was never spoken. Why else can I justify a Noctilux! Some of the halls I've shot in are darker than, well, they're just boxes with no windows and pot lights. Lovely. Churches are even darker, sometimes! Though then what Guy says about adding light is well taken, too! Quote Link to post Share on other sites More sharing options...
sean_reid Posted July 16, 2007 Share #52 Posted July 16, 2007 Personally you know me if i have to go above ISO 640 i'm reaching for the strobes but I think way to many push the crap out of the ISO because they can't handhold a camera Ya think...? <G> Might there be other reasons? Cheers, Sean Quote Link to post Share on other sites More sharing options...
Jamie Roberts Posted July 16, 2007 Share #53 Posted July 16, 2007 My standard procedure with the Canons I've used - 300D/20D/5D (anyone want to buy a 300D?) and the M8 is that when shooting at very high ISOs I've always had to consider that the resulting image may need converting to b&w - no ham in that, I prefer b&w anyway <grin> Hey Steve--all you need then is one good channel! Piece of cake! Quote Link to post Share on other sites More sharing options...
Jamie Roberts Posted July 16, 2007 Share #54 Posted July 16, 2007 This is really a great help Jamie, thx a lot!! i do appreciate this..btw, i am in love with your M8 colour profiles in my C1, just came to my mind now! Glad you liked my images.. i consider myself a lucky amateur who has a chance to meet real professionals like you, Guy or Sean Reid through this Leica forums. thanks again, ill try this technique.. best. Evren, happy to help, and thanks for your words on the profiles. Still working on the next set Listen, if you want one more tip, you can sometimes apply a "false profile" to raise the gamma of a shot, effectively getting more midtone detail without shifting too much colour around. This is actually a cheap trick, but very good. So try assigning a gamma 1,8 profile to a gamma 2.2 shot. So, for example, try Photoshop... assign profile Apple RGB to an sRGB developed shot. The colour gamuts are similar, so you won't see much colour saturation difference, but since the gamma is different, all your midtones will just "open up" Can make for a better pre-BW stage too. Quote Link to post Share on other sites More sharing options...
sean_reid Posted July 16, 2007 Share #55 Posted July 16, 2007 Sean-- a truer word was never spoken. Why else can I justify a Noctilux! Some of the halls I've shot in are darker than, well, they're just boxes with no windows and pot lights. Lovely. Churches are even darker, sometimes! Though then what Guy says about adding light is well taken, too! And there we have an important point. Much of this comes down to approach. If one uses a lot of lighting (as I do when shooting interiors) then high ISO may not be very important. But if one shoots existing light in all kinds of conditions - bring on the ISO 6400. Cheers, Sean Quote Link to post Share on other sites More sharing options...
Guest guy_mancuso Posted July 16, 2007 Share #56 Posted July 16, 2007 Ya think...? <G> Might there be other reasons? Cheers, Sean No give me some damn light. LOL I know, I know just love to bust your chops. But not talking about folks that may really need the higher ISO , it's just the ones that stick it up to the roof because they can but don't really need it. Or can't hold a camera in there hands. Quote Link to post Share on other sites More sharing options...
sean_reid Posted July 16, 2007 Share #57 Posted July 16, 2007 No give me some damn light. LOL I know, I know just love to bust your chops. But not talking about folks that may really need the higher ISO , it's just the ones that stick it up to the roof because they can but don't really need it. Or can't hold a camera in there hands. See, that's the thing...sometimes one just can't add the light or wouldn't want to. Available darkness can be a lot of fun...moody, creepy, dramatic, romantic, harsh, you name it. Jamie's not kidding about some of these churches, etc. And weddings are just the tip of the iceberg. I spent several years shooting on moving subway trains in mixed or low light...my kingdom for another stop...ya know. <G> Cheers, S Quote Link to post Share on other sites More sharing options...
nerve Posted July 16, 2007 Author Share #58 Posted July 16, 2007 Evren, happy to help, and thanks for your words on the profiles. Still working on the next set Listen, if you want one more tip, you can sometimes apply a "false profile" to raise the gamma of a shot, effectively getting more midtone detail without shifting too much colour around. This is actually a cheap trick, but very good. So try assigning a gamma 1,8 profile to a gamma 2.2 shot. So, for example, try Photoshop... assign profile Apple RGB to an sRGB developed shot. The colour gamuts are similar, so you won't see much colour saturation difference, but since the gamma is different, all your midtones will just "open up" Can make for a better pre-BW stage too. This is another gem of a trick for me again!! Thx a lot Jamie, this is some real help for me! Best. Quote Link to post Share on other sites More sharing options...
Jack_Flesher Posted July 16, 2007 Share #59 Posted July 16, 2007 You must also output to a TIFF. Doens't need to be 16bpp, but if you JPEG this, your blue channel will still be noisier. 1) convert the image in PS to LAB mode 2) create a copy of the background layer 3) go to channels... select the A channel 4) go to Surface Blur or Guassian Blur. Smear away!! A lot. 5) repeat on the B channel Note--in RGB or CMYK, you would be destroying your image doing this. Completely. But because the L channel in LAB carries all the luminance / brightness information, you can really smear colour without affecting sharpness at all. 6) select the L channel. If it's clean, sharpen it with unsharp mask (make sure you use the Threshold command to ensure you don't sharpen luma noise--unless you like it). If you're going to do more correction, I'd do this later, though. Vary the transparency of the copied layer to taste. Convert back to sRGB. Presto... no M8 colour noise. Sharper high ISO pictures. FWIW, you can accomplish pretty much the same thing without switching to LAB... For color noise, make a copy layer, blur it with whatever blur tool you prefer -- experiment with them, but Gaussian is a good starting point. Now change the blend mode of the blurred layer to "color". Presto, only the color data is blurred and the detail remains in-tact For sharpening as above, do the same, only change the sharpened copy layer to the "luminosity" blend mode -- and I usually dial opacity down to around 85% for a more organic look -- and this way you only affect the detail and not the color This method saves the two iterations of LAB <-> RGB. Cheers, Quote Link to post Share on other sites More sharing options...
Jack_Flesher Posted July 16, 2007 Share #60 Posted July 16, 2007 Way to mix things up Jack....<G> How dare you fly straight into the face of dogma! Cheers, Sean Hi Sean! That's what I do best! , Quote Link to post Share on other sites More sharing options...


Recommended Posts
Join the conversation
You can post now and register later. If you have an account, sign in now to post with your account.
Note: Your post will require moderator approval before it will be visible.